Because Eclipse® is a multi ledger software, it is important that you are accurately entering your patient Eclipse® account numbers and selecting the correct case numbers.
Step 1: Add a patient to your Cash Practice® account.
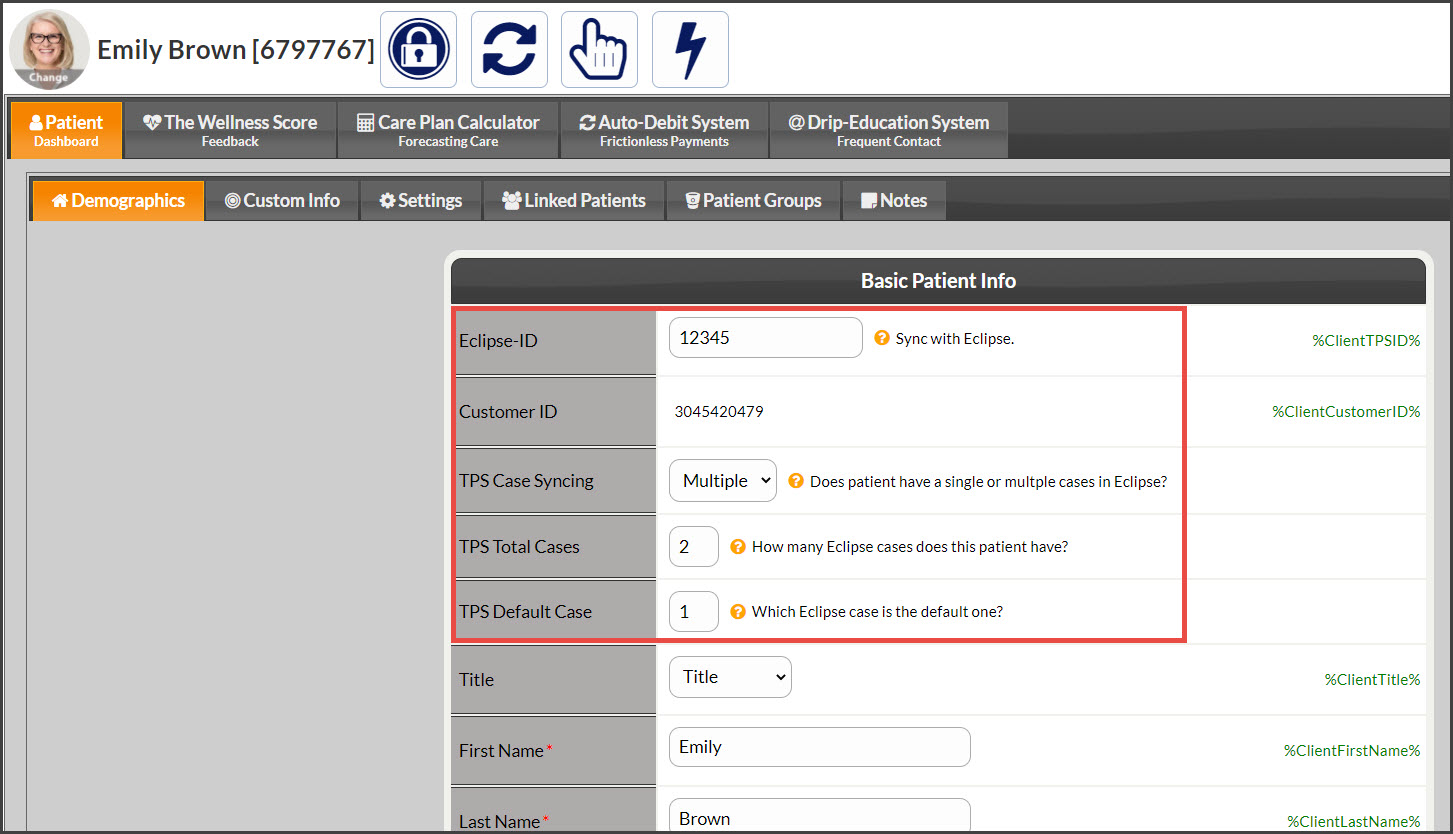
Once the patient is created, access their Patient Record, and add their Eclipse® account number. See the image example below.
Step 2: TPS (Third Party Software) Case Syncing- Does the patient have a single or multiple cases in TPS?
NO- No further action is needed. Save patient account.
Yes- Select [Multiple] from the drop-down menu.
Step 3: TPS Total Cases-Enter the total number of cases the patient has.
Step 4: TPS Default Case- Select the default case number you want to use as the patient's primary case. The default case is where transactions import to. (Case numbers can be changed at the time of processing or scheduling to post to an alternate case). Click [Save] when done.
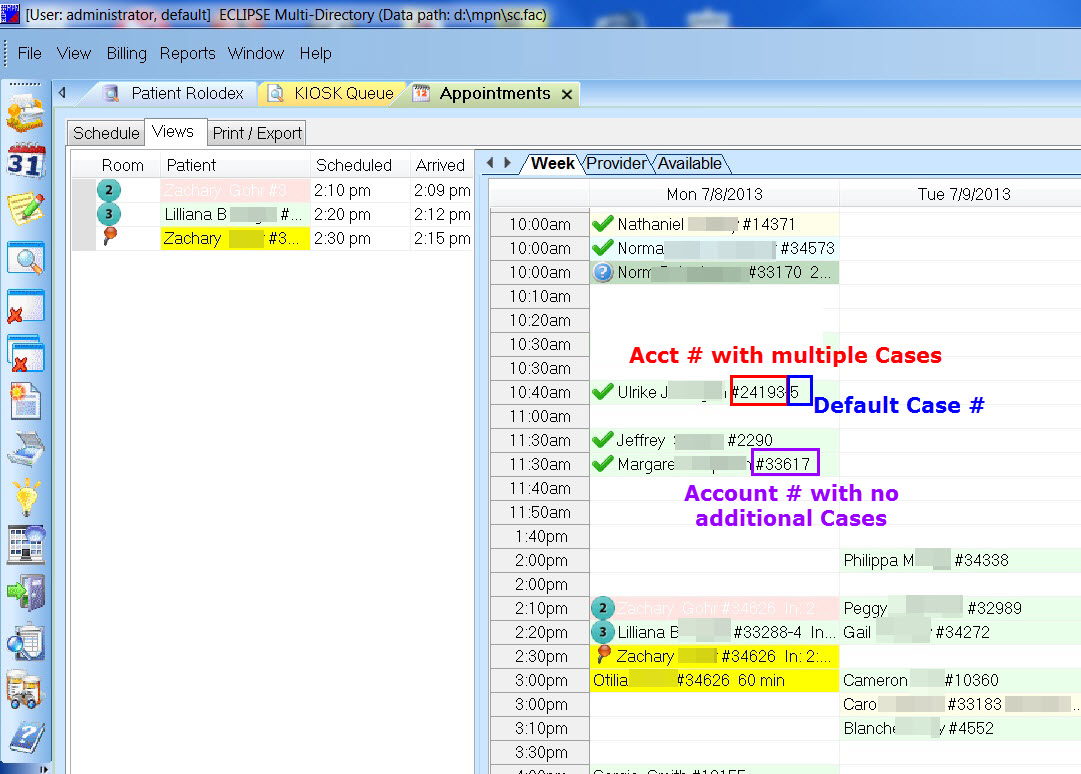
Example of where to find the Eclipse® patient account number and case number: