Watch the video below and follow along.
NOTE: Before processing a payment, you must first complete the integration. See HERE for details.
Getting Started:
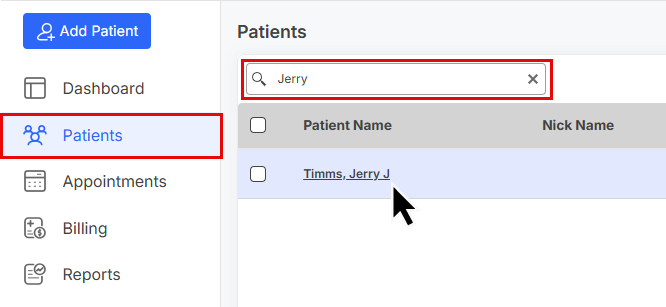
Step 1: Locate the patient by searching for them under [Patient Account].
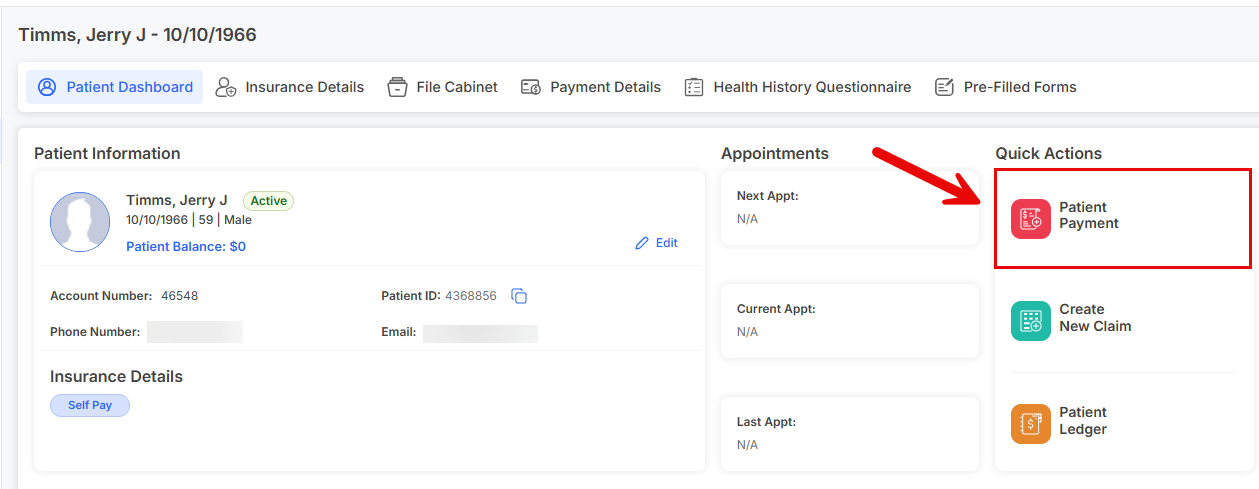
Step 2: Once you've located the patient, click the [Patient Payment] button.
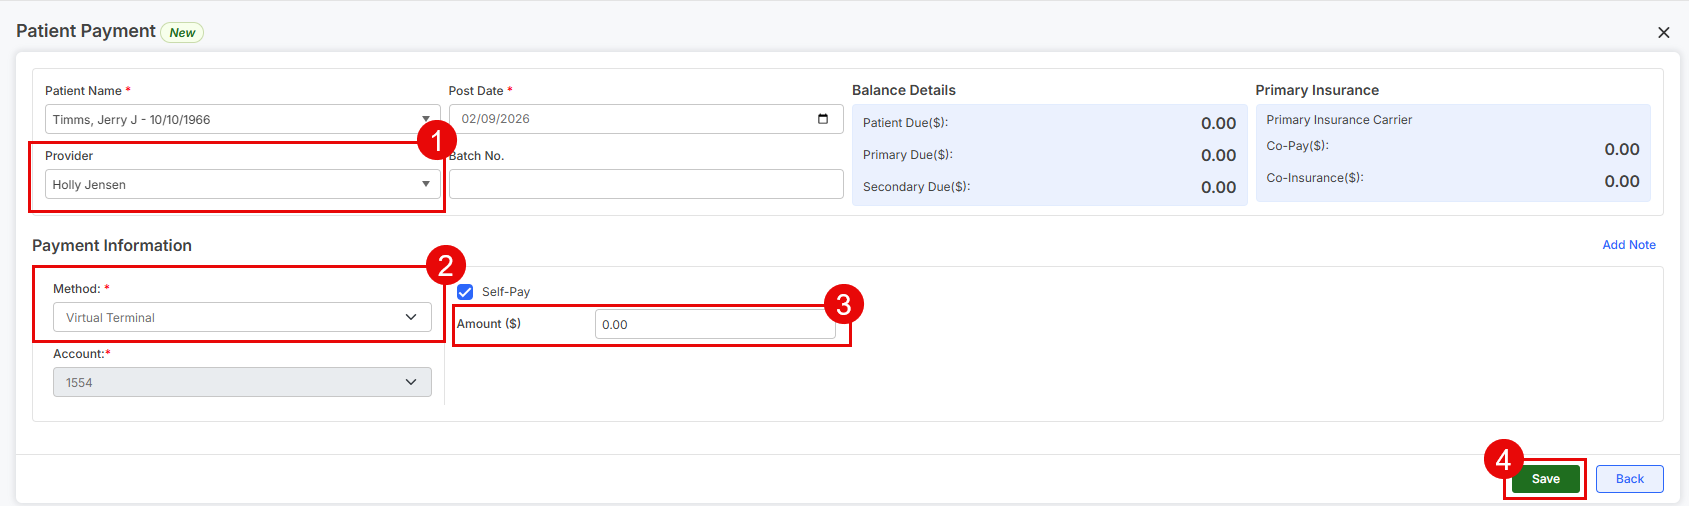
Step 3: Follow these steps
Provider: Select the Provider or Owner/Admin of the Cash Practice account needed to run the payment, if not already defaulted.
Method: From the drop-down menu, select [Virtual Terminal]. Note: Check off the [Self-Pay] box if it's not checked off already.
Amount: Enter the amount of the payment.
Click the [Save] button at the bottom of the screen
Step 4: In this example, we're using the Cash Practice Virtual Terminal. Select the [Billing Type] & [Billing Options] → Click [Next Step].
Note: Depending on your account settings, your user interface will say, Client, Patient, Practice Member, etc.
Processing Method: Defaulted to "Process Now" with the ability to "Schedule Later" and select a specific date for the transaction to run.
Amount: The amount is carried over from what is entered in PayDC.
Patient Billing: Already carried over from PayDC.
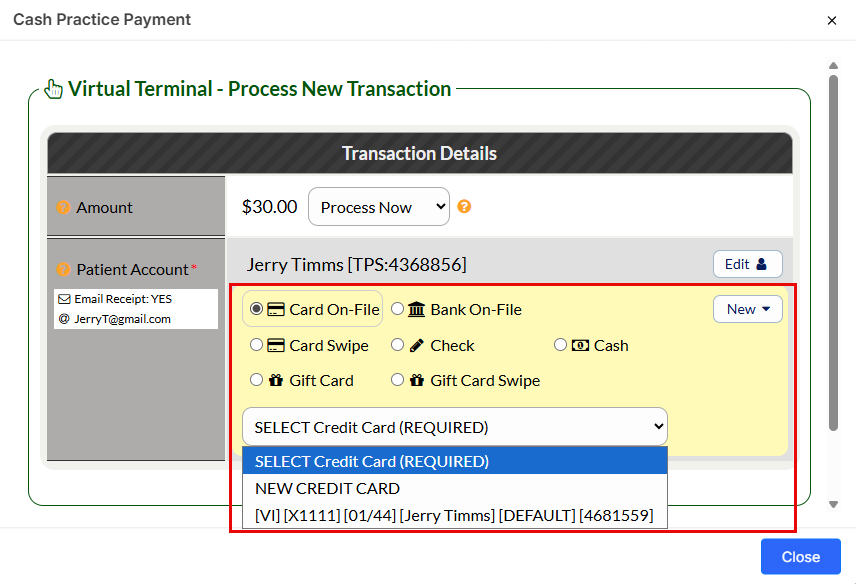
Billing Type:
Card On-File: Key enter the credit card information, OR pull stored credit card information that has been previously saved on file in the patient account. Click the [New] button to the right to add in new info
Bank On-File: Routing and Account Number of Check *Canadian offices will see DD/EFT. Click the [New] button to the right to add in new info
Card Swipe: Use the Cash Practice® USB Card Swiper to swipe a credit card and collect payment information for the payment. A small modal window will appear allowing you to swipe
Check: Add in the Check # in the supplied field. It's very important that you have strong procedures in place as to how your office collects, records, and tracks checks
Cash: Record the transaction as being collected with cash. It's very important that you have strong procedures in place as to how your office collects, records, and tracks cash
Card EMV: (not in the example image) if using an EMV terminal purchased from Cash Practice, select this option to trigger the transaction to be sent to the device to complete the transaction
Gift Card/Gift Card Swipe: Redeem a Gift Card already loaded with value directly in the Virtual Terminal
Depending on the billing type, you can choose ANY previously used form of payment, except those processed with the CP Mobile App™, payment forms hidden in the patient's billing vault, or credit cards that have expired. The DEFAULT billing will always display first unless the patient has no billing information saved as the default.
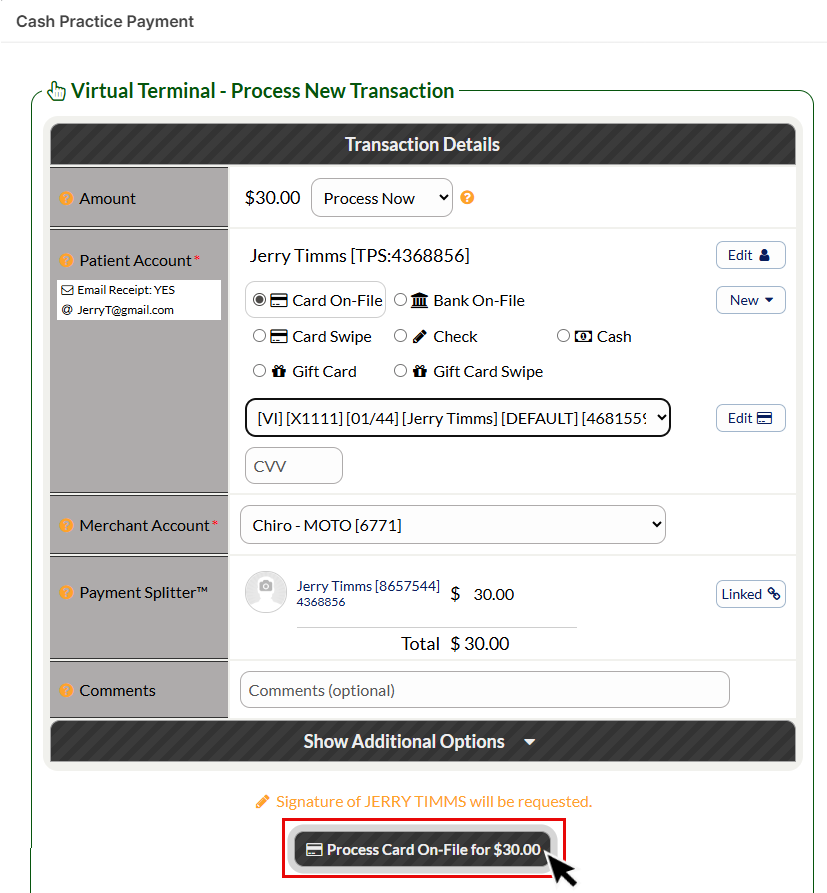
Payment Splitter™: If you would like to split this one-time payment, refer to our article HERE on how to Link Accounts, and HERE on how to split the transactions amongst multiple patients.
Comments: (optional) Comments are not seen by the patient and cannot be deleted.
Show Additional Options:
Patient Groups: Gives you the ability to group your patients based on whatever parameters you would like. You can then use this as a search action to keep track of your patients and leads and also efficiently target market to them
Drip-Ed™ Campaign: (optional) We highly recommend you use this feature to continue to educate and market to your patient. Campaign Start Date is the date you want the Drip-Ed™ Campaign you selected to start. By default, today’s date is pre-selected
Auto-Debit Group™: (optional) This allows you to categorize your payments into groups. For example, it allows you to track your Chiropractic Services, Massage Services, Products, Locations, etc.
Care Plan Option: (optional) If this is a payment for an existing care plan created with the Cash Plan Calculator® System, indicate the payment option (i.e. Option 1, 2, or 3). This will keep your stats more accurate.
Step 5: Click the [Process ___ for $0.00] button.
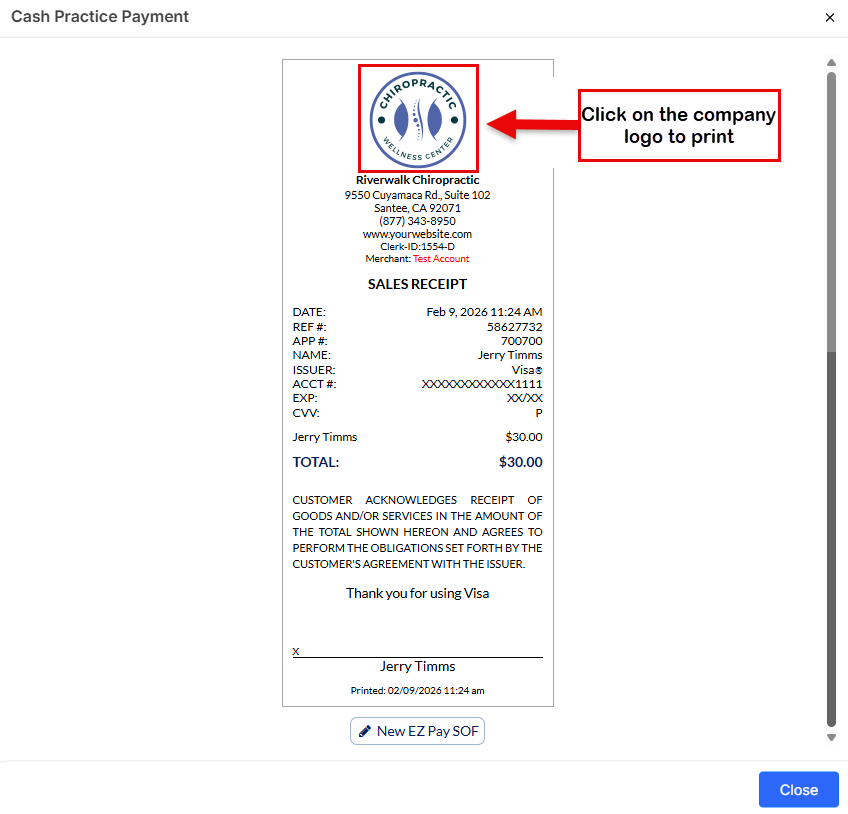
Step 6: Once accepted, you will see the receipt appear on your screen. To print, click the logo.