NOTE: Before processing a payment, you must first complete the integration. See HERE for details.
Getting Started:
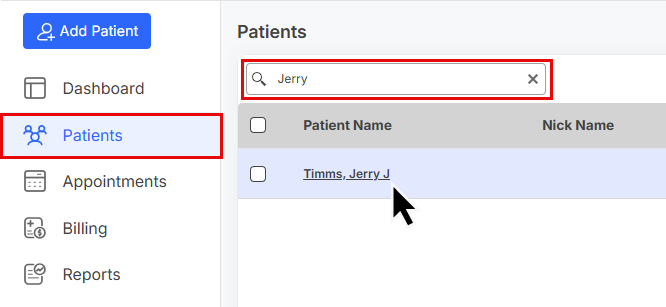
Step 1: Locate the patient by searching for them under [Patient Account].
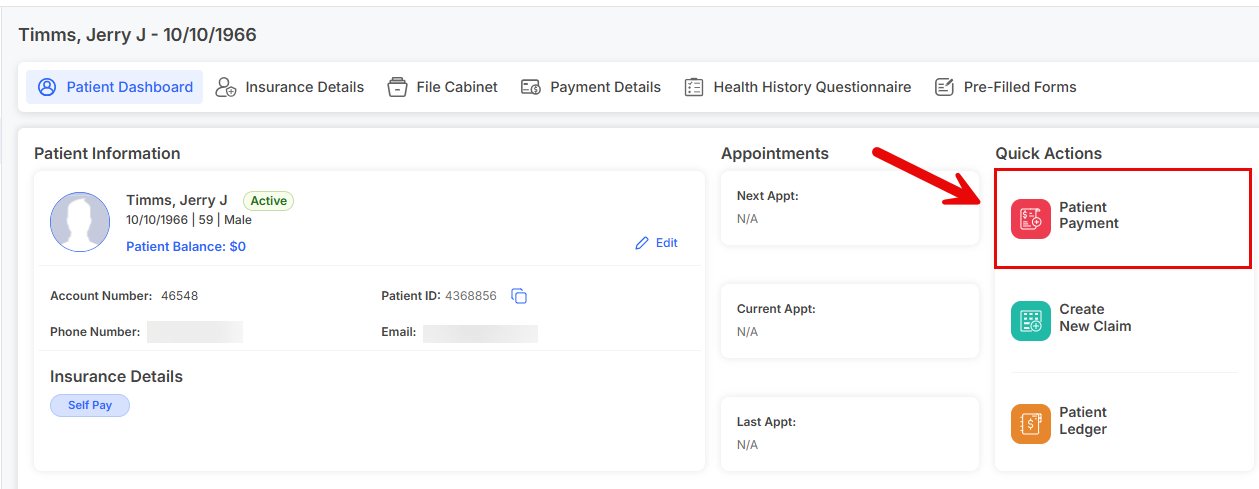
Step 2: Once you've located the patient, click the [Patient Payment] button.
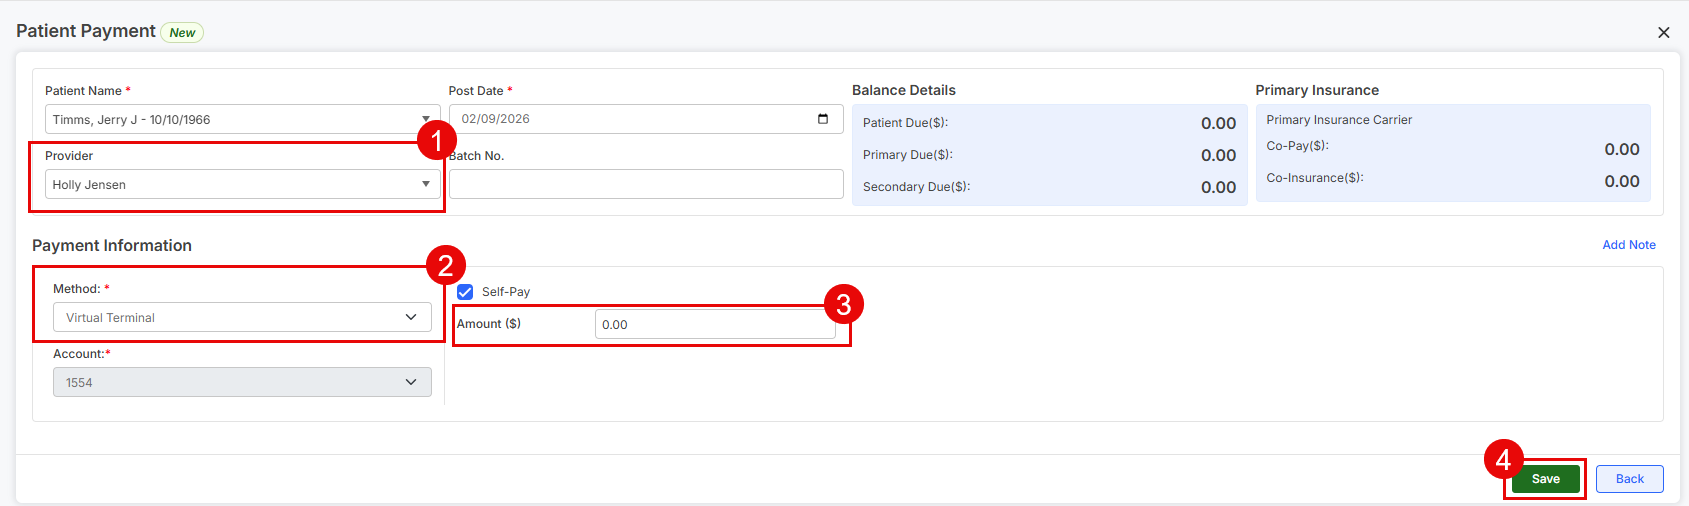
Step 3: Follow these steps
Provider: Select the Provider or Owner/Admin of the Cash Practice account needed to run the payment, if not already defaulted.
Method: From the drop-down menu, select [Virtual Terminal].
Amount: Enter the total amount needing to be collected from all linked patients
Click the [Save] button at the bottom of the screen
Step 4: The Cash Practice Virtual Terminal will load. See the actions below:
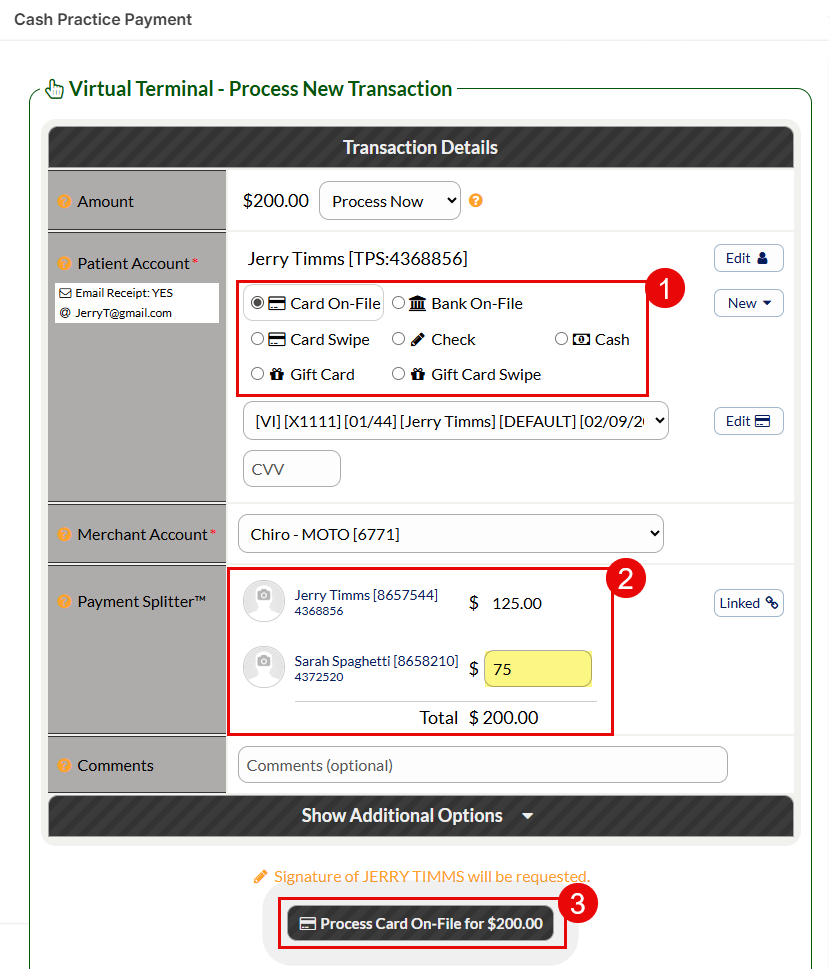
Patient Billing: Select the type needed to complete this transaction. OR click the [New] button to the right to add in a new Credit Card or Bank Account.
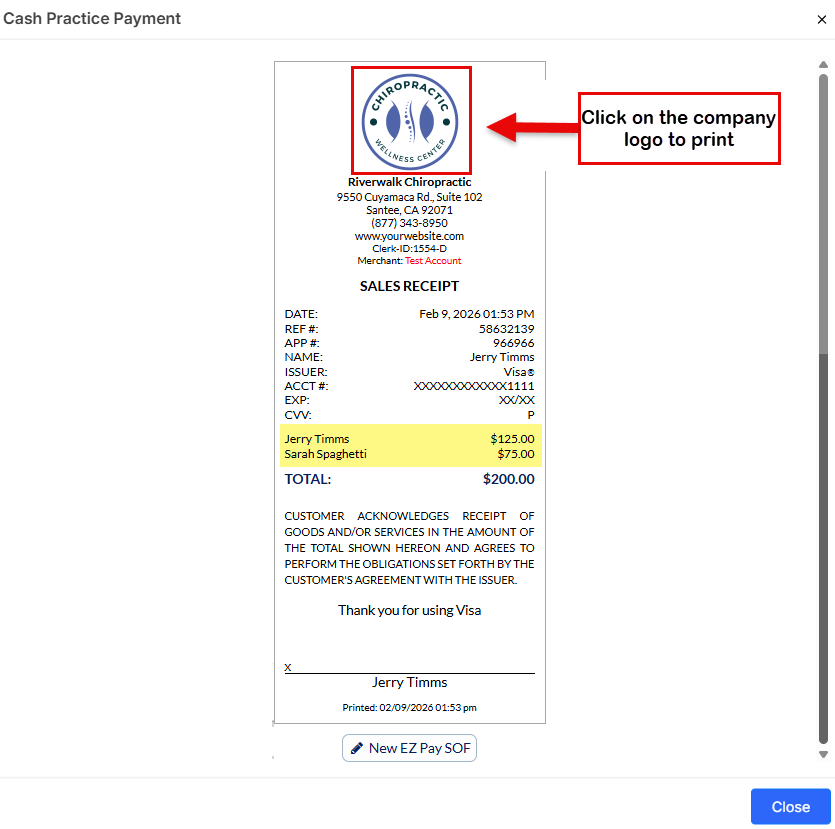
Patient Accounts: If this patient is linked with others, they will appear in this section. In the example image below, Jerry needs to be charged $125, and Sarah $75, for a total payment of $200. By editing Sarah's amount to $75, this automatically adjusts Jerry's payment to the remaining value of $125. Click HERE for instructions on how to link patient accounts for split payments/shared billing information.
Scroll down and select [Process Card On-File for $X]. Click [OK]
Step 5: The receipt will then populate. To print, click the logo. Some details you may notice on the receipt as you scroll down is a list of all the patient names along with their totals of who the payment was split amongst. The payments will be split and posted to the correct ledgers in PayDC.