NOTE: Before processing a payment, you must first complete the integration. See HERE for details.
Getting started:
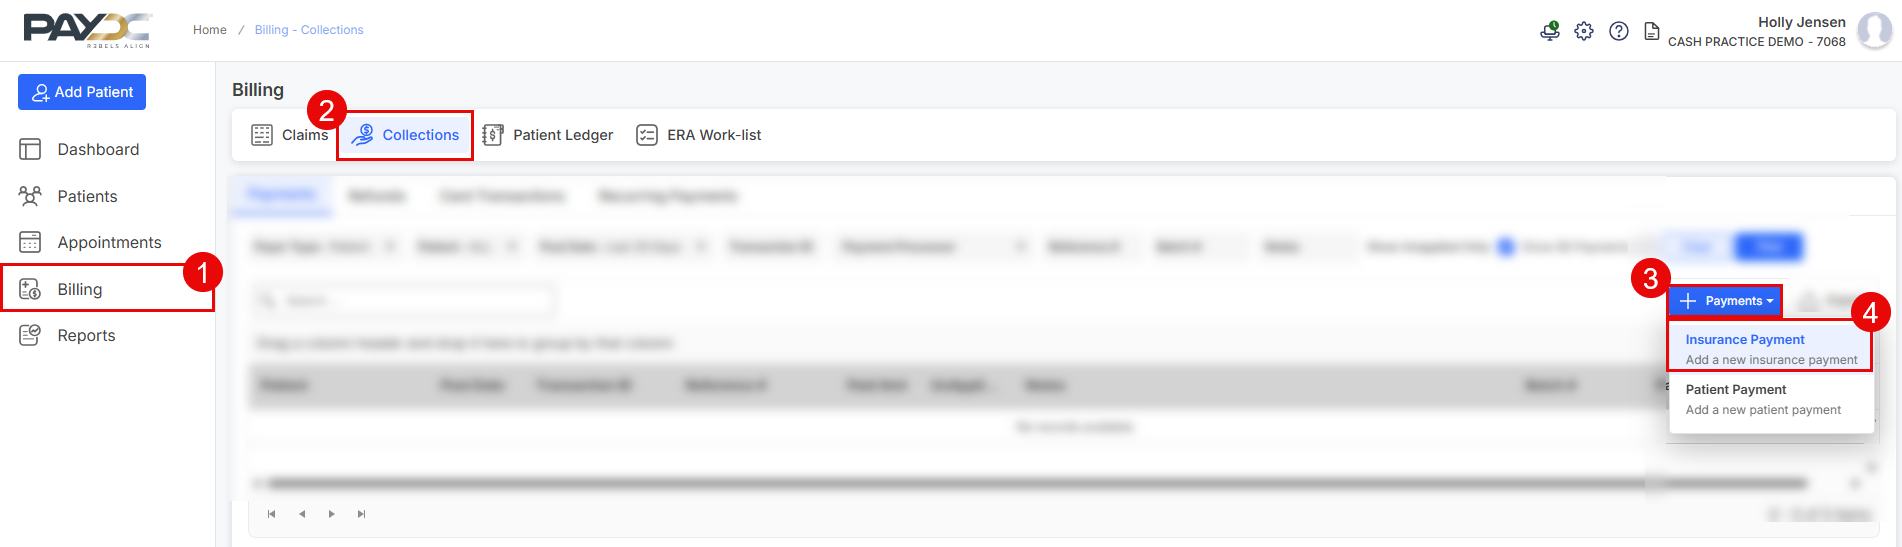
Step 1:
On the left, select [Billing]
Then, click the [Collections] tab
On the right, click the [Payments] drop-down menu
Select [Insurance Payment]
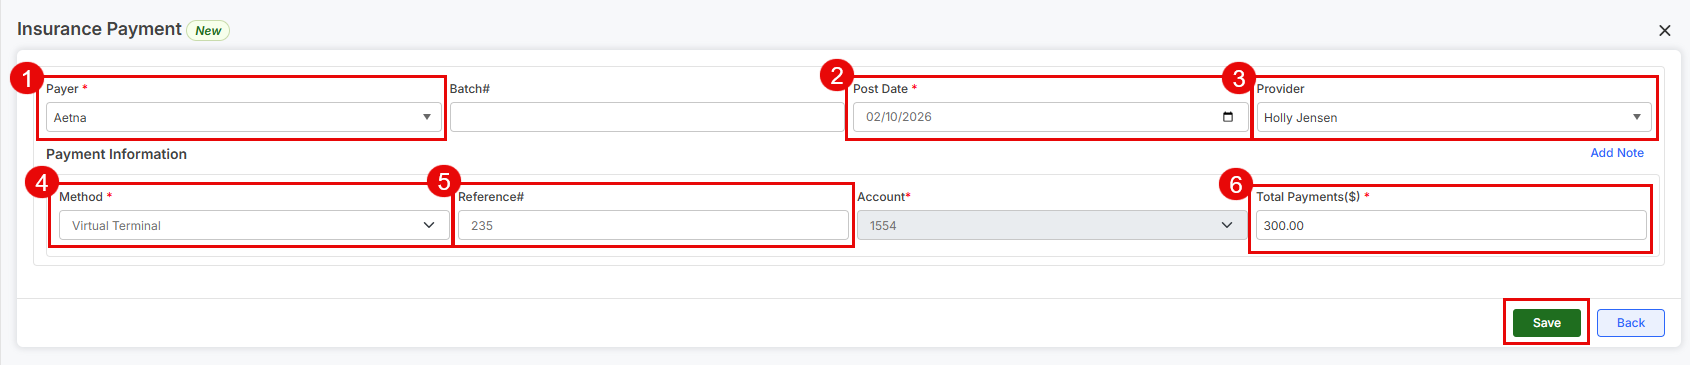
Step 2:
Payer: From the drop-down menu, select the Payer or insurance company that has sent the payment
Post Date: Choose the Post Date from the calendar or leave the current date
Provider: From the drop-down menu, select the correct Provider
Method: Select the "Virtual Terminal" from the drop-down menu
Reference #: Add this information directly from the EOB
Total Payment ($): Type the amount of the insurance reimbursement
Click the [Save] button at the bottom of the screen
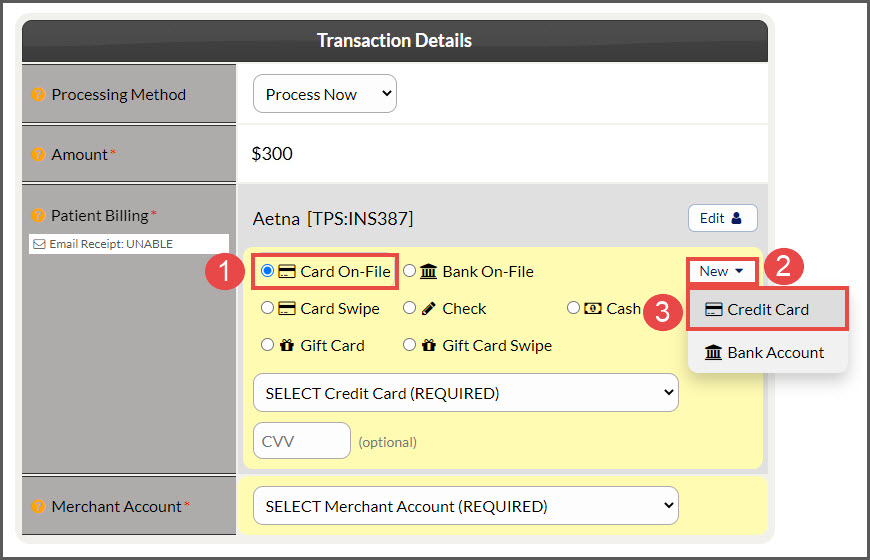
Step 3: This will then load the Virtual Terminal.
Under "Patient Billing", select "Card On-File"
Select the [New] button to the right
Choose [Credit Card]
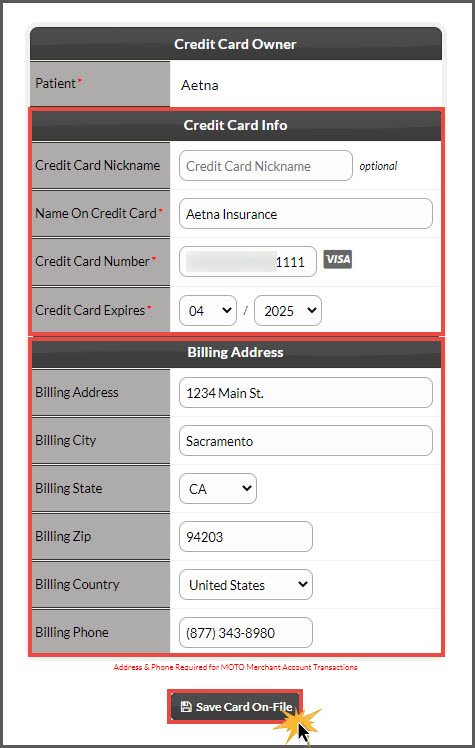
Step 4: Add in the Card information and Billing Address. Click the [Save Card On-File] button once completed. Click the red X to close out, once the card has been successfully saved/added.
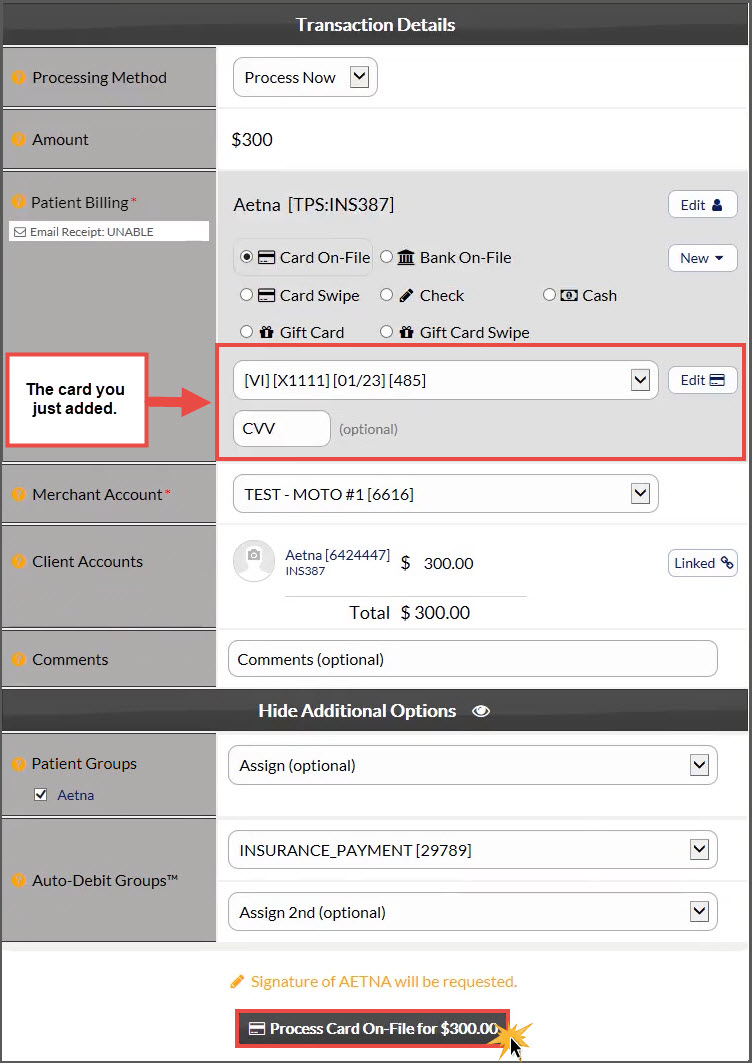
Step 5: The card you added will now be listed in the "Patient Billing" section. Scroll down and select [Process Card On-File for $X]. Click [OK]
Step 6: Click the [Print Receipt] button if needed.
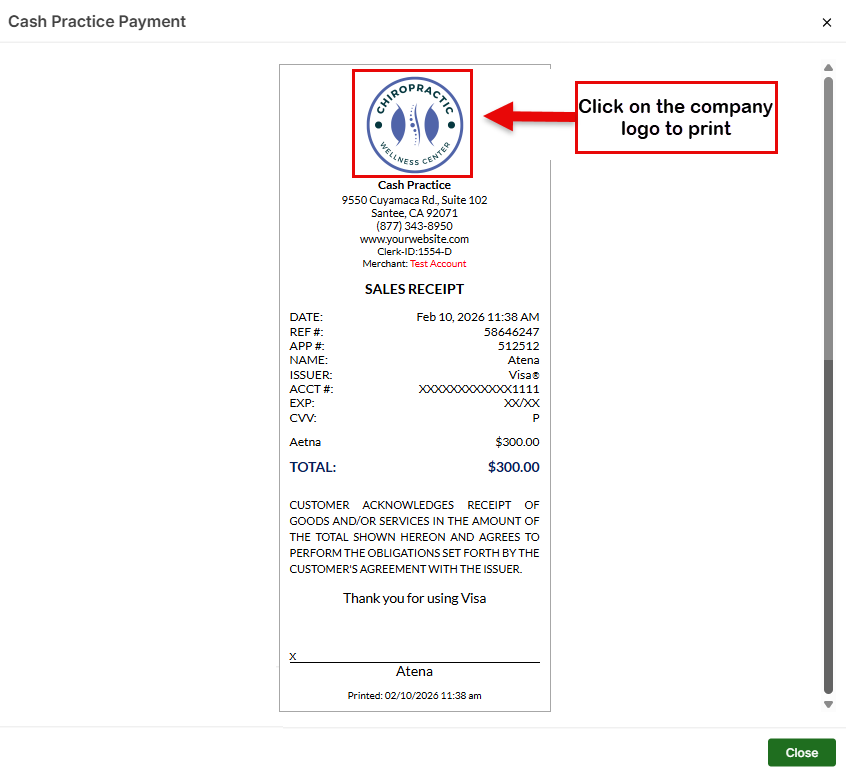
Step 7: The transaction will then be recorded in Cash practice, to be viewed at a later time.
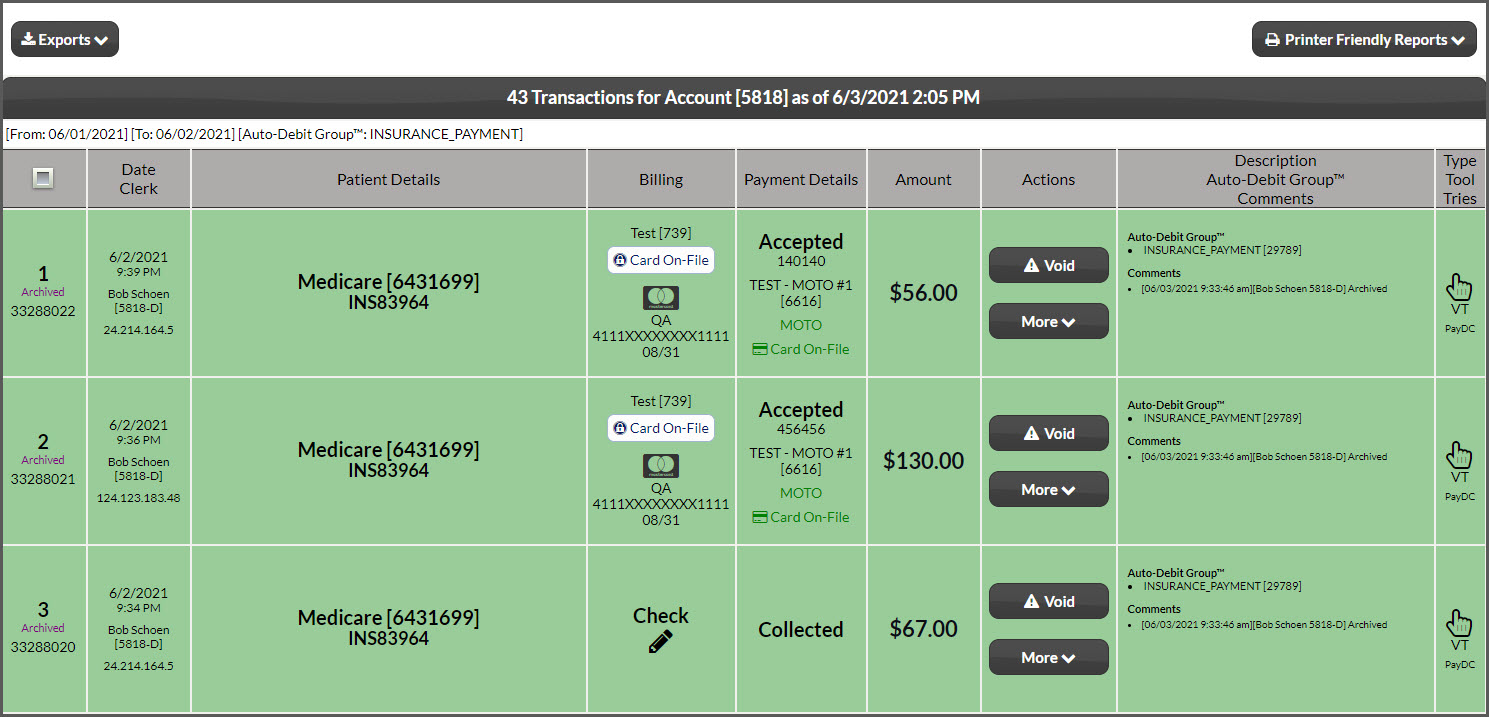
Optional: If you need to locate a report of all insurance payments like this, please follow the instructions below:
Step 1: From the Dashboard, click on the [Search Payments] button.
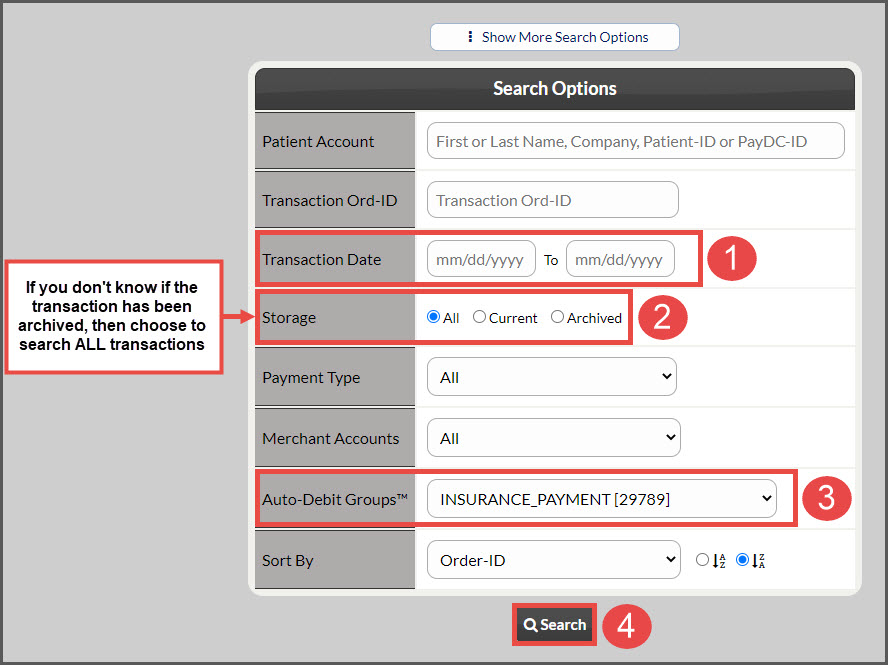
Step 2: Narrow down your search:
Transaction Date: (optional) Select a transaction date range from the provided fields
Storage: Choose [All] for Storage
Auto-Debit Groups: Choose the group titled "INSURANCE_PAYMENT" from the drop-down menu
Click the [Search] button at the bottom of the screen
Step 3: This then loads the report according to your search criteria for insurance payments.