
Why use Custom Patient Fields?
Do you have "custom" information you want to keep a record of on your patients? For example, you want to store information such as "Spouse's Name", "Place of Birth", etc. You can have Text Inputs, Checkboxes, or Radio Buttons.
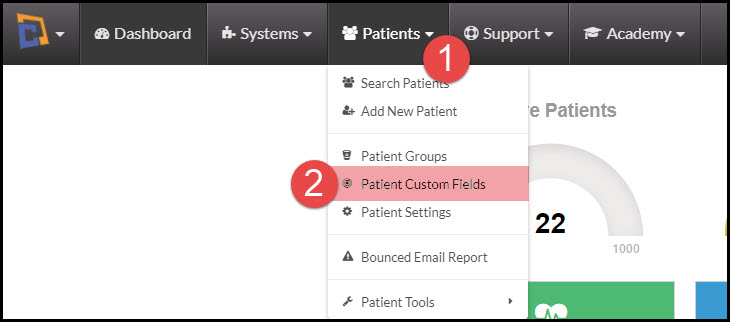
Step 1: Hover your mouse over the [Patients] menu → click [Patient Custom Fields].
Step 2: In the field labeled [Input Field Label], enter the custom information you would like to keep track of.
Step 3: The type of selections is determined by how you "separate" the Input Field Selections. See below for details:
Text Input - Leave the Input Field Selections empty
Selector Input (drop-down menu) - Enter Input Field Selections separated by commas (,)
Checkbox Input - Enter Input Field Selections separated by Colons (:)
Radio Buttons Input - Enter Input Field Selections separated by Semi-Colons (;)
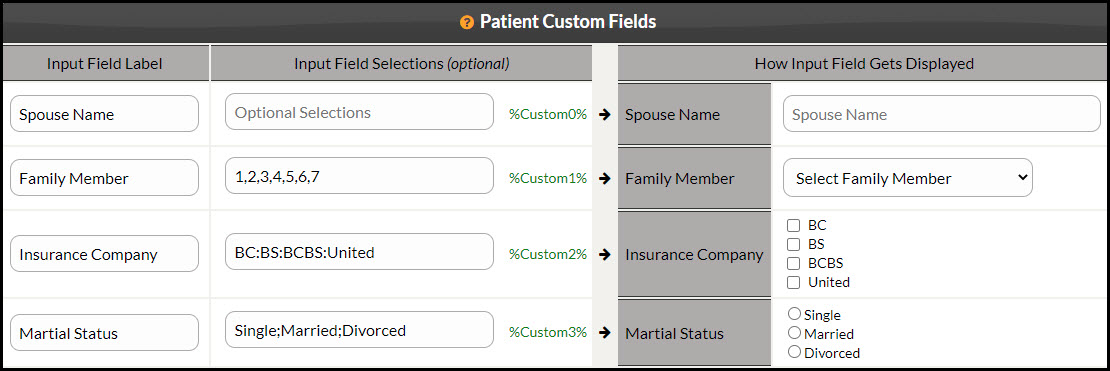
Step 4: Once you have entered the input fields, click [Save}. The system will save your preferences and show you a preview of what your custom patient fields look like in the [How Input Field Gets Displayed] box (see below). You now have the ability to use these items when adding or editing a patient account.