Before you're able to process any transactions you must first:
Have an active subscription and merchant accounts turned on in the Auto-Debit System
Reach out to Genius/eTHOMAS support and give them your Cash Practice Integration Keys to enter into your account
Note: If you've already been using your Cash Practice account, you must also enter the patient's account number from Genius/eTHOMAS into the patient account within Cash Practice. See HERE for details.
Once you're ready to go, you can process payments using the Auto-Debit System right within Genius/eTHOMAS. Follow the instructions below to learn how to process a one-time payment.
Watch the video or follow the instructions below.
INSTRUCTIONS
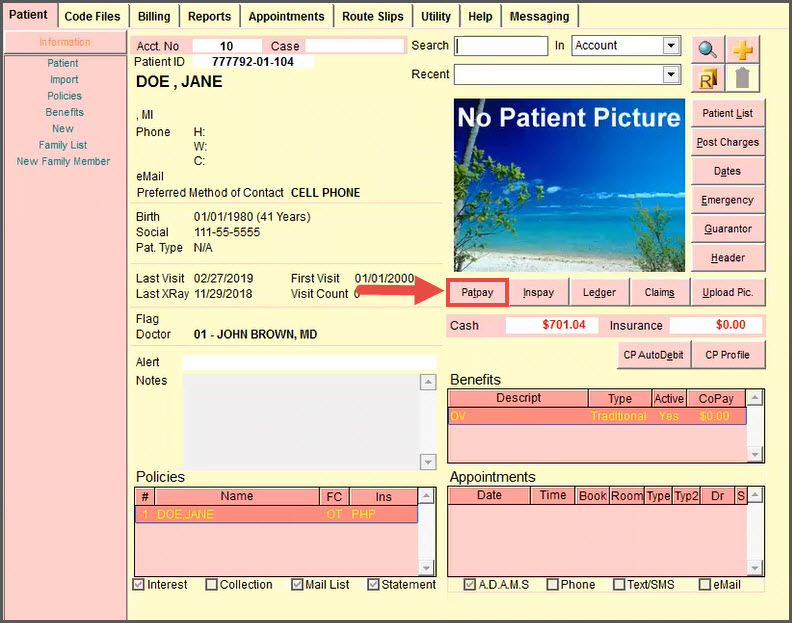
Step 1: From the Patient screen → Click on the [Patpay] button.
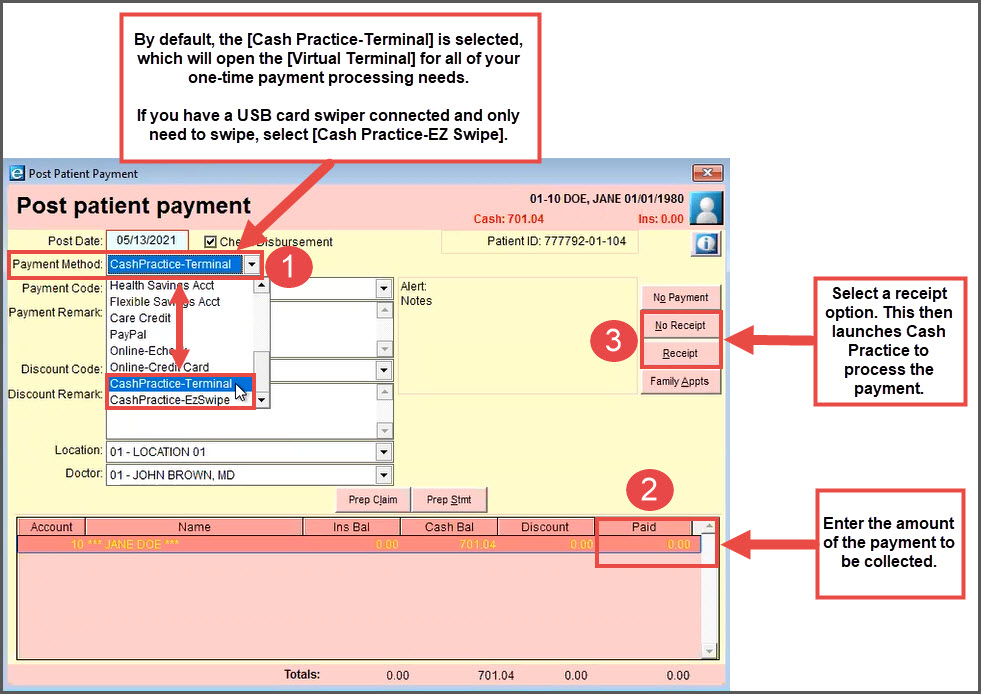
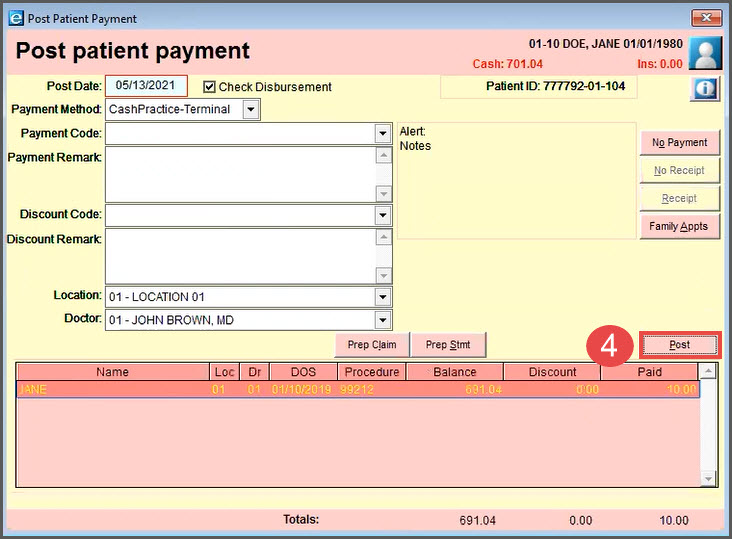
Step 2: Select the [Payment Method] → Enter the amount to be collected under [Paid] → Select a receipt option, which will launch Cash Practice to process the payment. Click the [Post] button.
Step 3: In this example, we're using the Cash Practice Virtual Terminal. Select the [Billing Type] & [Billing Options] → Click [Next Step].
Note: Depending on your account settings, your user interface will say, Client, Patient, Practice Member, etc.
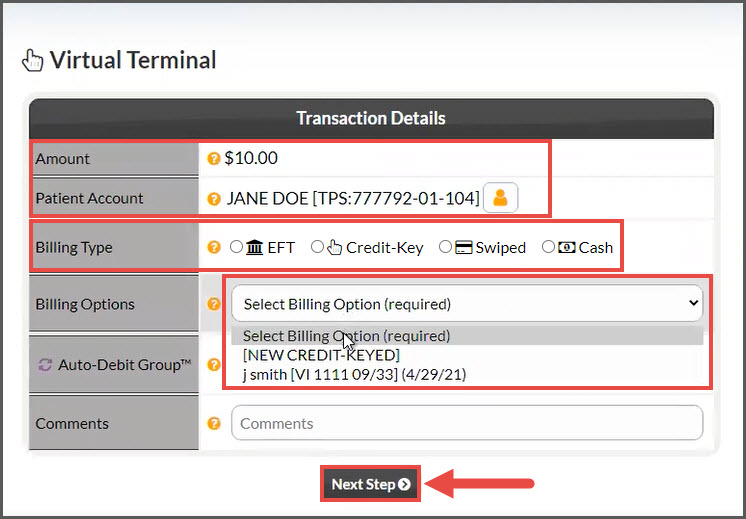
Amount: The amount is carried over from what is entered in Genius Solutions/eTHOMAS
Patient Account: Already carried over from Genius Solutions/eTHOMAS
Billing Type:
EFT: Routing and account Number of Check *Canadian offices will see DD/EFT
Credit-Keyed: Key enter the credit card information, OR pull stored credit card information that has been previously saved on file in the client account
Swiped: Use the Cash Practice® USB Card Swiper to swipe a credit card and collect payment information for the payment.
Cash: This tool allows you to record the transactions as being collected with cash. It's very important that you have strong procedures in place as to how your office collects, records, and tracks cash.
Billing Options: Depending on the Billing Type, you can choose ANY previously used form of payment, except those processed with the CP Mobile App™, payment forms hidden in the patient's billing vault, or credit cards that have expired. The DEFAULT billing will always display first unless the client has no billing information saved as the default. You will also have the option to Add New billing by selecting [NEW CREDIT-KEYED] or [NEW BANK EFT].
Auto-Debit Group™: (optional) This allows you to categorize your payments into groups. For example, it allows you to track your Chiropractic Services, Massage Services, Products, Locations, etc.
Comment: (optional) Comments are not seen by the client and cannot be deleted.
Step 4: Click the [Next Step] button.
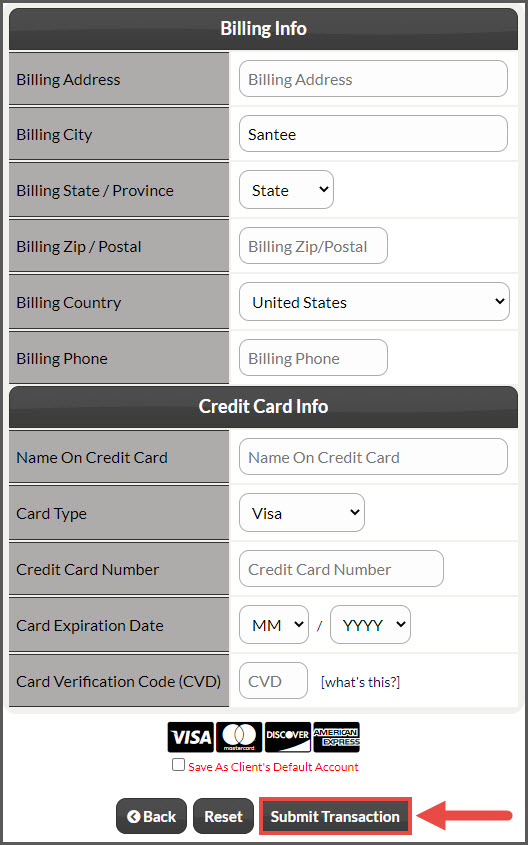
Step 5: Confirm or enter the billing information and click [Submit Transaction].
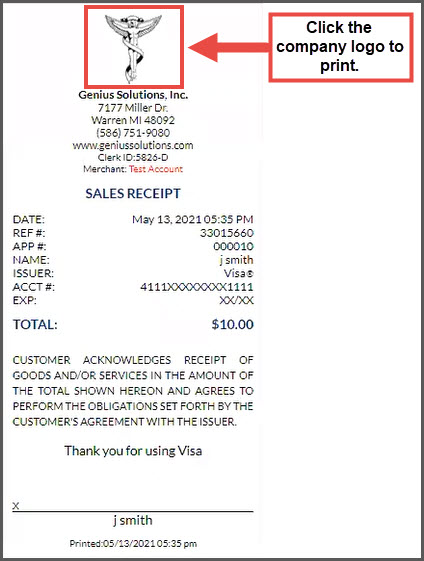
Optional: View or print the receipt.
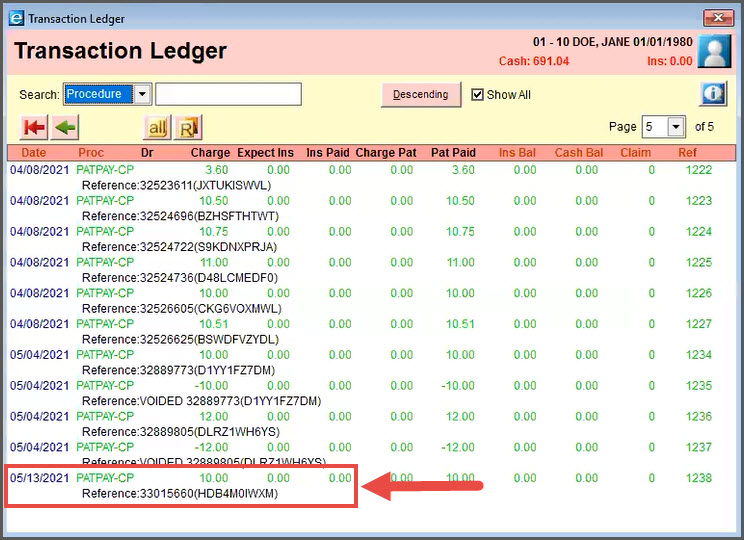
Optional: View the patient ledger to see the auto-posted payment.
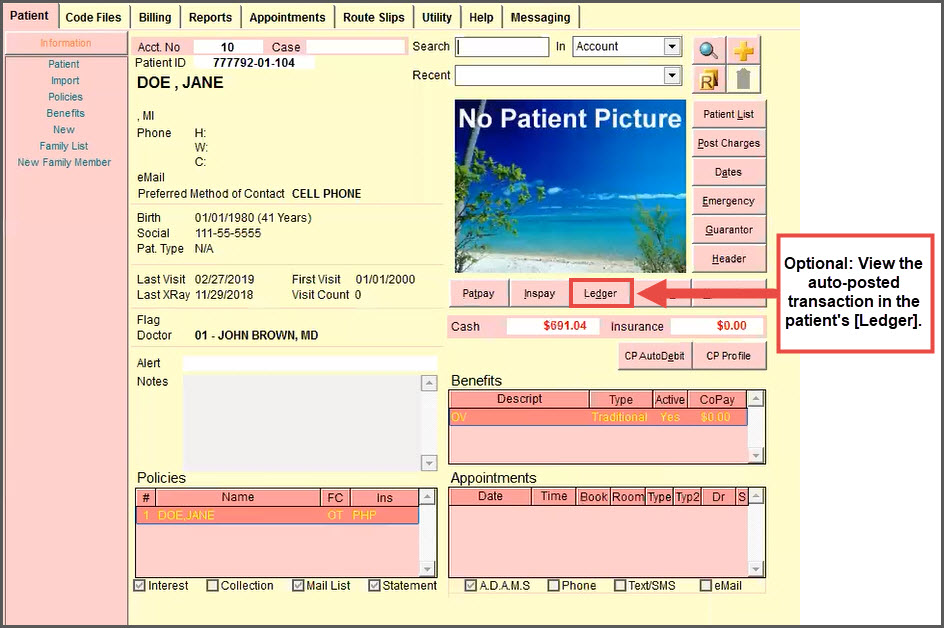
The auto-posted transaction will appear on the ledger for the date the transaction was processed.