
IMPORTANT - Create Cash Practice accounts for each staff person:
It is highly recommended that you create separate accounts with different login credentials for each staff member. Do not share login credentials - each user should have their own account to login into. The purpose is to maintain security and set up permissions in order to prevent users from accessing areas of the account that you do not want them to have access to. (Example: You may not want a user logged into the account after business hours, or performing refunds, etc.)
Each account user will have their own unique Clerk Key that gets plugged into PayDC that will honor the permissions that you have given them and log their activity. Click HERE for instructions on how to add account users to your Cash Practice account.
Before processing payments within PayDC using the Auto-Debit System®, you must first complete this one-time setup.
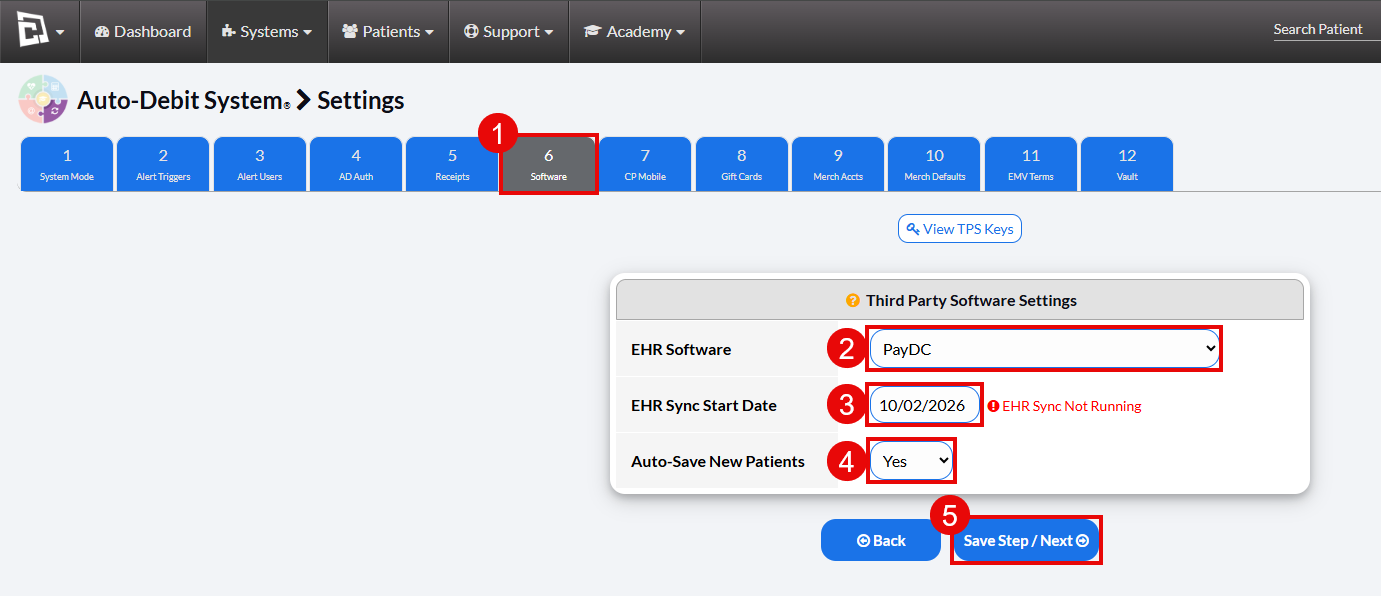
Access the Auto-Debit System Setup, by following the instructions HERE. Skip over to Step 8. See the below image:
Select Step 6 Software
Choose PayDC as your Third-Party Software
Choose the date to start the automatic importing of payments
"Yes" will be selected for auto-saving new patients
Click the [Save Step/Next] button
Getting Started:
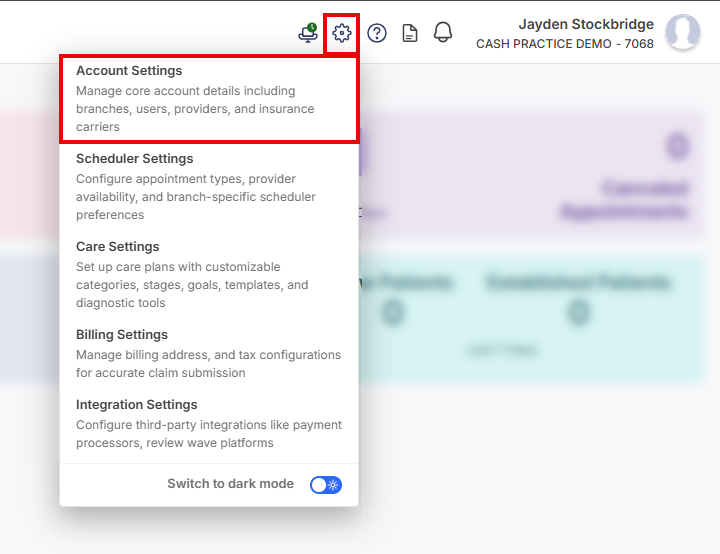
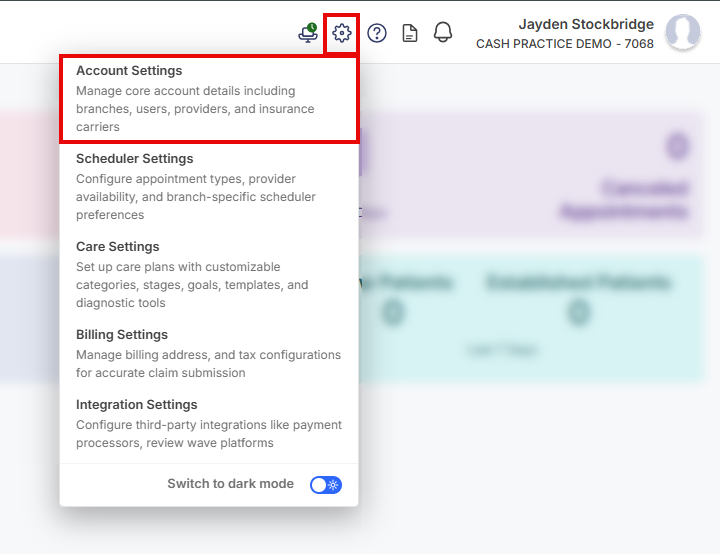
Step 1: First, you must be signed in as the Primary Account Owner of the PayDC account. From the PayDC [Home] screen, click the settings icon in the top right corner & then select the [Account Settings] option.
Step 2:
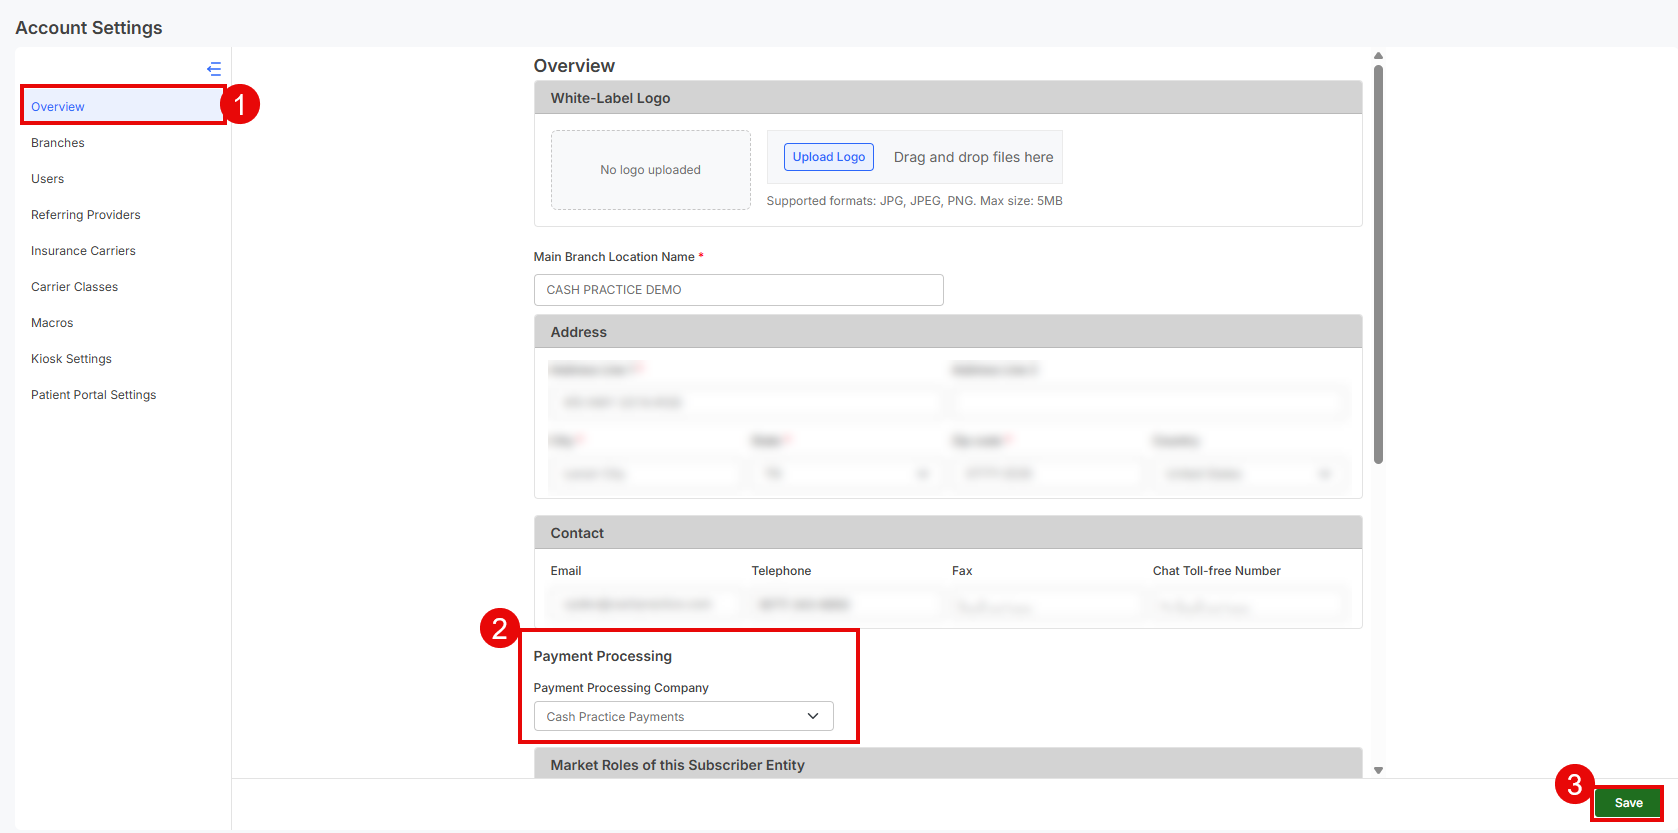
The "Overview" page will open
Select the "Payment Processing Company" as [Cash Practice Payments]
Click the [Save] button at the bottom of the screen
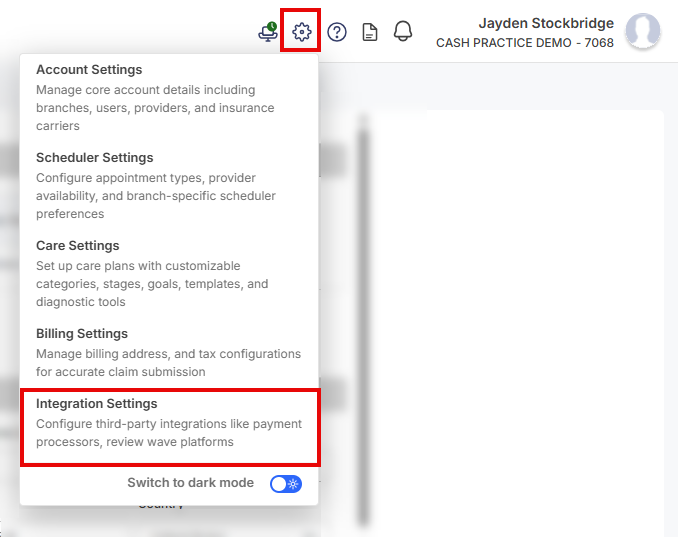
Step 3: Locate the settings icon again in the top right hand corner of your screen & select the [Integration Settings] option.
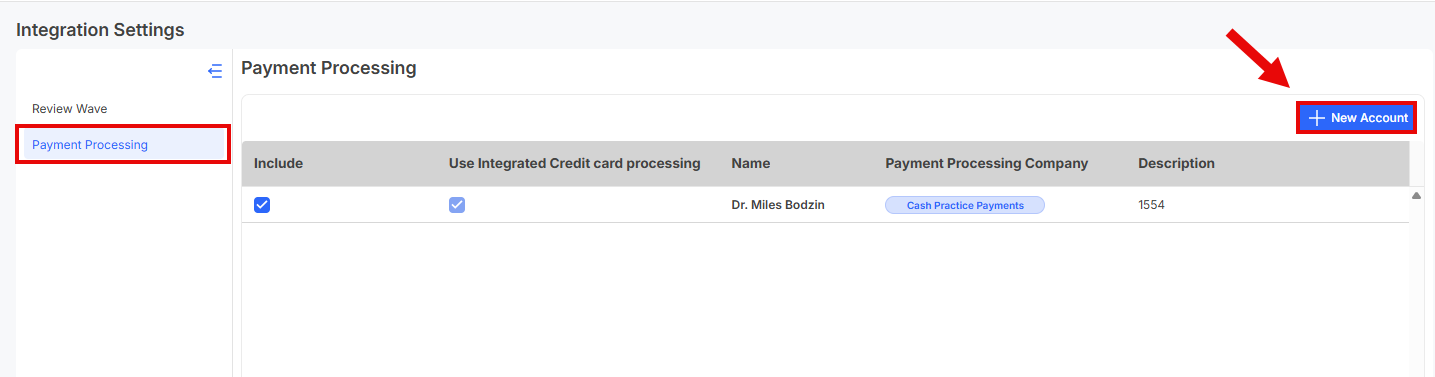
Step 4: From the left side of the screen, click on [Payment Processing]. Then select the [New Account] button.
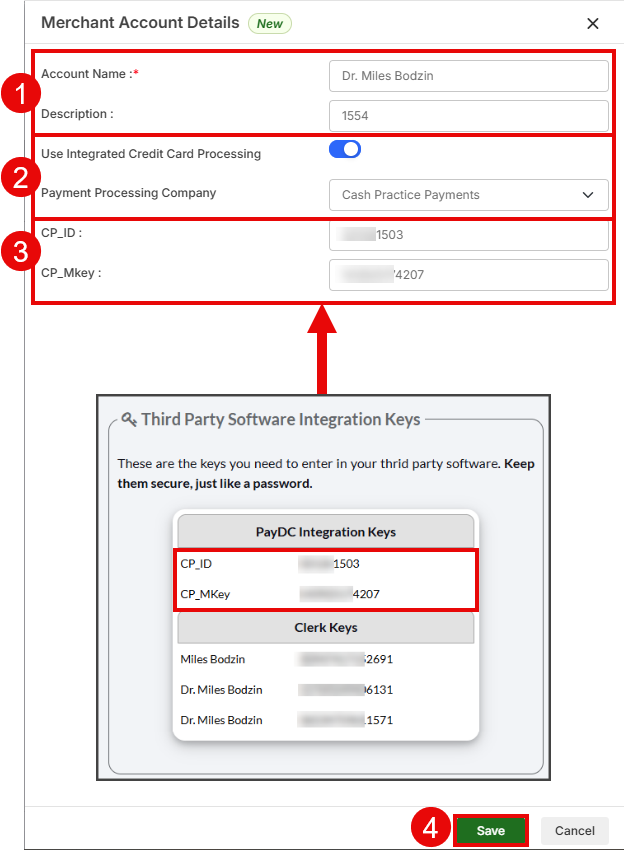
Step 5: Add a Merchant Account that represents the Cash Practice Account linked to the PayDC account.
Merchant Account Details:
Add in the Cash Practice Account Owners name in the [Account Name] field
Enter Cash Practice Account Number as the [Description]
Integrated Credit Card Processing:
Check the box for [Use Integrated Credit Card Processing]
Select [Cash Practice Payments] from the drop-down menu
Using the Third Party Software (TPS) Integration Keys page in Cash Practice, copy and paste the CP_ID & CP_MKey in this section
Once finished, click the [Save] button at the bottom of the screen
Note: If your office uses one PayDC account and has multiple providers, each with separate Cash Practice accounts, then this process would need to be repeated for Cash Practice Account Owner.
Adding Account Users:
If your office uses one PayDC account and has multiple providers, each with separate Cash Practice accounts, then this process would need to be repeated for Cash Practice Account Owner. They would need to be added as a new user to each separate Cash Practice account, and then added to PayDC multiple times with the unique Third-Party Software Integration Keys for each account.
Step 6: Head back to the settings icon in the top right corner & then select the [Account Settings] option.
Step 7: From the left side of the screen, click on [Users]. To configure settings for an existing user, click their name. To configure settings for a new team member, click the [+ Users] button.
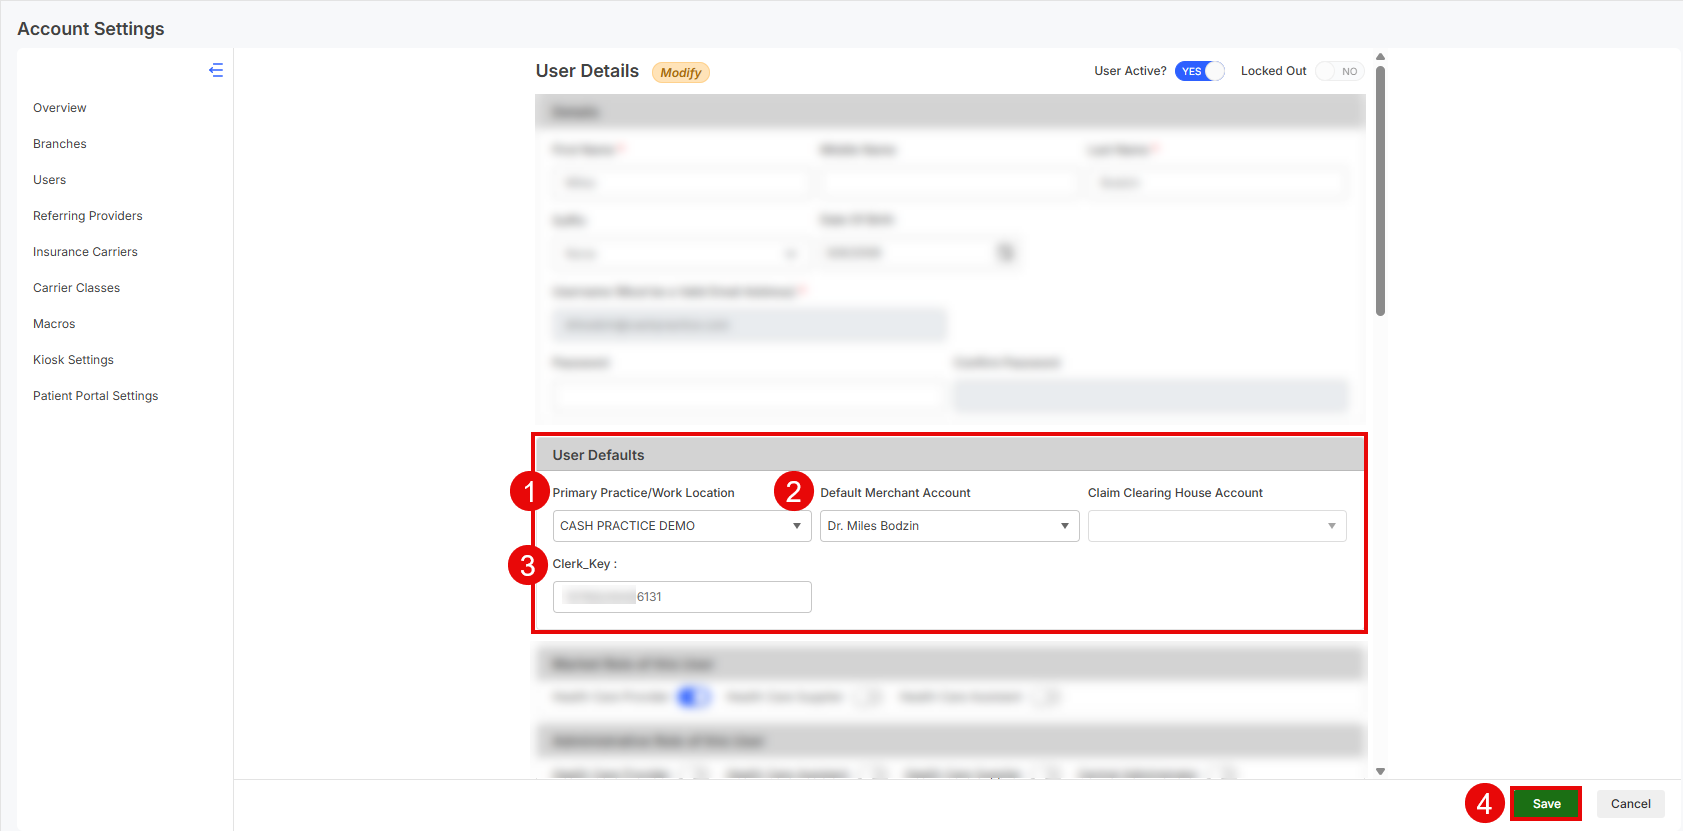
Step 8: For each user:
Primary Practice/Work Location: Make sure that their user defaults are selected with the correct Primary Practice/Work Location
Default Merchant Account: Select the one that's attached to the owner of the Cash Practice account
Using the Third Party Software (TPS) Integration Keys page in Cash Practice, copy and paste the Account Users Clerk Key
Click the [Save] button
Repeat these steps for all remaining users. If the integration settings are already configured, review them to ensure they are correct.