Getting Started:
Step 1: Follow the sequence below.
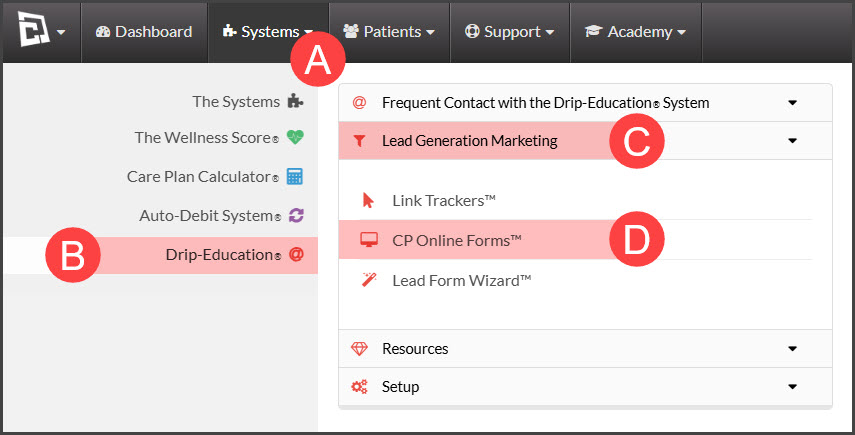
A: Go to the [Systems] menu
B: Select the[Drip-Education®] menu
C: Click on [Lead Generation Marketing]
D: Choose [CP Online Forms™]
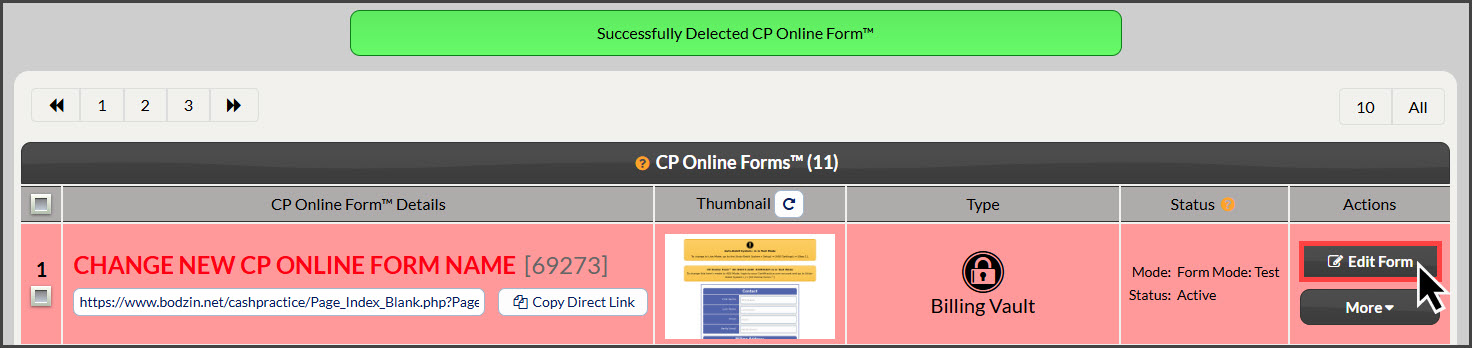
Step 2: Click the [+Add New CP Online Form™] button, then click [OK] to confirm adding the form.

Step 3: The page will reload with a new form that now needs to be customized. Click on the [Edit Form] button to start customizing the form.
Step 4: Customize the form with Form Settings
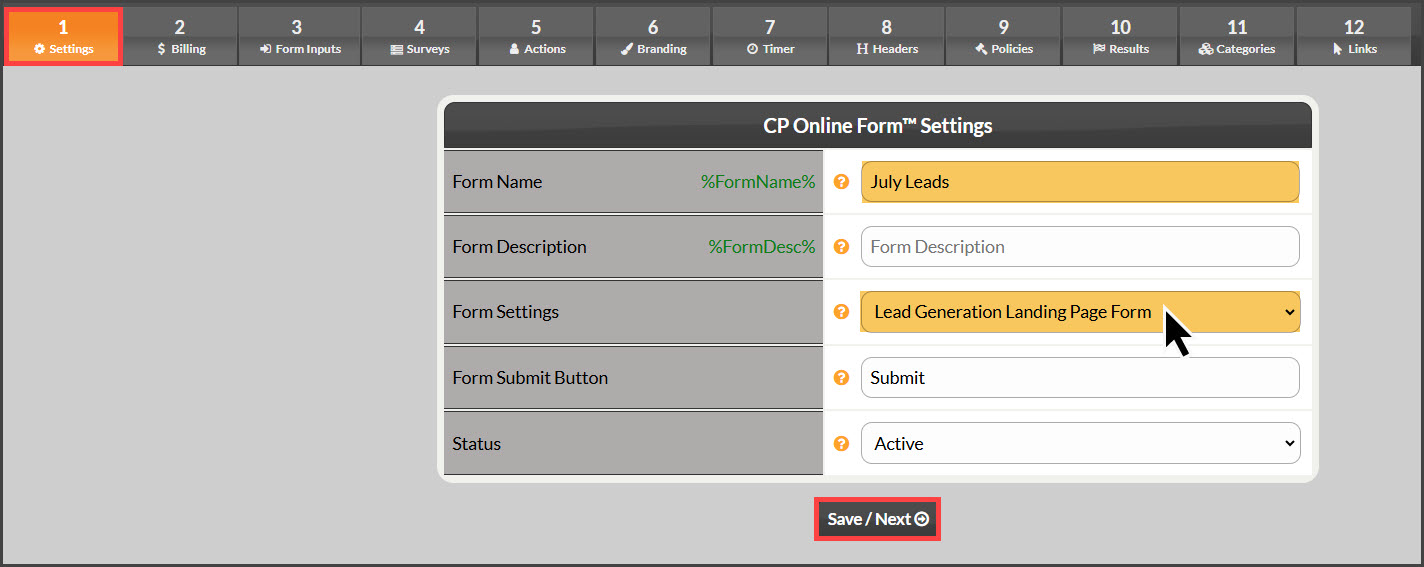
Form Name: You can create your own Custom Form Inputs to capture additional data. To create Custom Fields, click the [Custom Fields] button. Form Name: Enter a name for the CP Online Form™ using characters A-Z, a-z, and 0-9. Choose a name that identifies the CP Online Form™ so it can be easily found when you have a large list of forms.
Form Description: Enter a description for the CP Online Form™. What you enter here will be displayed on the CP Online Form™ and Email Receipt as well as substituted for the Drip-Ed™ Variable %FormDesc%. Ex: Monthly Website Membership. If left blank, no description will be displayed.
Form Settings:
Form Type:
Lead Generation Landing Page Form: Select to create Landing Pages. Using the Drip-Education System to assign email campaigns makes this a powerful tool for generating leads online.
Static Display Landing Page: No information is collected at all. Use this choice to display the page only. Great if you want to create a custom thank you page.
Form Submit Button: Enter what you want the CP Online Form™ Submit button to say. For example, 'Subscribe Now' or 'Click To Pay. '
Status:
Active: Turns ON the CP Online Form™.
Inactive: Turns OFF the CP Online Form™. If you try to access the CP Online Form™ while it's Inactive, you will be redirected to an error page.
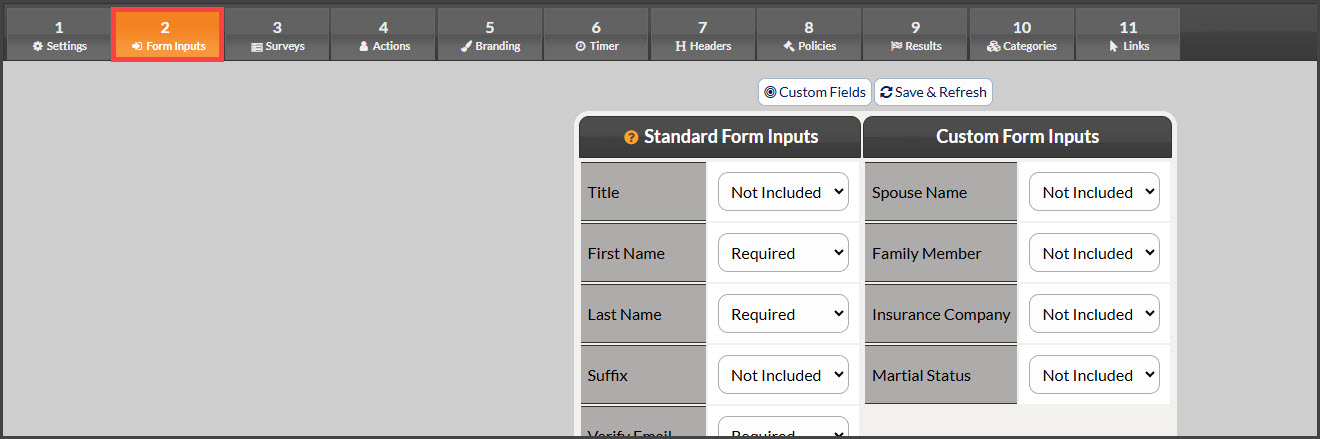
Step 5: Form Inputs
Form inputs allow you to select what information is collected when processing the online form. Select your form Inputs from the list of standard inputs and custom inputs.
Not Included - Input will not be included in the CP Online Form™.
Included - Input will be included on the CP Online Form™ and will be Optional.
Required - Input will be included in the CP Online Form™ and is Required.
Click [Save/Next]
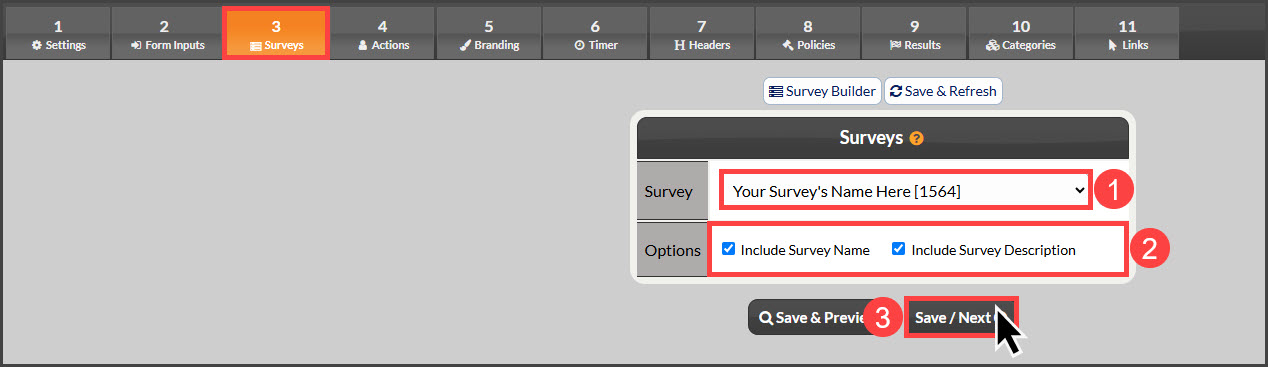
Step 6: Surveys (Optional)
For more information on Surveys, click HERE.
SurveyS: Select the desired survey to include on the form from the drop-down menu
Options: Check the boxes to include or not include the Survey's name for the patient to see, as well as the survey's description
To view the changes, click [Save & Preview] or select [Save/Next] to move forward
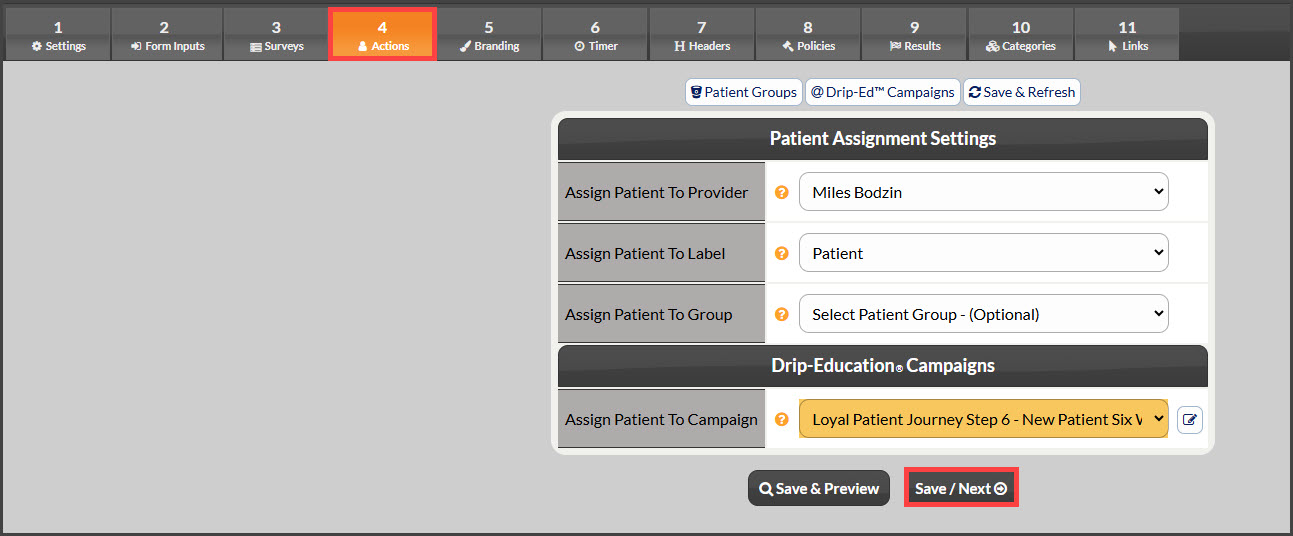
Step 7: Actions
Patient Assignment Settings
Assign Patient To Provider: You can create your own Custom From Inputs to capture additional data. To create Custom Fields, click the [Custom Fields] button. Select the Provider you want the customer assigned to. If you select an associate Provider to assign the customer to, their account must remain active for the CP Online Form™ to function.
Assign Patient To Label: Select the Label you want to be assigned to the customer if the transaction is successful.
Assign Patient To Group: Select the Group you want the patient assigned to if the transaction is successful. This is optional.
Drip-Education® Campaigns
Assign Patient to Campaign: Select the Drip-Ed™ Campaign you want to be assigned to the customer if the transaction is successful. This is optional.
Select [Save/Next]
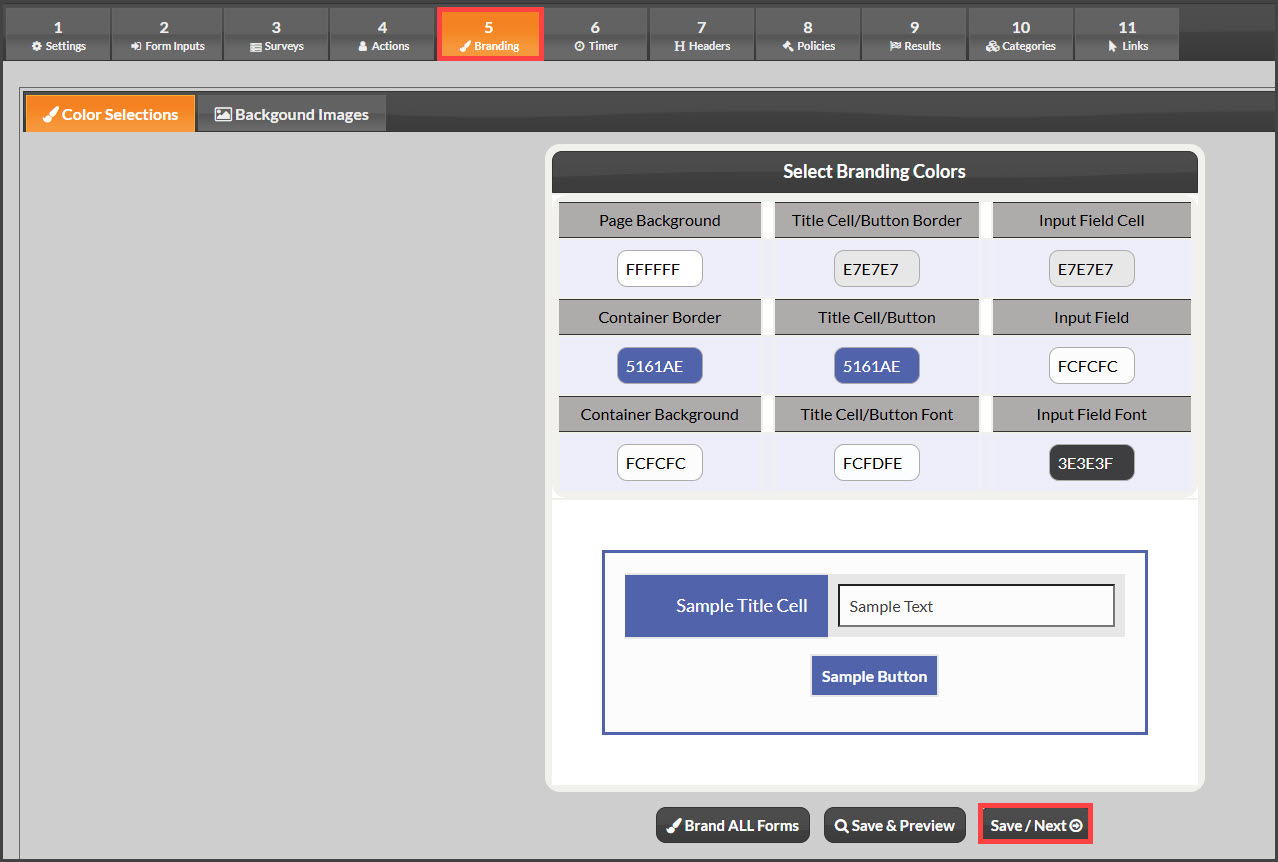
Step 8: Branding
Color Selections: The form comes defaulted with a generic color scheme. Choose to customize any part of the form colors or leave as is.
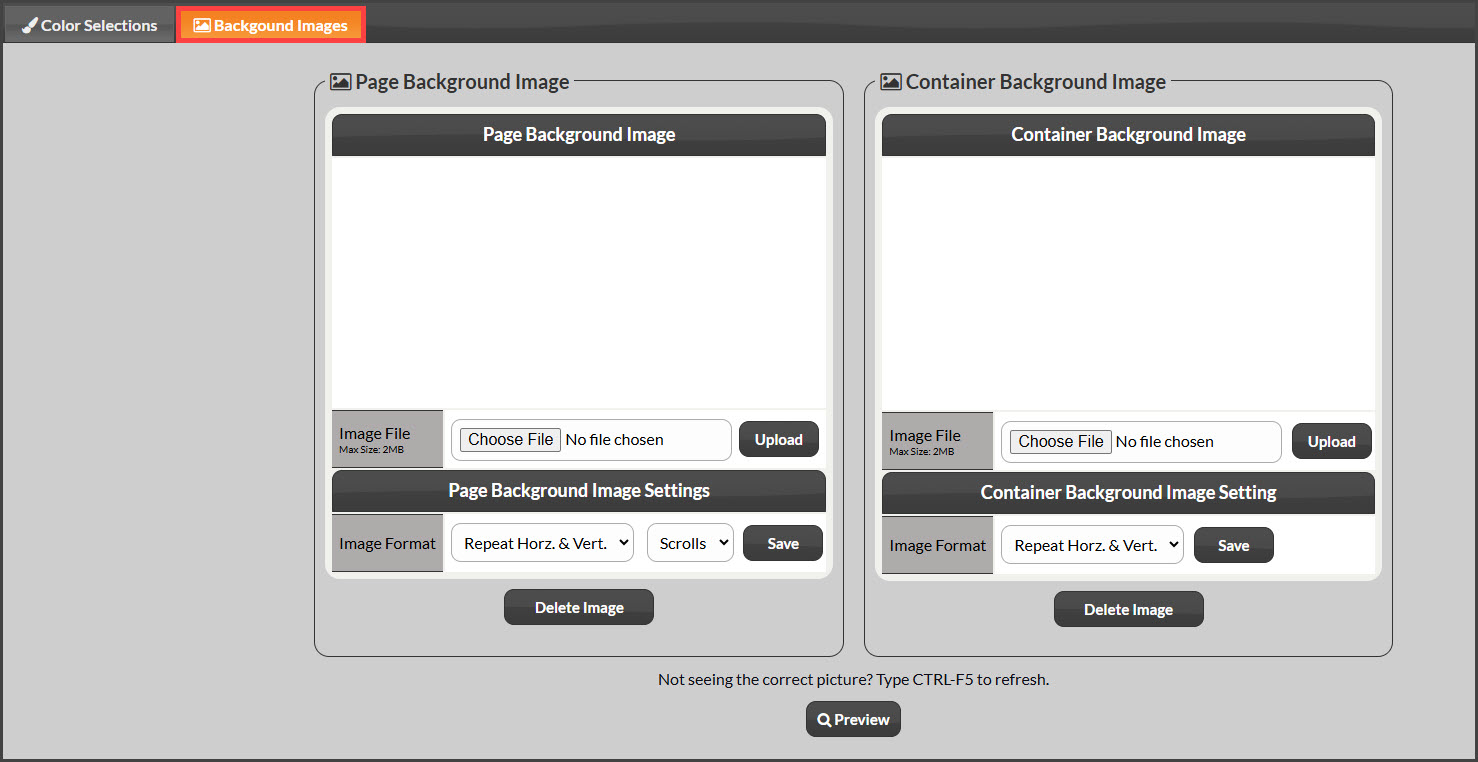
Background Images: You have the option to upload your own background or container image. Choose the file and select the correct settings.
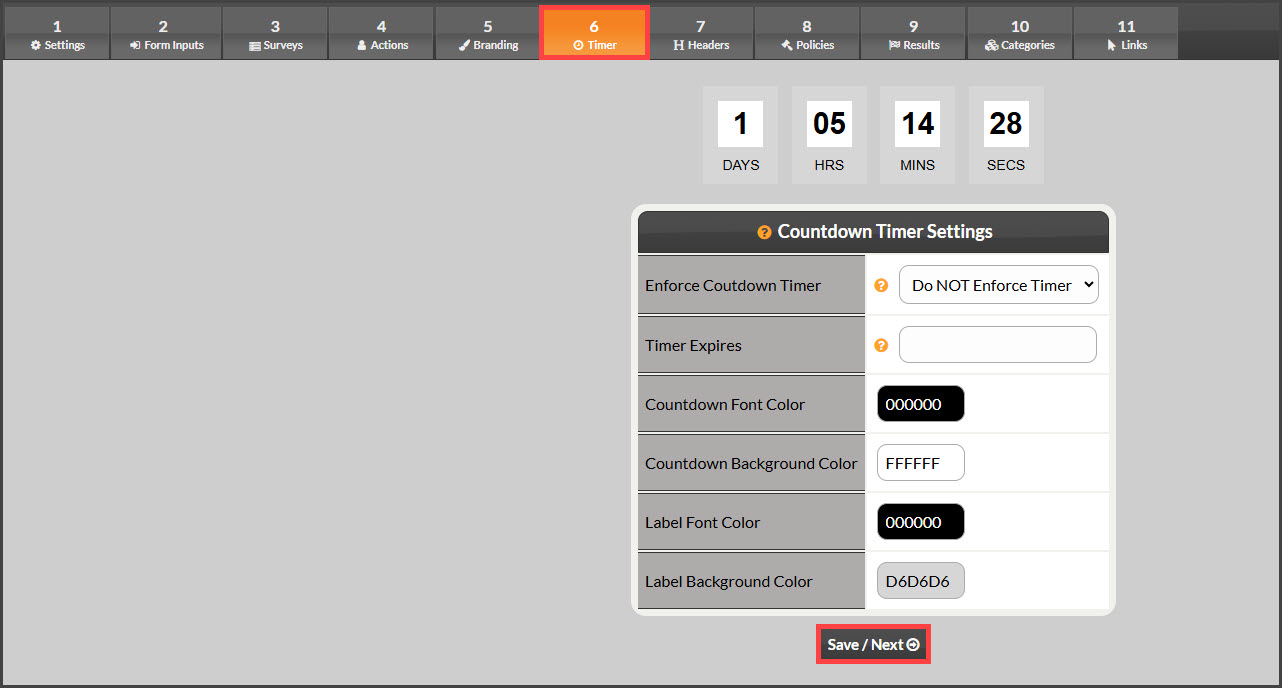
Step 9: Timer
Countdown Timer Settings: (Optional) Customize a Countdown timer to display on your form. The Countdown Timer is a great way to create urgency so people take action.
Set the Timer Expires date and time.
Customize the colors of the timer or leave it as is.
You will use the %CountDownTimer% variable created in Step 6 and insert the %CountDownTimer% variable into the header of your form in Step 6.
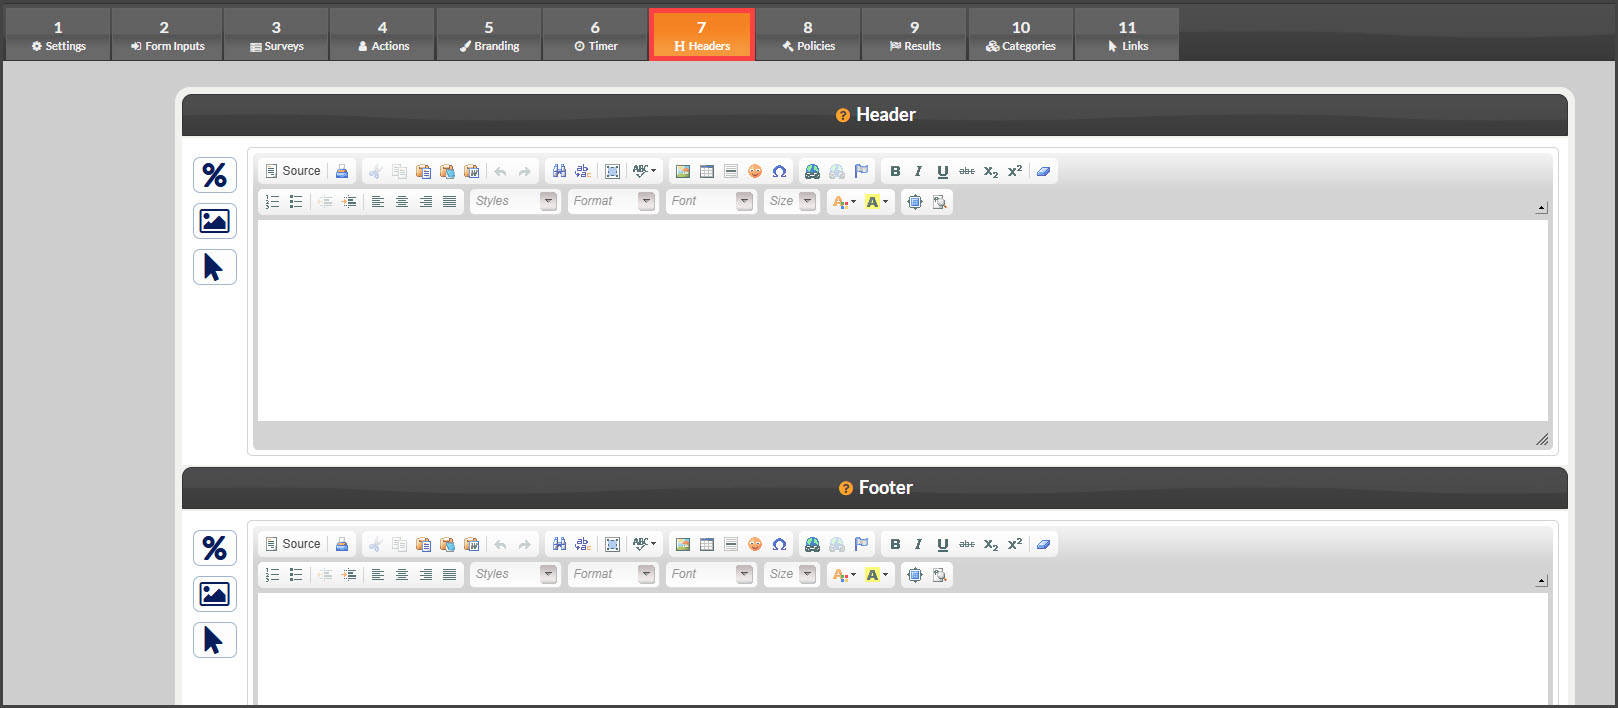
Step 10: Headers
Header: The CP Online Form™ Header can be customized with whatever info you want. This is where you may give instructions, descriptions, thank yous, etc., so the customer knows what they should do.
For the most professional look, it is suggested that you create a Header Image File (PNG, GIF, or JPG) and upload it using the Insert/Edit Image button in the editor. Using the same header image on both the CP Online Form™ Receipt and the Header is a good technique for a professional look. If you leave it blank, no header will be displayed.
Footer: The CP Online Form™ Footer can be customized with whatever info you want. The footer is typically where you would place your company guarantees, return/cancellation policies, etc.
If you do use a link, be sure to instruct the link to open in a new window so the customer does not leave the form when they click it. Like the header, you can use an image file or leave it blank.
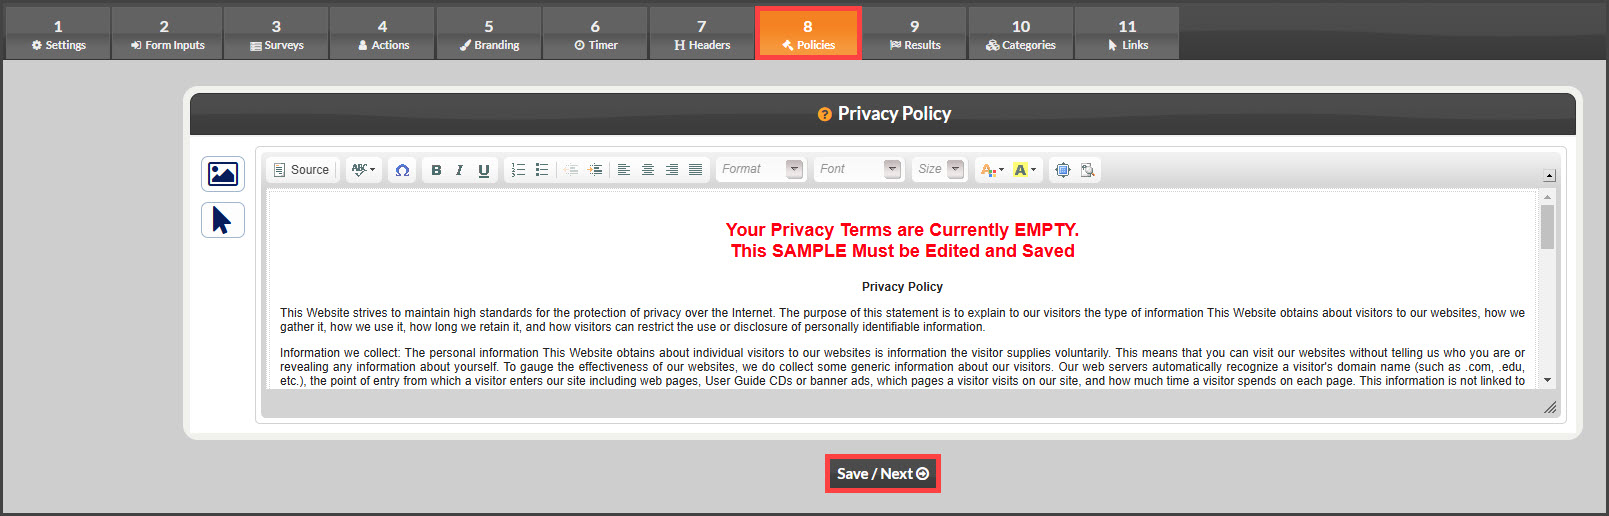
Step 11: Policies
Privacy Policy: The CP Online Form™ Privacy Policy is where you indicate your company's Privacy Policy. The link to the Privacy Policy will be placed at the bottom of the CP Online Forms™ and will open a pop-up window. Here, enter your policies, or at a minimum, use the pre-loaded content and delete the text in red font confirming you've read and agreed.
Click [Save/Next]
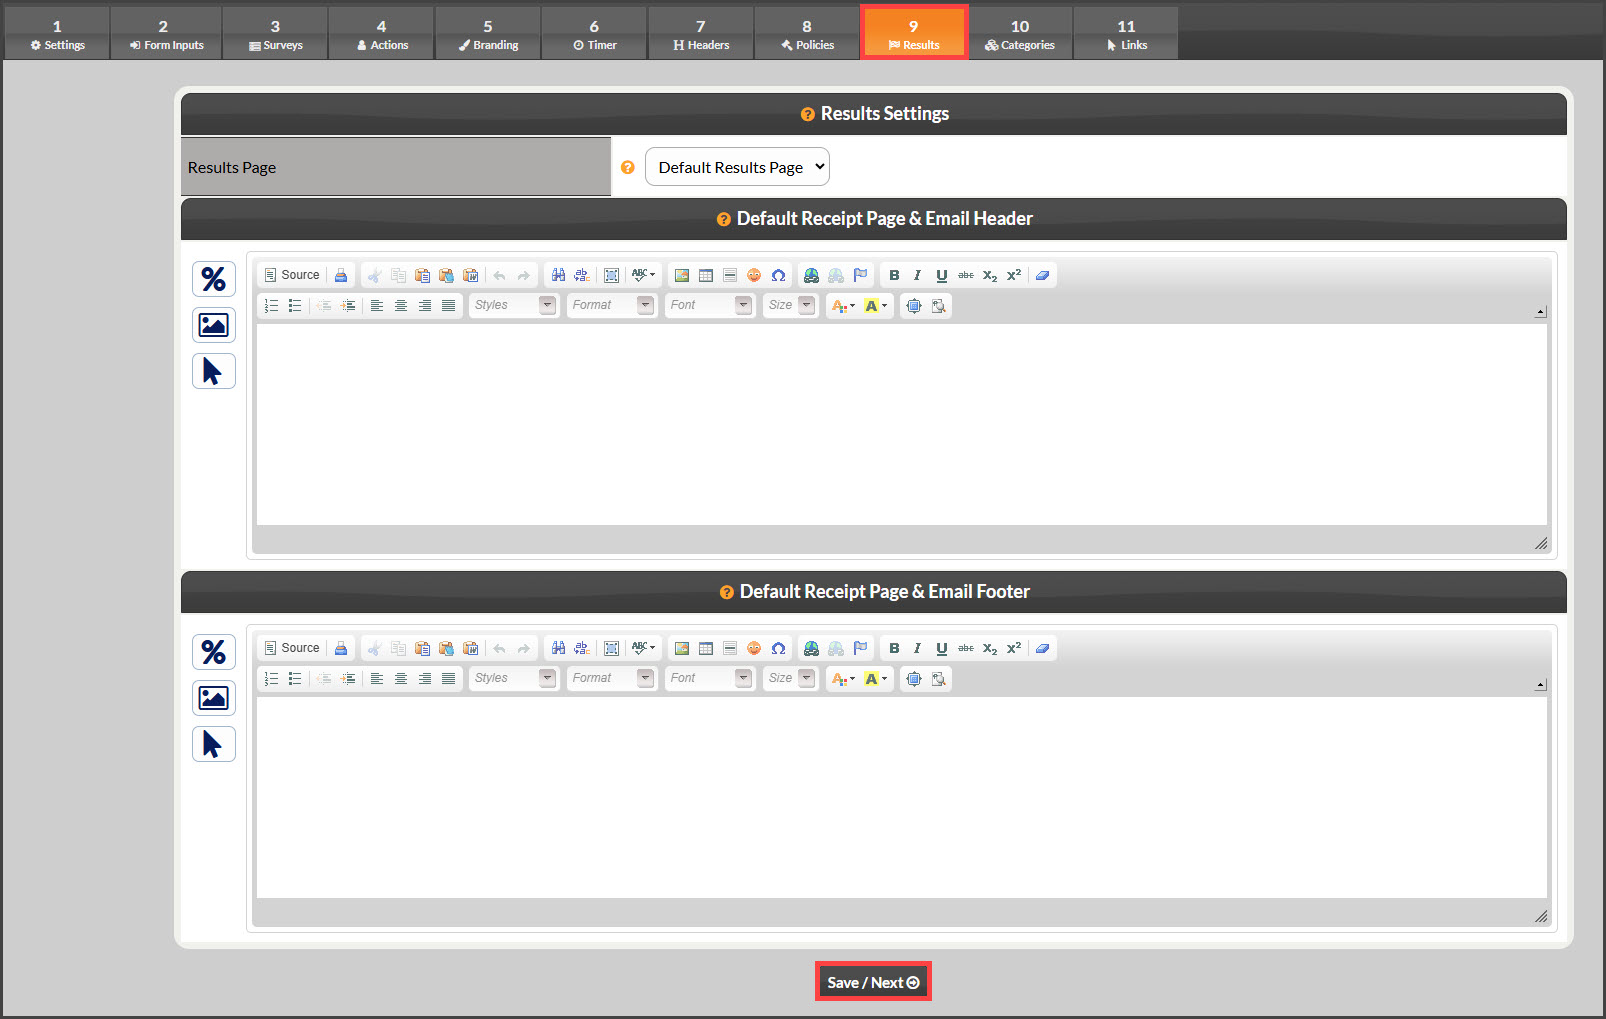
Step 12: Results
Once the customer submits the CP Online Form™, it will return a result. In most circumstances, you want the customer to be redirected to a "receipt" or "thank you" page. However, you may have the need to redirect the results to your own page/script. For example, if you have a script that creates a new member account on your own website, you would want to redirect to that URL.
Besides sending the customer to a results page, the CP Online Form™ can email them a receipt. Use the two editors below to customize both the Default Receipt Page and the Email Receipt Header and Footer.
Default Receipt - Once a customer submits the form, they will be redirected to the Default Receipt Page.
Custom Results Page - Select this option if you need to redirect a customer to another page or script. Enter the CP Online Form™ Custom Results URL. If you are using a custom URL, you will need to download the Auto-Debit System® API Manual for a list of result variables that can be passed to the custom URL. If you are not sure what to do, leave by DEFAULT.
Select [Save/Next]
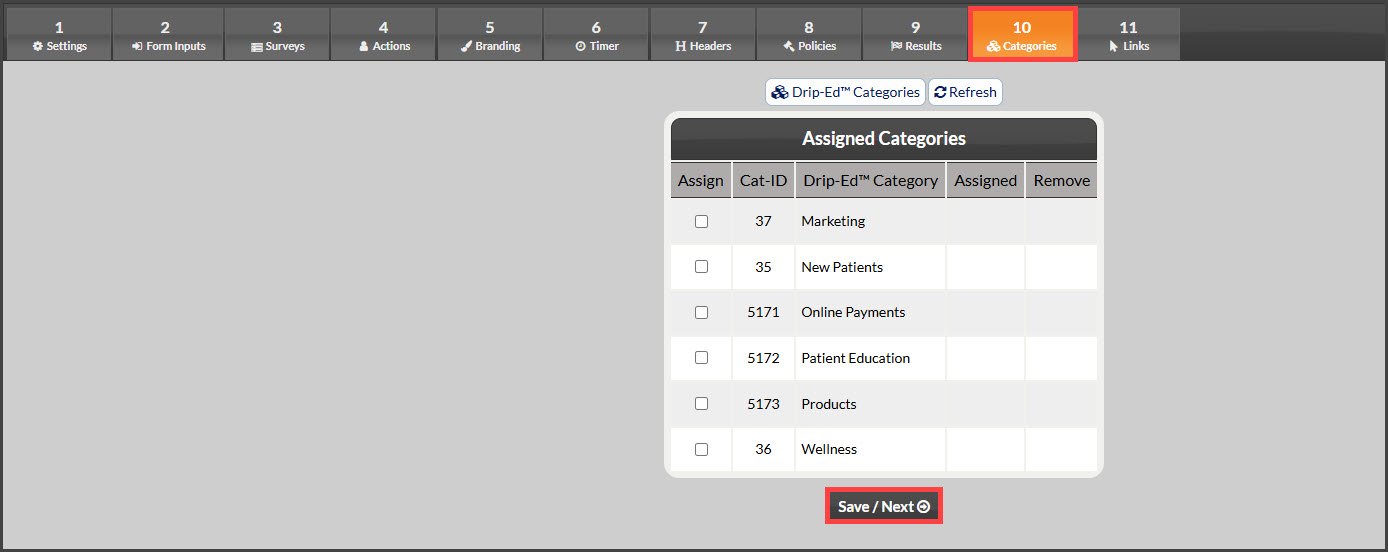
Step 13: Assigned Categories:
Use the Categories to organize your Online forms, Drip-Ed Campaigns™, and Link Trackers™.
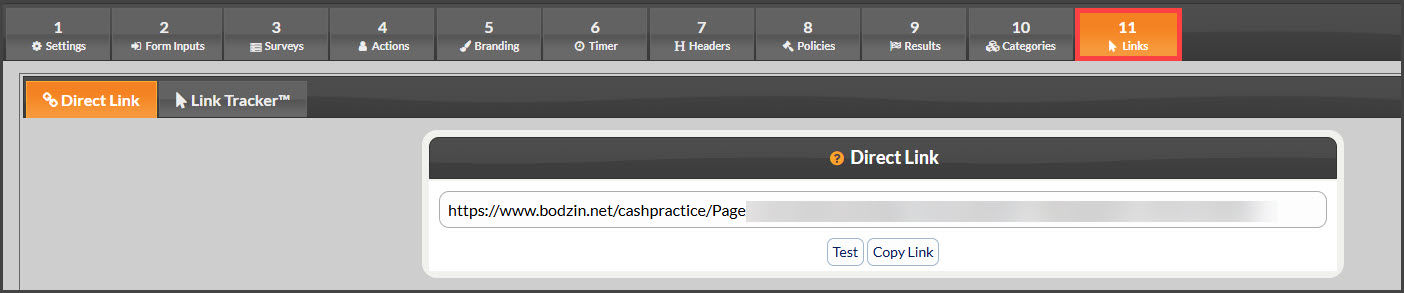
Step 14: Links
Direct Link: This is the link to this CP Online Form™. You can click it to open the CP Online Form™ in a new browser tab. In the URL, the FID can be changed to any 3-digit code. This is used to identify where you place the link. For example, if you place the link on your website, on Facebook, and on Google ads, use a unique 3-digit code for each so you can see where the link was clicked when looking at your stats.
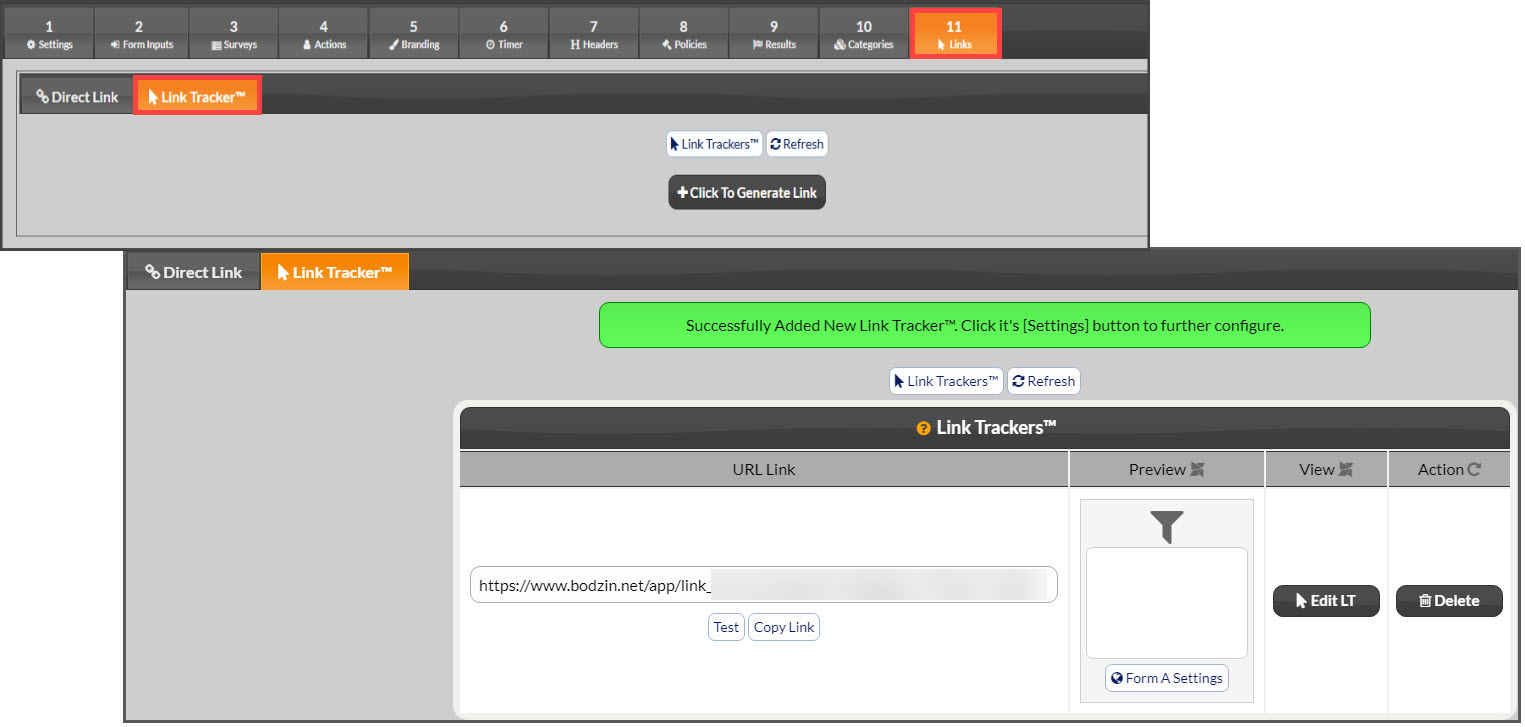
Link tracker: The Drip-Ed Link Trackers™ allow you to better track your stats. By assigning this CP Online Form™ to a Drip-Ed Link Tracker™, you will be able to see who clicks the links and more. Then, use its Drip-Ed™ Variable in your email campaigns as links to the form.
To generate tracker access, click on the [+ Click to Generate Link] button.