
The Auto-Debit System allows you to place a link on your website for patients to self-pay using a secure online payment link. Check out the article below to learn how to use it.

Important: To create a professional and trustworthy experience for your patients, we highly recommend you customize your online forms. By uploading your company logo and adjusting the colors to match your website's branding, you can build confidence and assure patients that their billing information is being submitted in a safe and secure environment.
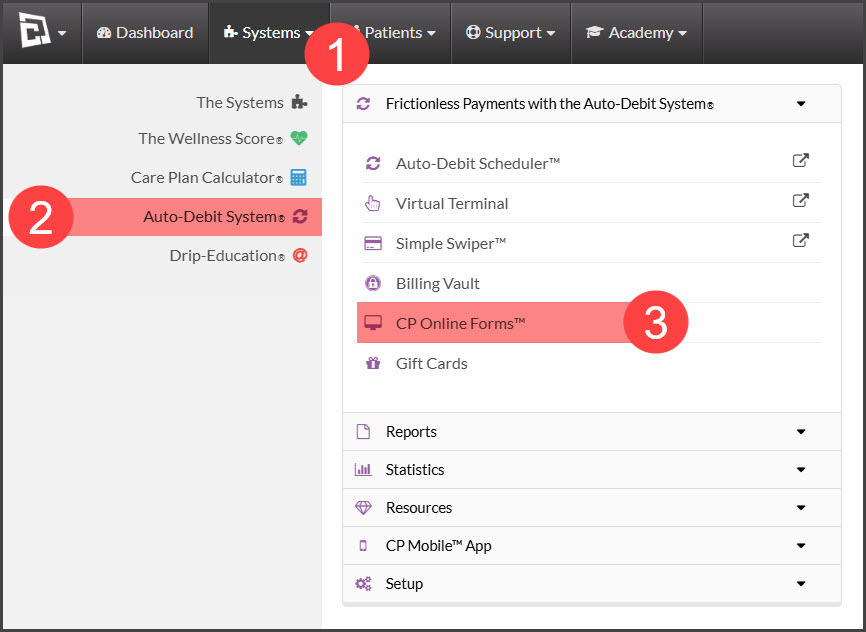
Step 1: Follow the sequence below.
Hover over the [Systems] menu
Click [Auto-Debit System®]
Select [CP Online Forms™]
Step 2: Click on the [+Add New CP Online Form™] button. Click [OK].

Step 3: The page will reload with a new form that now needs to be customized. Click on the [Actions] drop-down and select [Edit Form]to start customizing the form.

Step 4: Customize the form using the form settings below:
1. Form Settings
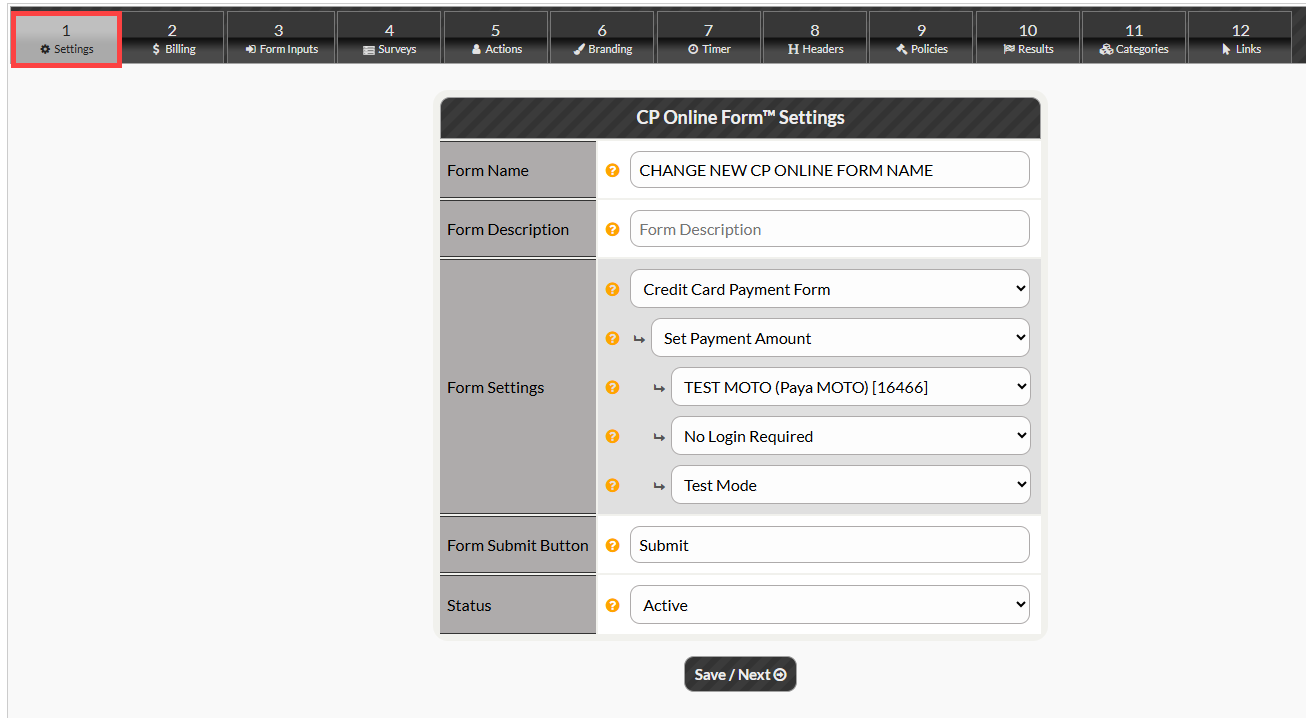
CP Online Form Settings | |
Form Name | Using characters A-Z, a-z, and 0-9. Choose a name that identifies the CP Online Form™ so it can be easily found when you have a large list of forms. |
Form Description | Enter a description for the CP Online Form™. What you enter here will be displayed on the CP Online Form™ and Email Receipt as well as substituted for the Drip-Ed™ Variable %FormDesc%. Ex: Monthly Website Membership. If left blank, no description will be displayed. |
Form Settings | |
Form Type (choose from the following) | Lead Generation Landing Page Form (DES): Select to create Landing Pages. Using the Drip-Education System to assign email campaigns makes this a powerful tool for generating leads online. |
Static Display Landing Page (DES): No information is collected at all. Use this choice to display the page only. Great if you want to create a custom thank you page | |
Credit Card & Bank EFT Payment Form: Uses the Auto-Debit System® to offer both credit/debit and bank EFT payment choices on your form. | |
Credit Card Payment Form: Uses the Auto-Debit System® to offer credit/debit payments only. This is recommended if you are selling a physical product. | |
Bank EFT Payment Form: Uses the Auto-Debit System® to offer bank EFT payments only. If you are selling a physical product, we recommend you wait at least one week before shipping it to ensure the EFT does not get returned for insufficient funds. | |
Payment Choices | Set Payment Amount : Designate the dollar amount the patient will pay for your product or services. |
Custom Payment Amount or Schedule: Allow customers to enter their own payment amount. | |
Log in Options | No Login Required - If the customer uses the same email address each time they complete a CP Online Form™, their patient record will be updated without creating a new patient record. Otherwise, a New Patient Record will be created. (recommended) |
(optional) Show Login Button - Verify CP Customer ID - Use this setting if you want a Returning Customer to LOG IN (using their Customer ID) so that the CP Online Form™ gets pre-populated with their Patient Record data. They log in with a CP Customer ID (which is included in the receipt that gets emailed to them) and their email address. You can locate their Customer ID in the Patient Record as well. | |
(optional) Show Login Button - Verify TPS ID - Use this setting if you want a Returning Customer to LOG IN (using their TPS/EHR ID) so that the CP Online Form™ gets pre-populated with their Patient Record data. They log in with their TPS and their email address. | |
Form Mode | ADS-Mode Live: Uses your active merchant account to process payments. Select this option when you are ready to go live with your form. You may turn this back to test mode at any time |
Test Mode: Uses a test merchant account and requires the use of test credit card numbers (see Auto-Debit System® Quick Start Guide for test card numbers.) Recommended to run test transaction on the form before providing the form to patients. | |
Form Submit Button | Enter what you want "Submit" button to say. For example, 'Subscribe Now' for memberships or 'Click To Pay'. |
Status | Active: Turns ON the CP Online Form™. |
Inactive: Turns OFF the CP Online Form™. If you try to access the CP Online Form™ while it's Inactive, you will be redirected to an error page. | |
[Click Save/Next] to save your changes and move on to the next step. |
2. Billing
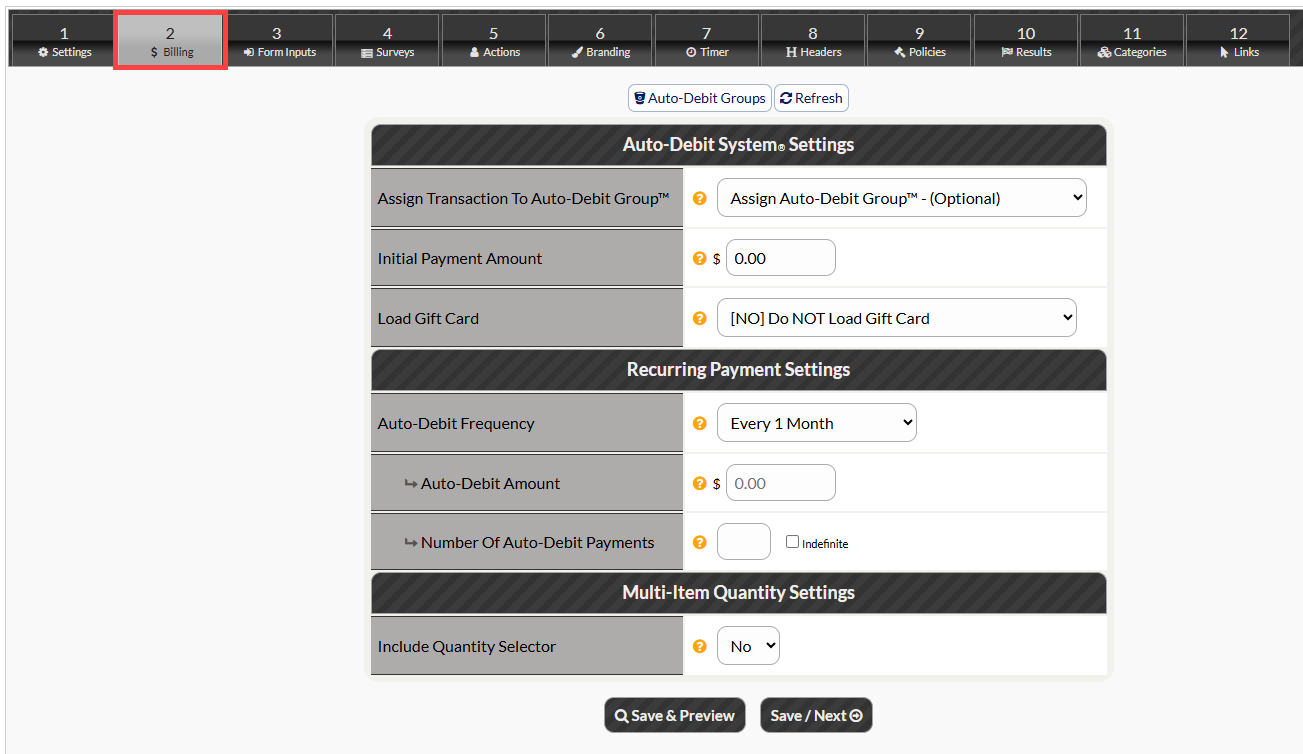
Auto-Debit System Settings | |
Assign Transactions to Auto-Debit Group | (Optional) Select an Auto-Debit Group™ the patient will be assigned to when the form is completed |
Initial Payment Amount | Enter the $ amount for the initial payment. This payment is processed as soon as the form is submitted. |
Load Gift Card | [NO] Do NOT Load Gift Card |
[Yes] Load Gift Card - this is for Gift Card Purchases only. Only compatible with our in house Gift Card program. | |
| |
Auto-Debit Frequency | None: select this option if there are no recurring payments for the products/services on this form. |
Click the drop down to choose from the recurring payment increments from 1 week to 1 year. | |
Auto-Debit Amount | Enter the $ amount for the recurring payment. |
Number of Auto-Debit Payments | Enter the total number of recurring payments, or check the indefinite box to set them up indefinitely. |
Multi-Item Quantity Settings | |
Include Quantity Selector | No: Select this if you are not selling products or services that your clients can purchase multiple. |
Yes: Select this option if you would like your clients to purchase multiple. | |
Quantity Label | Enter the label for your Quantity Selector. |
Quantity Minimum | Enter the minimum number a client can purchase. |
Quantity Maximum | Enter the maximum number a client can purchase. |
Quantity Multiplier Value | Enter the Quantity Multiplier Value you wish to use. For example, if you want to increase the price by 15% for each quantity selected, enter 0.15. The default value is 1, which increases the price by 100% for each increment. |
Apply Quantity Multiplier To | Initial Fee Only: Applies the multiplier only to the upfront cost, keeping the recurring Auto-Debit Fee at a flat rate. |
[Click Save/Next] to save your changes and move on to the next step. |
3. Form Inputs
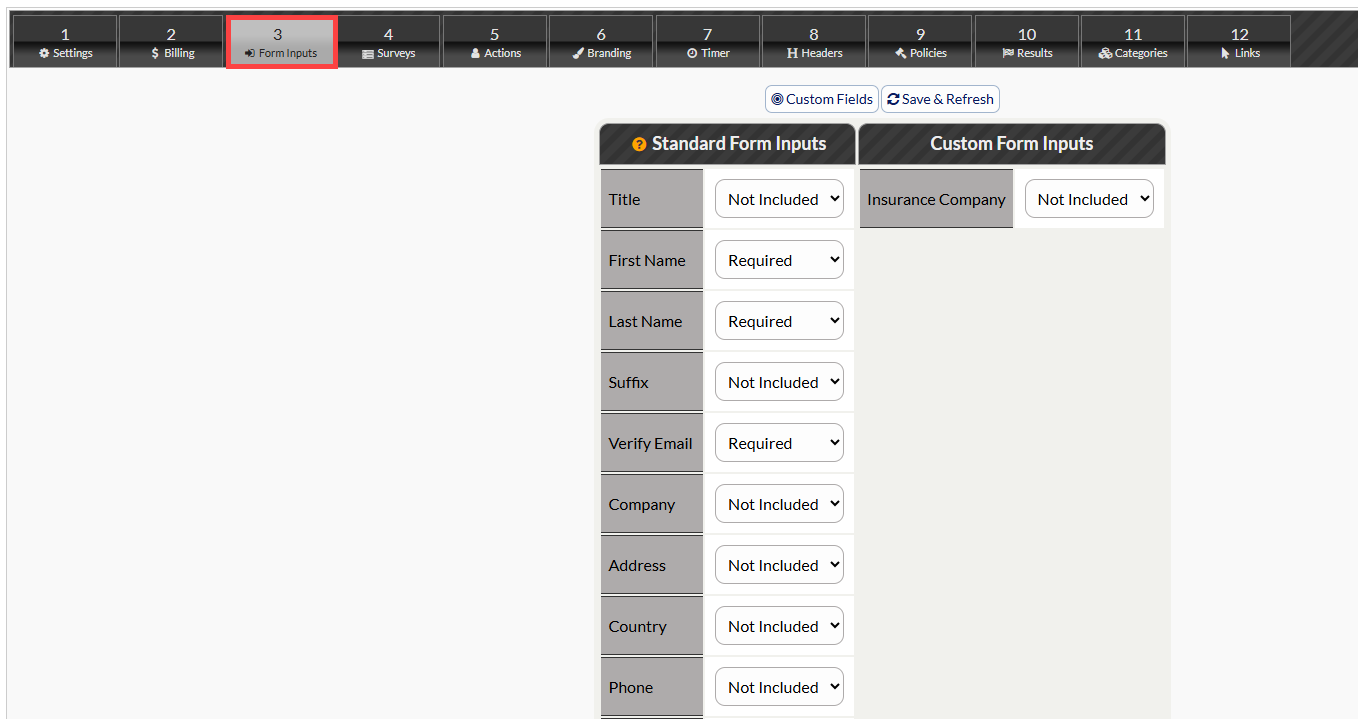
Form inputs allow you to select what information is collected when processing the online form. Select your form Inputs from the list of standard inputs and custom inputs.
You can create your own Custom From Inputs to capture additional data. To create Custom Fields, click the [Custom Fields] button.
Standard & Custom Form Inputs | |
Not Included | Input will not be included in the CP Online Form™ |
Included | Input will be included on the CP Online Form™ and will be Optional. |
Required | Input will be included in the CP Online Form™ and is Required to submit the form. |
[Click Save/Next] to save your changes and move on to the next step. |
4. Surveys
(OPTIONAL) Only for offices with the Drip-Education System
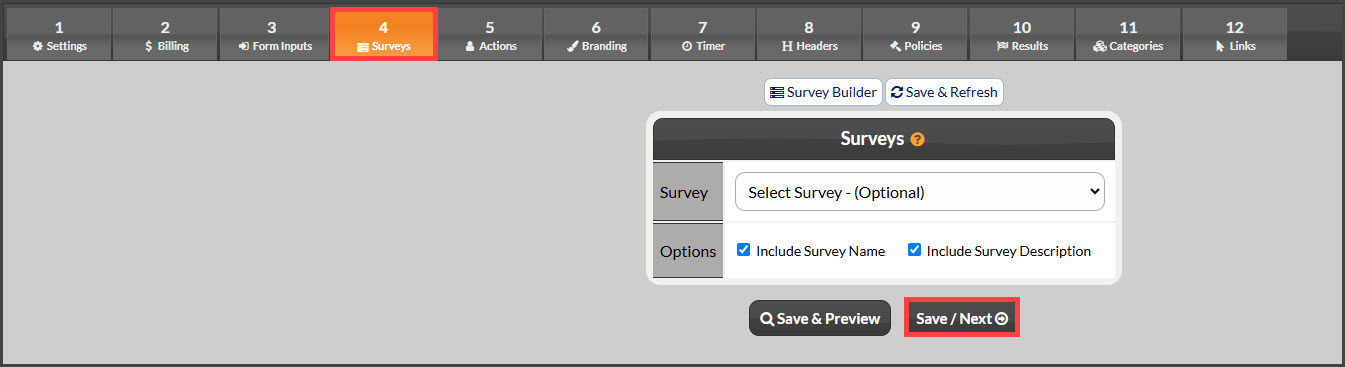
Click the drop down menu to select which survey will be displayed as the Online Form.
5. Actions
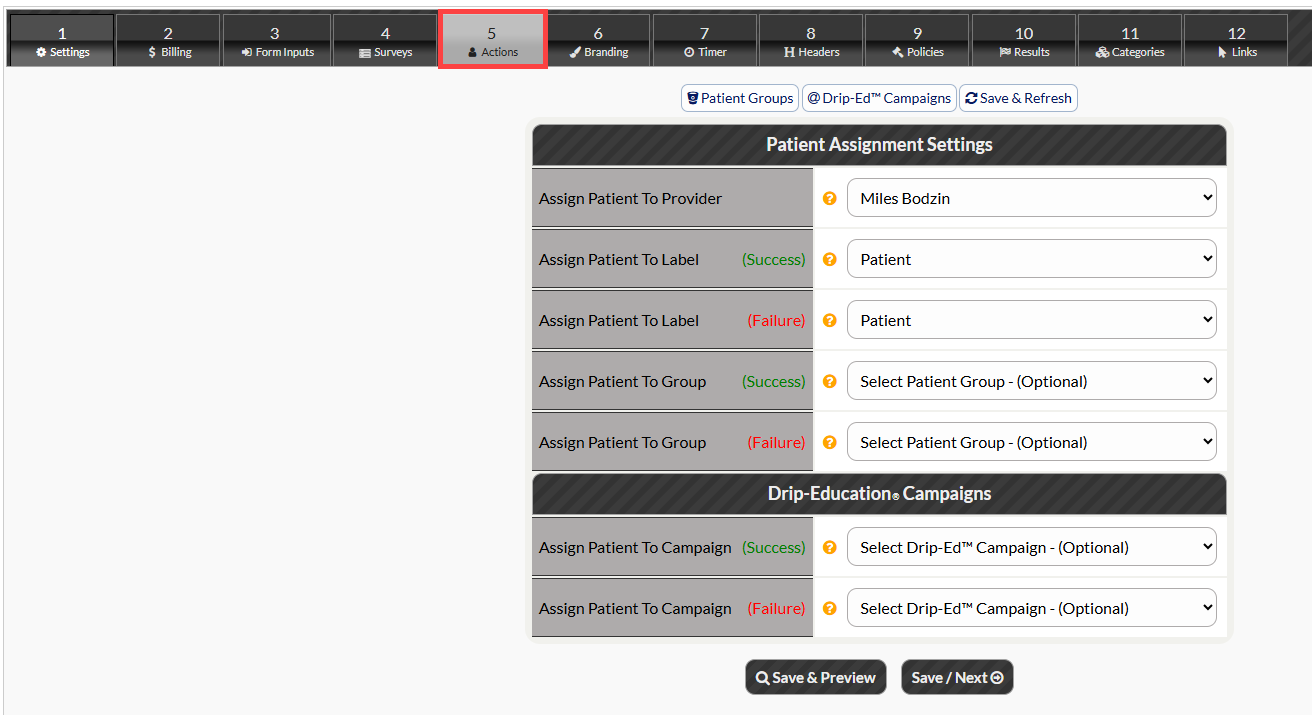
Patient Assignment Settings | |
Assign Patient To Provider | Select the provider you want the customer assigned to. If you select an associate member to assign the customer to, their account must remain active for the CP Online Form™ to function. |
Assign Patient To Label (success) | Select the Label you want to be assigned to the customer if the transaction is successful. |
Assign Patient To Label (failure) | Select the Label you want to be assigned to the customer if the transaction fails. |
Assign Patient To Group (success) | Select the Group you want the patient assigned to if the transaction is successful. This is optional. |
Assign Patient To Group (failure) | Select the Group you want the patient assigned to if the transaction fails. This is optional. |
| |
Assign Patient to Campaign (success) | Select the Drip-Ed™ Campaign you want to be assigned to the customer if the transaction is successful. This is optional. |
Assign Patient to Campaign (failure) | Select the Drip-Ed™ Campaign you want to be assigned to the customer if the transaction fails. This is optional. |
[Click Save/Next] to save your changes and move on to the next step. |
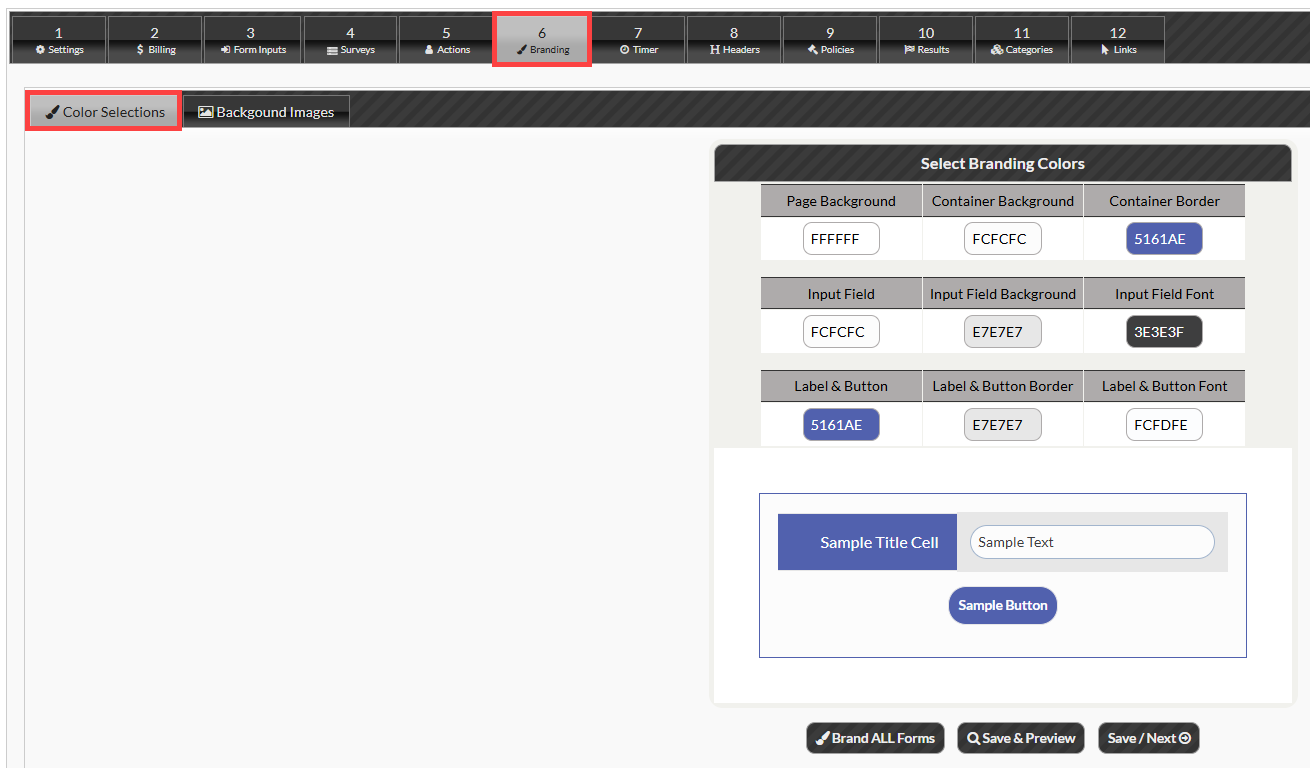
6. Branding
Color Selection: The form comes defaulted to a generic color scheme. Choose to customize any part of the form colors or leave as is.
Background Images: You have the option to upload your own background or container image. Choose the file and select the correct settings.
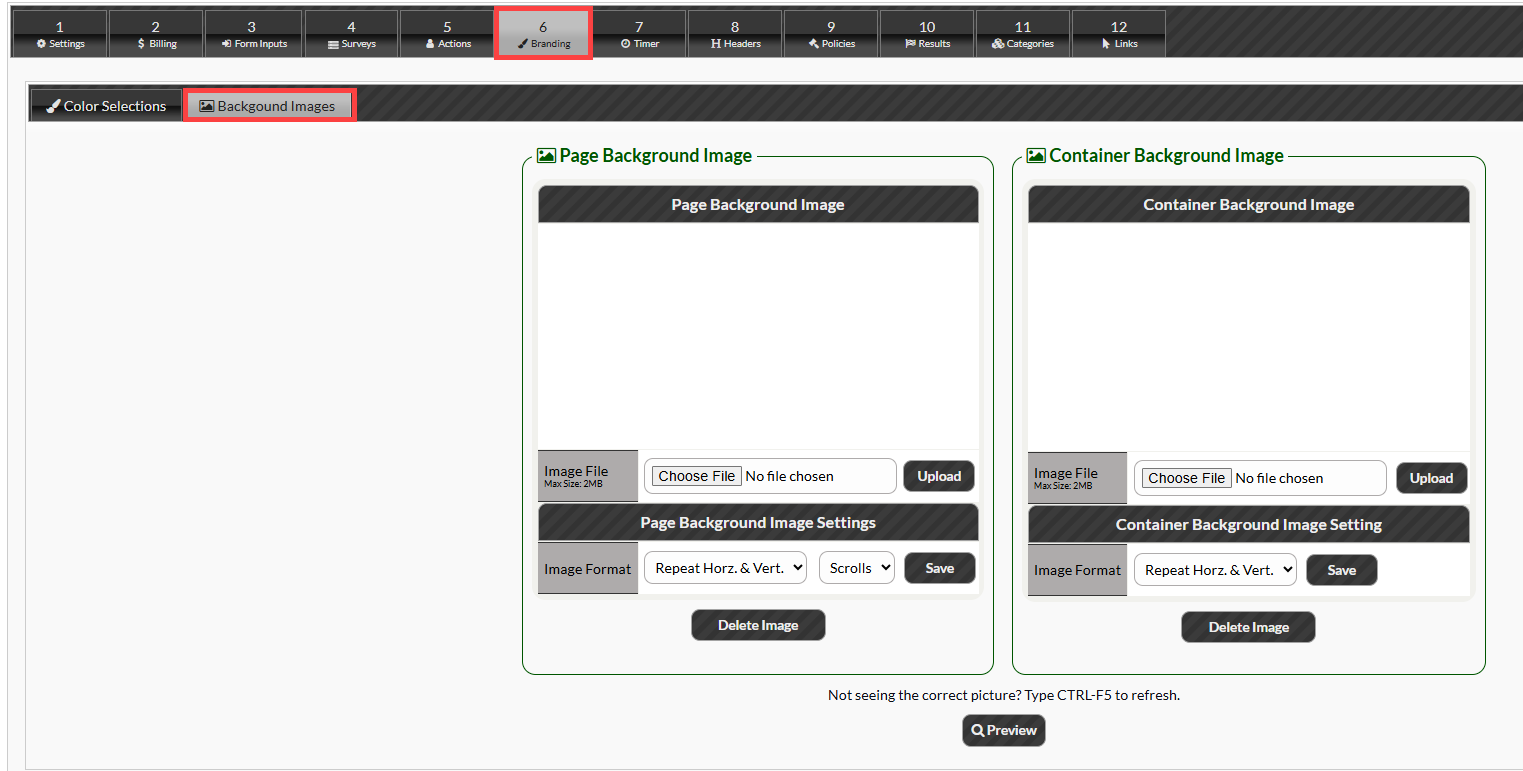
Click [Save/Next] and move on the next step.
7. Timer
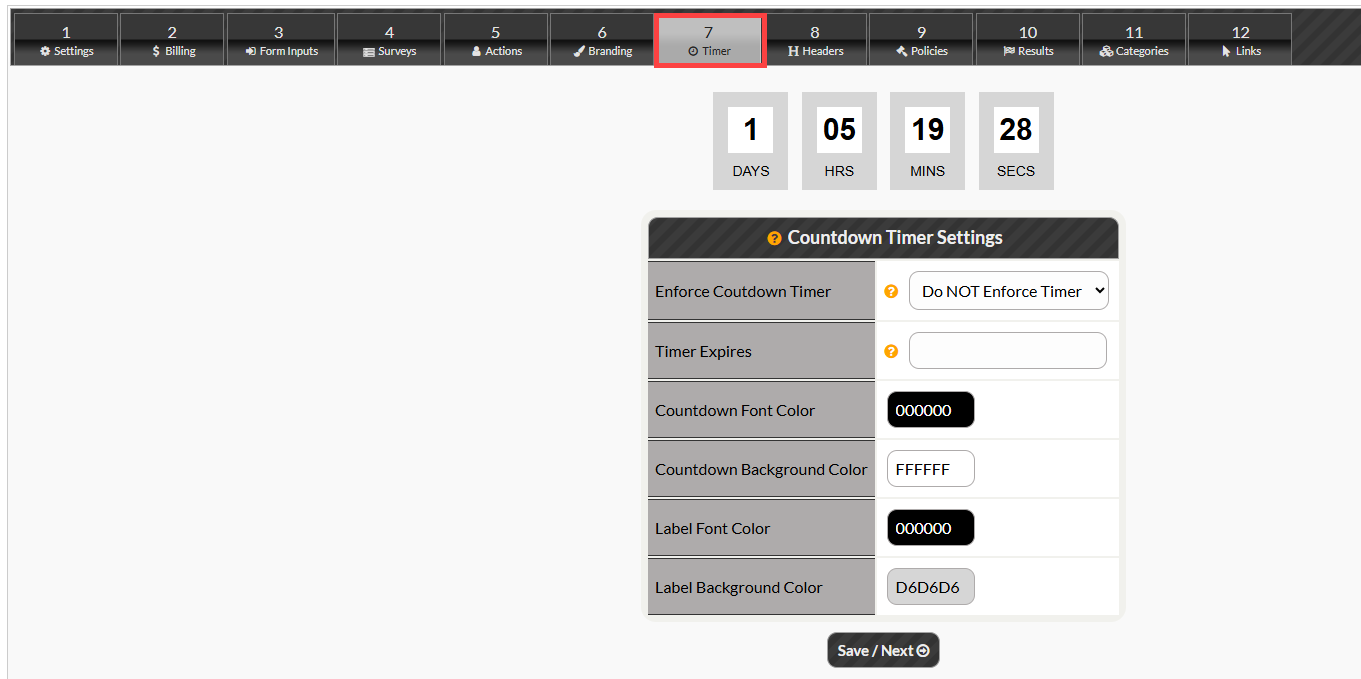
Countdown Timer Settings: (Optional) Customize a Countdown timer to display on your form. The Countdown Timer is a great way to create urgency so people take action.
How to use: You will use the %CountDownTimer% variable created in this step and insert the %CountDownTimer% variable into the header of your form in Step 8. Headers.
8. Headers
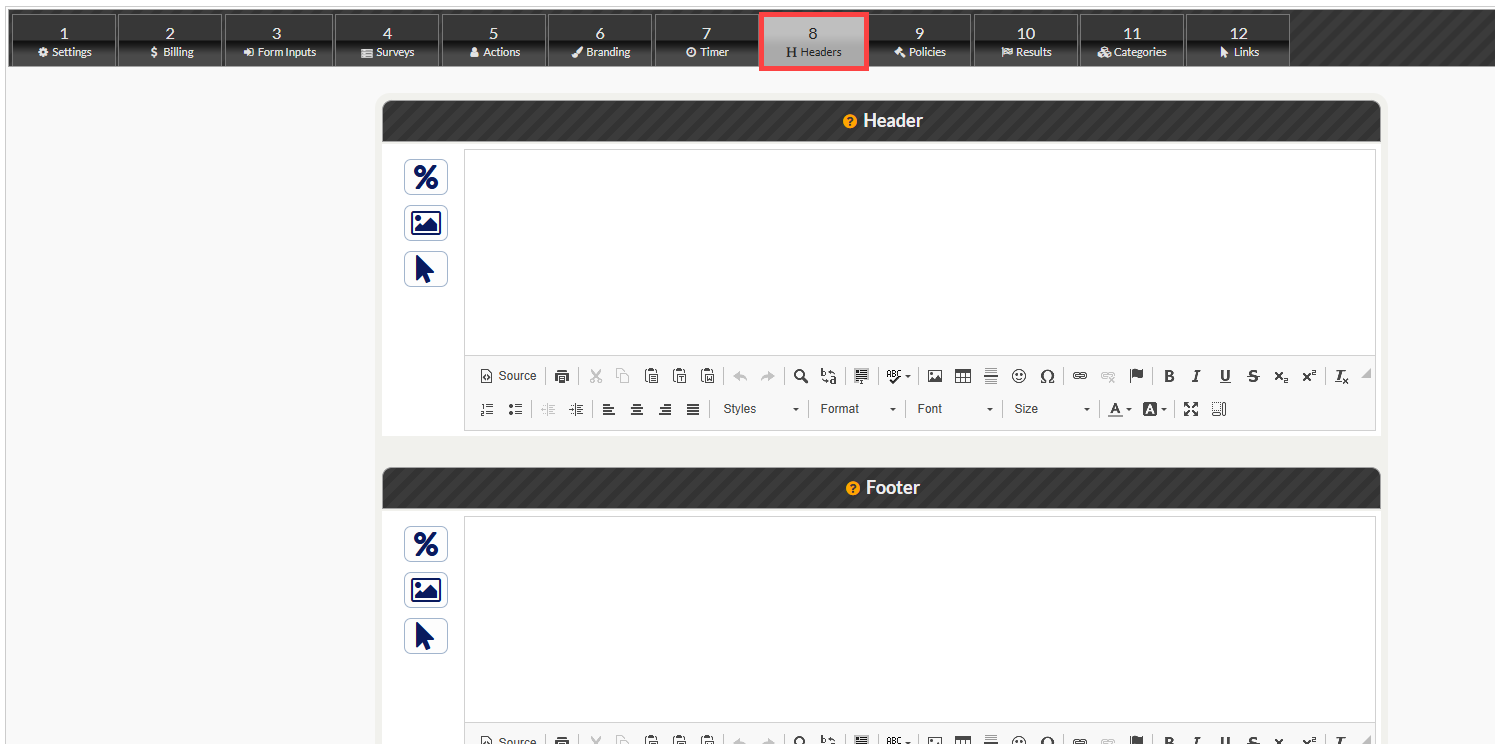
Header: The CP Online Form™ header is fully customizable. Add clear instructions, helpful descriptions, or a brief thank-you note to guide your customers from the very start.
For a polished, cohesive look, we recommend uploading a single header image (PNG, GIF, or JPG) to use across both your CP Online Form™ and its Receipt.
How to add it: Use the %Header% variable to use your system's Mail Merge variable.
Or click the Insert/Edit Image button in the editor toolbar to upload your image file.Note: If you leave this section blank, no header will display on your form.
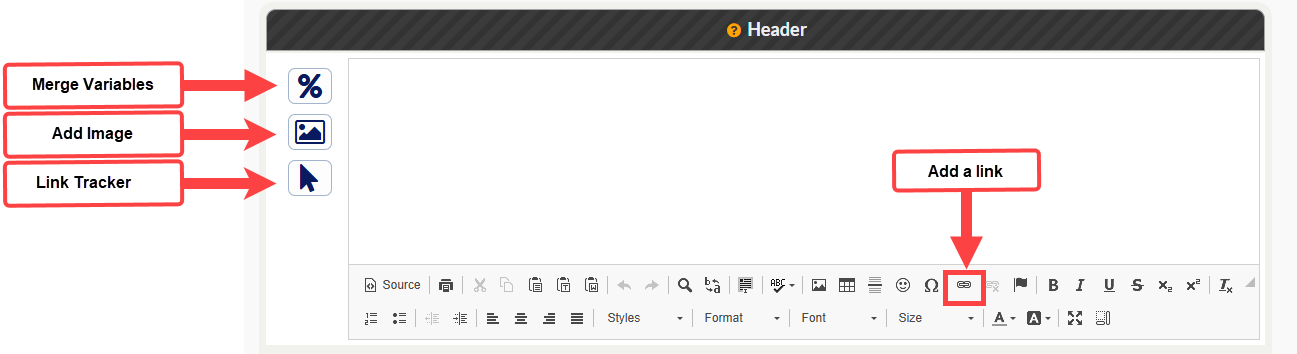
Learn more about Mail Merge variables:
Learn more about adding links in this related article:
Footer: The CP Online Form™ Footer can be customized with whatever info you want. The footer is typically where you would place your company guarantees, return/cancellation policies, etc.
If you do use a link, be sure to instruct the link to open in a new window so the customer does not leave the form when they click it. Like the header, you can use an image file or leave it blank.
[Click Save/Next] to save your changes and move on to the next step.
9. Policies
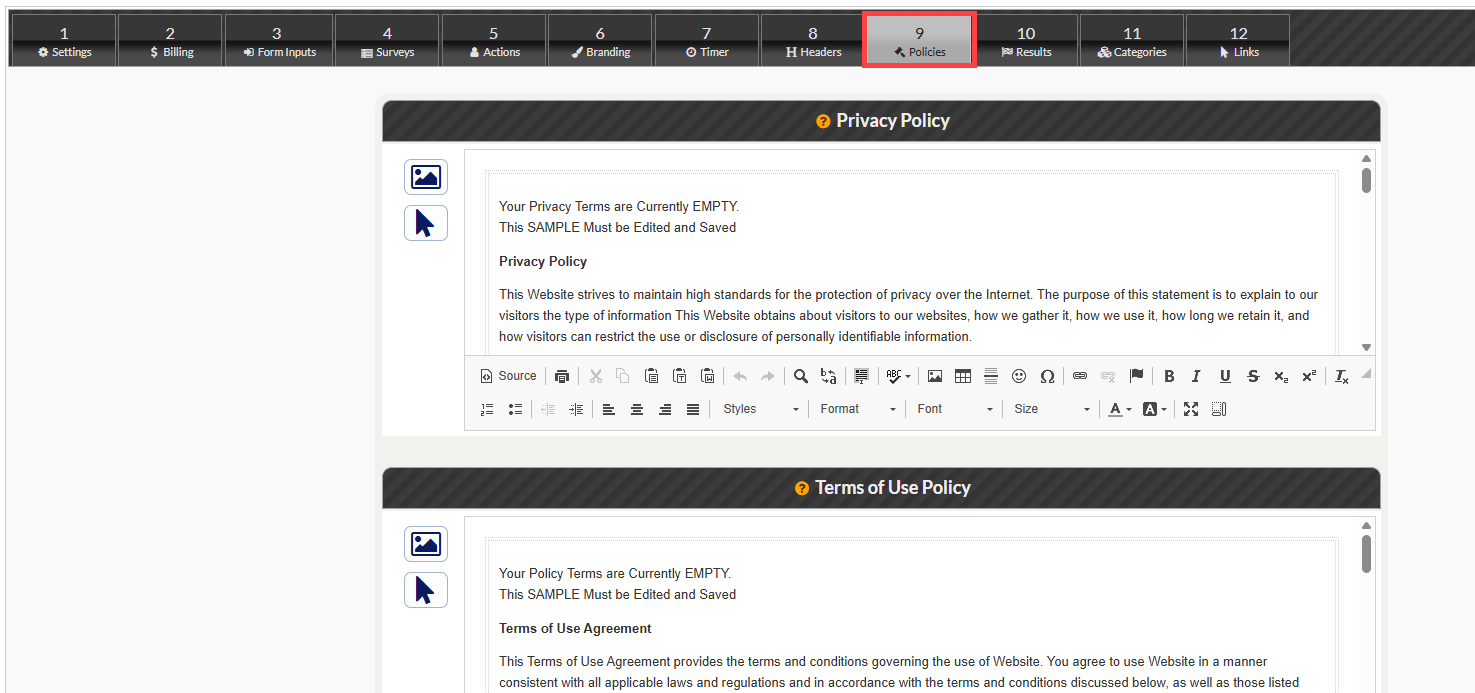
Privacy Policy | The CP Online Form™ Privacy Policy is where you indicate your company's Privacy Policy. The link to the Privacy Policy will be placed at the bottom of the CP Online Forms™ and will open a pop-up window. Here, enter your policies, or at a minimum, use the pre-loaded content and delete the text in red font confirming you've read and agreed. |
Terms Of Use | The CP Online Form™ Terms of Use is where you indicate your company's Terms of Use. The link Terms of Use will be placed at the bottom of the CP Online Forms™ and will open a pop-up window. Your merchant provider REQUIRES this link on ALL online forms. Here enter your Terms of Use, or at a minimum, use the pre-loaded content and delete the text in red font confirming you've read and agreed. |
Return Policy | The CP Online Form™ Return Policy is where you indicate your company's Return Policy. The link Return Policy will be placed at the bottom of the gateway and will open a pop-up window. Your merchant provider REQUIRES this link on ALL online forms. Here, enter your Return Policy and remove the red font confirming you've read and agreed. |
|
10. Results
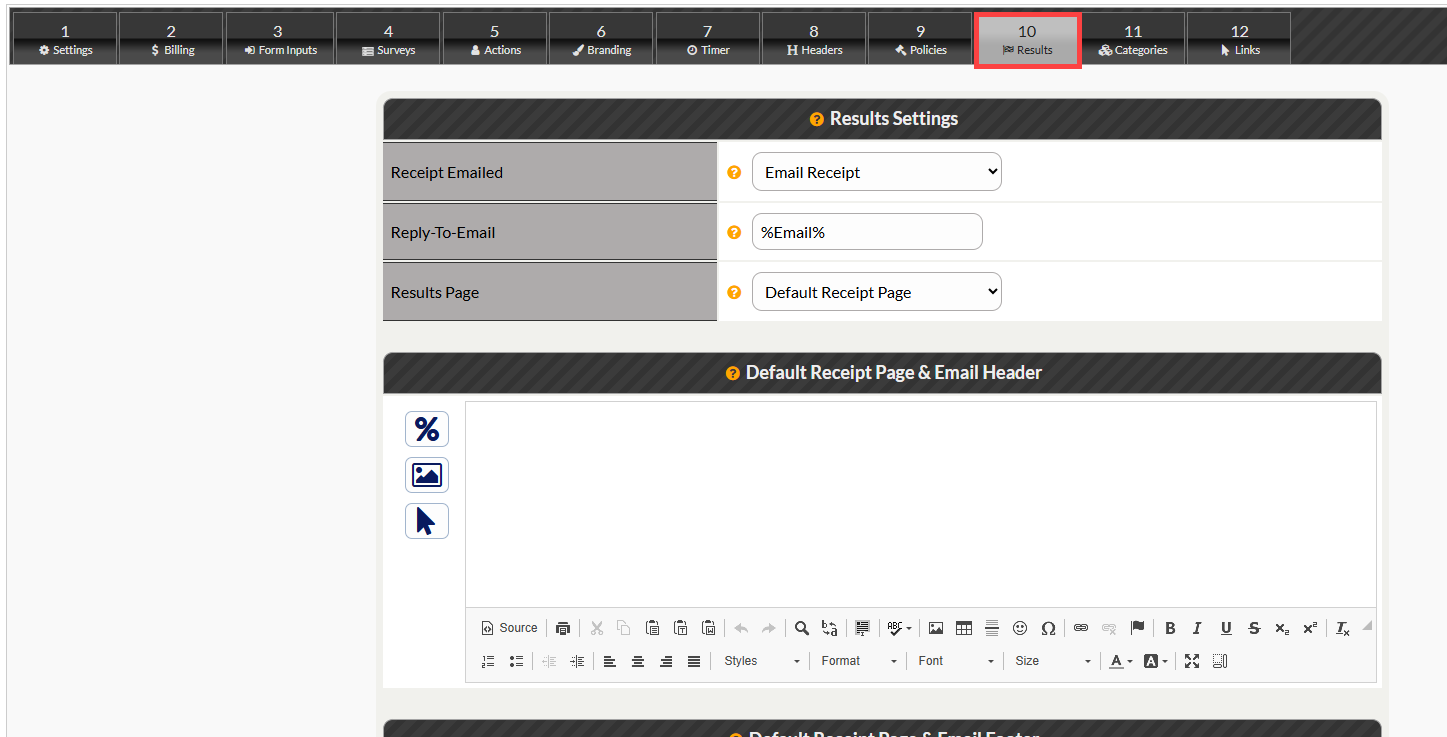
When someone submits the CP Online Form™, you can decide where they go next. While most businesses automatically redirect customers to a "thank you" or receipt page, you can also link it to your own website. For example, you can redirect them directly to your site's account creation page so they can log in right away.
You can also have the CP Online Form™ automatically email a receipt to your customer.
Use the two editors on this page to customize exactly what they see on their screen.
Receipt Emailed | Email Receipt: Sends an emailed receipt to the client. |
No Email Receipt: Does not send an emailed receipt. | |
Reply-To-Email | %Email% : This option will use the account administrator's email on file. |
You can remove the %Email% variable and enter a custom email address for the Reply-to. This is used when clients reply to an emailed receipt. | |
Results Page | Default Receipt Page: This will redirect to a receipt page that uses the Default Receipt Page & Email Header and Footer. |
Custom Results URL: This option will take the client to the specified webpage. | |
Custom Results Destination URL | Enter the URL you want to forward the results of the CP Online Form™. Then, Select POST or GET for the method you want the form to use when redirecting to the Custom Results Destination URL. |
POST: Used for updates, sends data securely in the request body and is perfect for forms. | |
GET: Use this for fetching data and appending parameters in the URL, ideal for searches | |
Random Value Generator (optional) | You may have need of a randomly generated value created for your Custom Result URL. For example, if you need an Account Name or Password generated, this will do it |
[Click Save/Next] to save your changes and move on to the next step. |
11. Categories
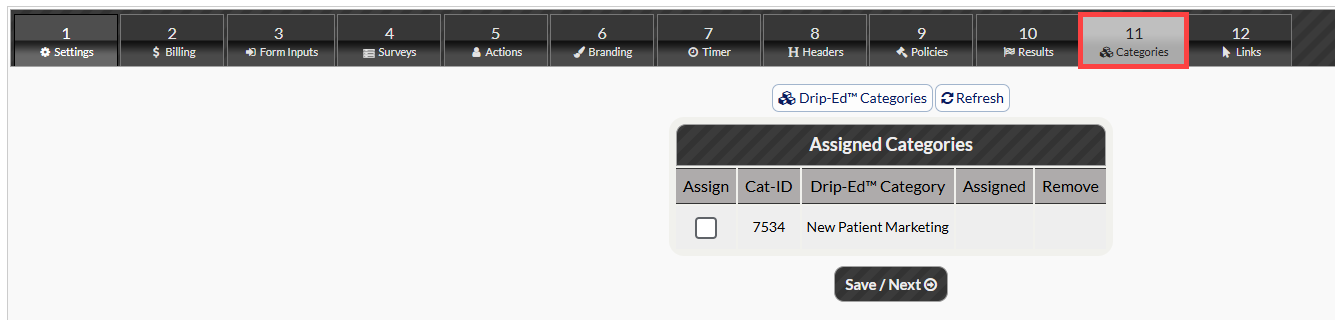
Use the Categories to organize your Online forms, Drip-Ed Campaigns™, and Link Trackers™
To Access/Manage [Drip-Ed™ Categories] click the button at the top of the page. Use refresh to see any changes.
[Click Save/Next] to save your changes and move on to the next step.
12. Links
This direct link is a URL to your CP Online form. Use this link on your website or to send to patients.
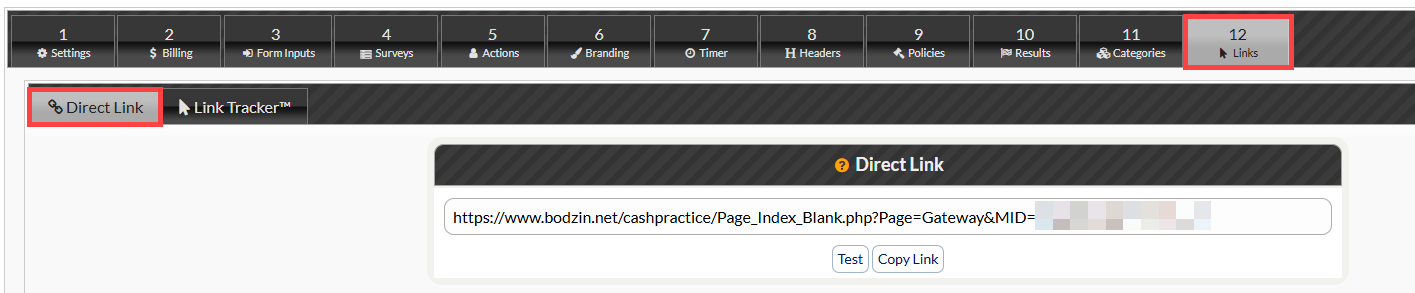
Direct Link | This is the link to this CP Online Form™. You can copy the link and paste it into your browser to open the CP Online Form™. |
(For members use Drip-Ed) The Drip-Ed Link Trackers™ allows you to better track your stats. By assigning this CP Online Form™ to a Drip-Ed Link Tracker™, you will be able to see who clicks the links and more. Then use its Drip-Ed™ Variable in your email campaigns as links to the link tracker. |
To use a Link Tracker, follow the sequence to obtain the link for the tracker:
Select the Link Tracker Tab.
Click the [+Click to Generate Link].
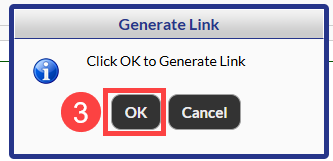
Select OK.
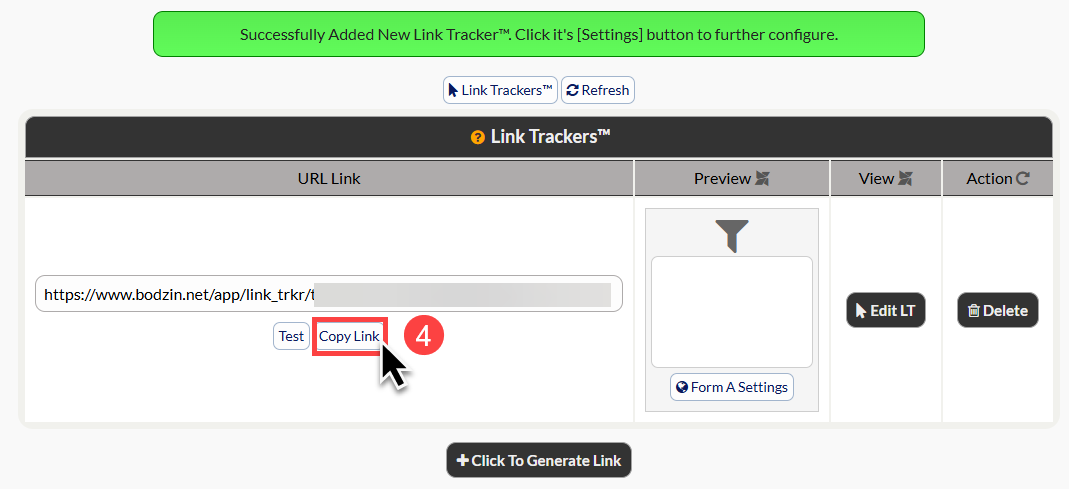
Click on [Copy Link] to copy your Link Tracker link.