
Let's do it together!
The Biomarker data being entered in this article is for example purposes only.
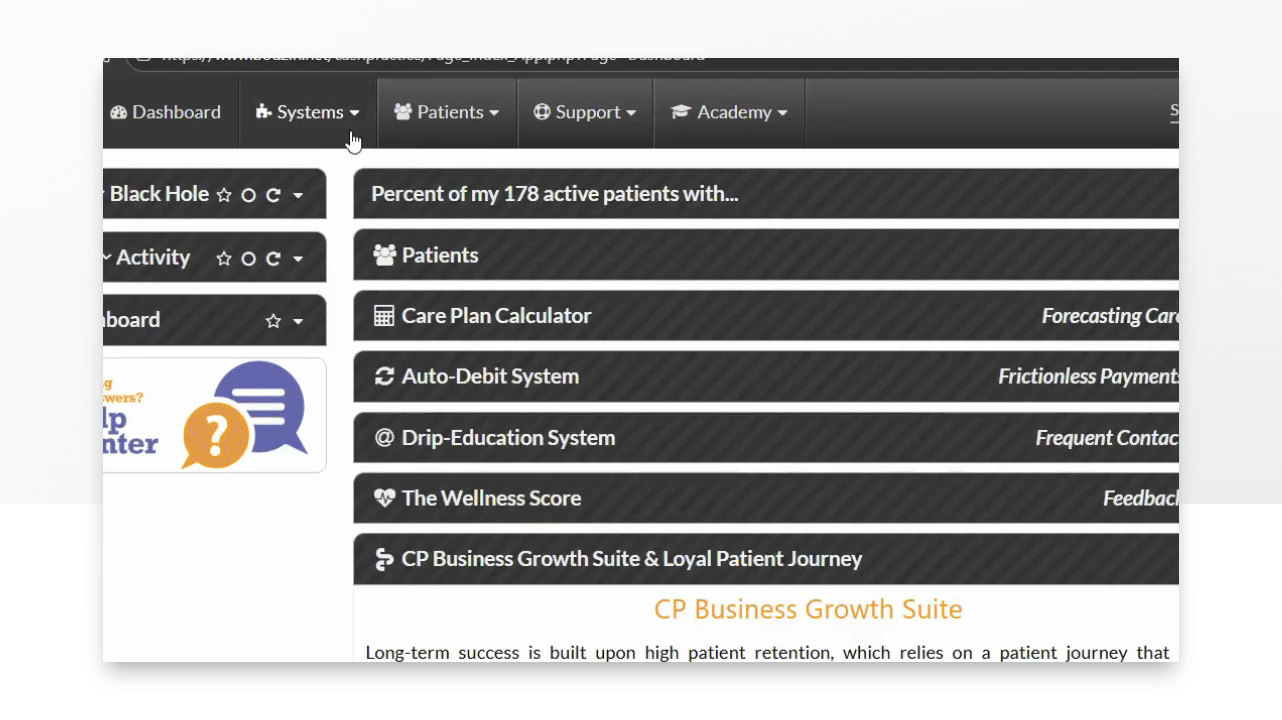
Step 1: Access WS Settings
Hover over Systems → Click The Wellness Score® → Click Setup → Click WS Settings.
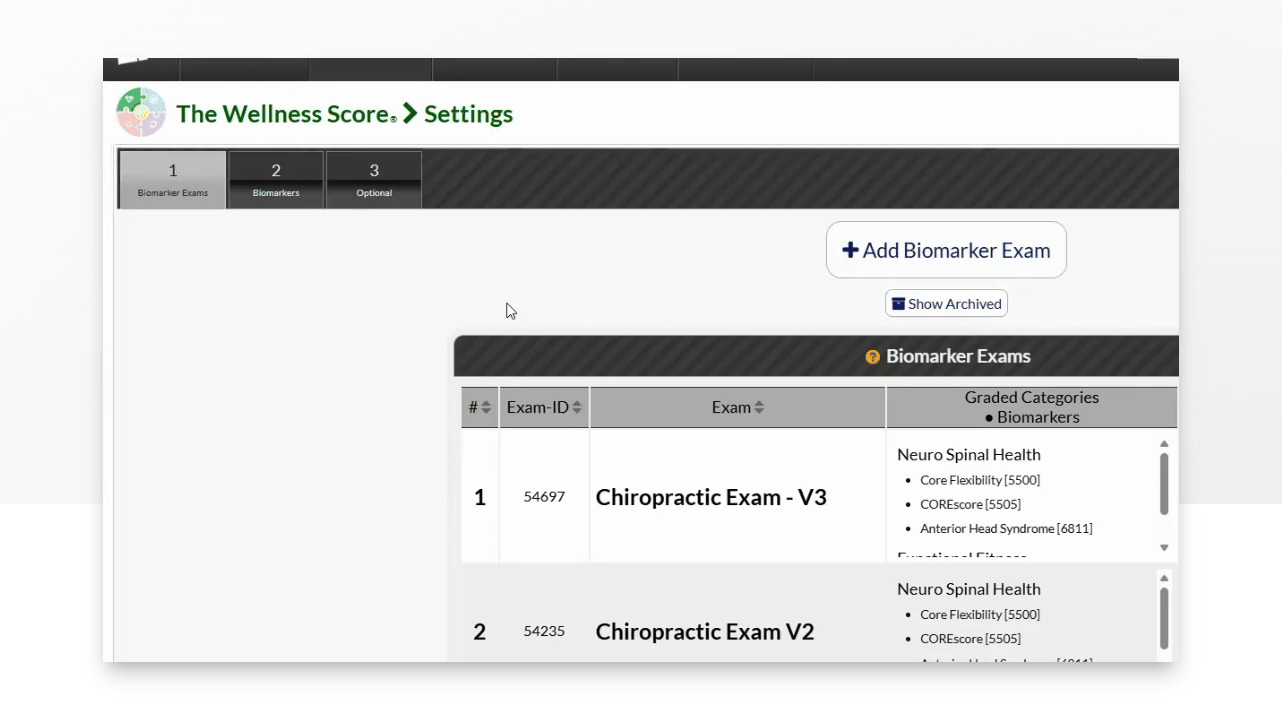
Step 2: Add Custom Biomarker
Click Step 2 Biomarkers → Click +Add Custom Biomarker to begin the biomarker creation process.
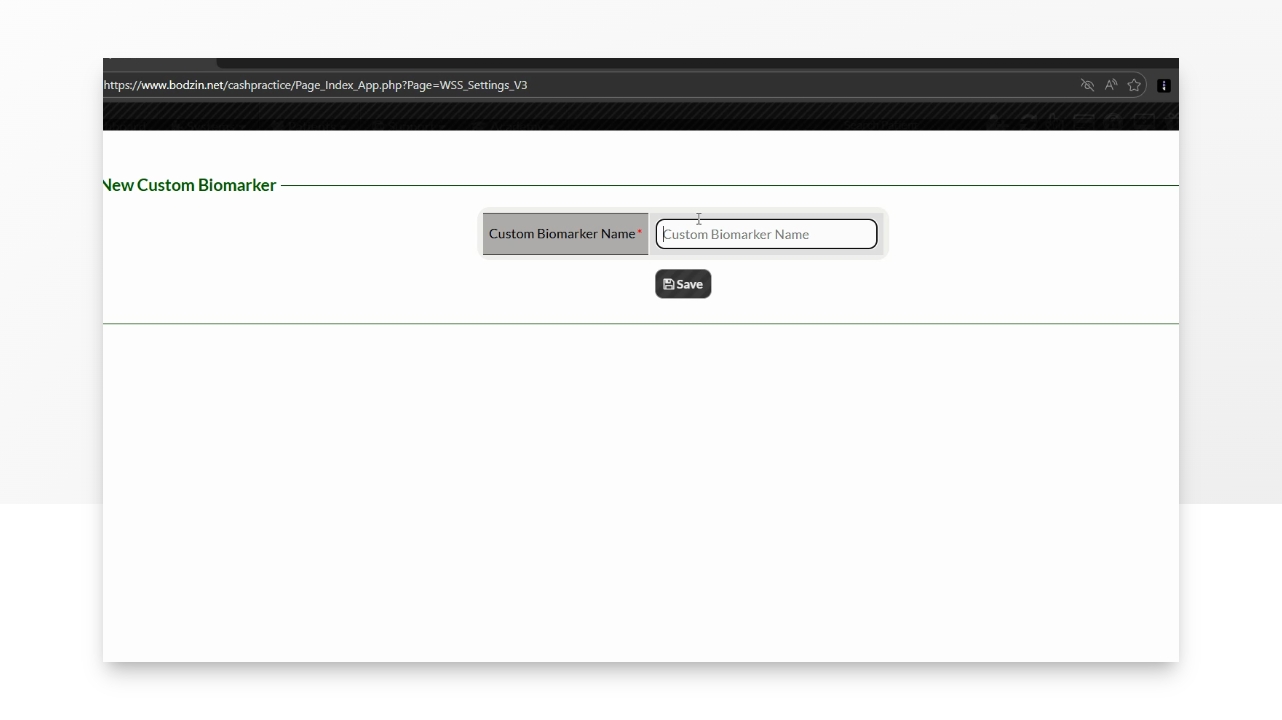
Step 3: Name the Biomarker
Give your biomarker a name and click Save to proceed. In this example, we are creating a Biomarker titled "The Sky Score".
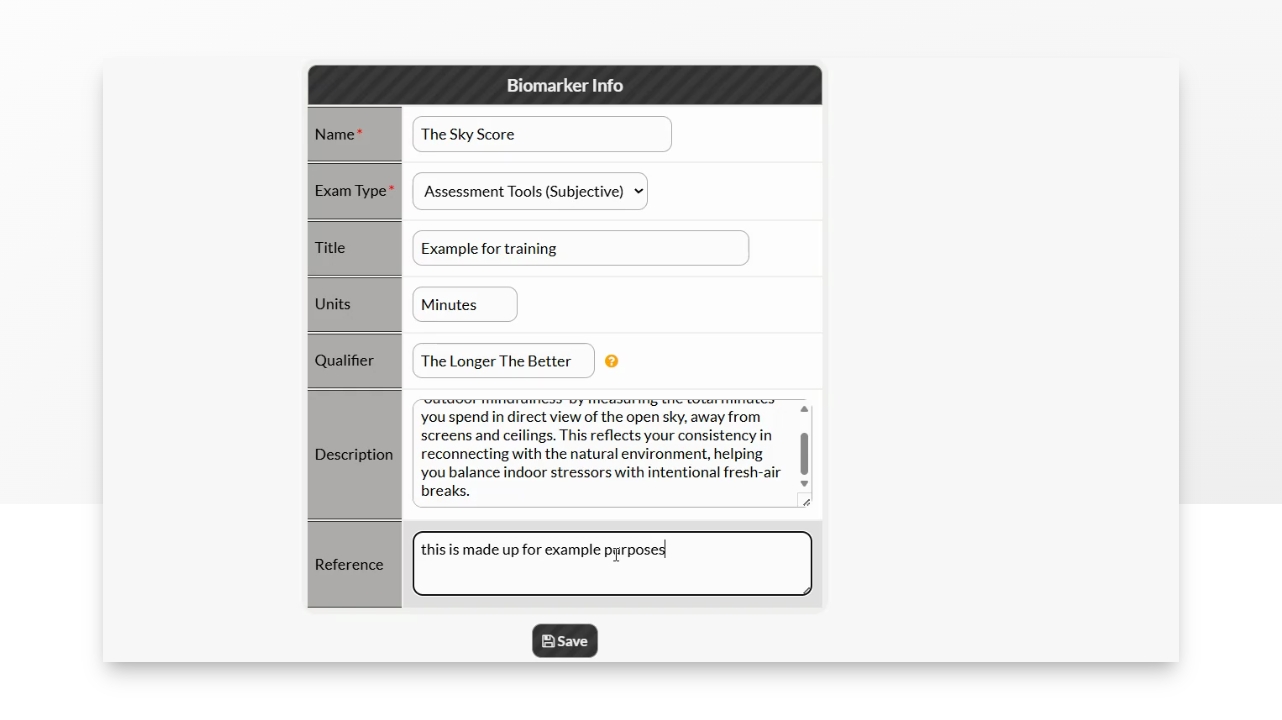
Step 4: Enter Biomarker Info
Fill out the Biomarker Info and Click [Save]:
Name (Required): The name of the Biomarker and what will appear on the report for the patient to see. This is the name of the test you are performing
Exam Type (Required): The type of exam. This will help organize the Biomarker in the setup. The options are
Physical Exam
Radiology
Objective Assessment Tool
Subjective Assessment Tool
Blood Labs
Urine Labs
Saliva Labs
Other
Title (Optional): Use this title to give a more detailed explanation of the biomarker name. This will only appear in your Biomarker list. The patient will not see this.
Units (Optional): Units will show on the Wellness Score® next to the data explaining how the data is measured (i.e. %, inches, mmHg).
Qualifier (Optional): Think of the Qualifier as a way to customize what displays on the report to explain how the report is graded. You have three options:
To use a standard range from the data: Leave the Qualifier blank. The report will simply show the data that you enter as the Ideal Range (passing grade) in the next step. (e.g., "10-20").
To replace the range with text: Type your own words in the Qualifier field. This will hide the numbers and show your text instead (e.g., "Pass/Fail", "Higher is Better", "Pass all four tests").
Note: If you don't select an Ideal Range in the next step, this will also help explain how the test was measured.
Description: (Optional, but recommended) Use this section to explain to your patient what this biomarker measures and how it is scored. The description will be printed on the last page of your wellness report and will be seen by your patient.
Reference: (Optional) Use this section to reference the applicable material you are using to create this biomarker's data table.
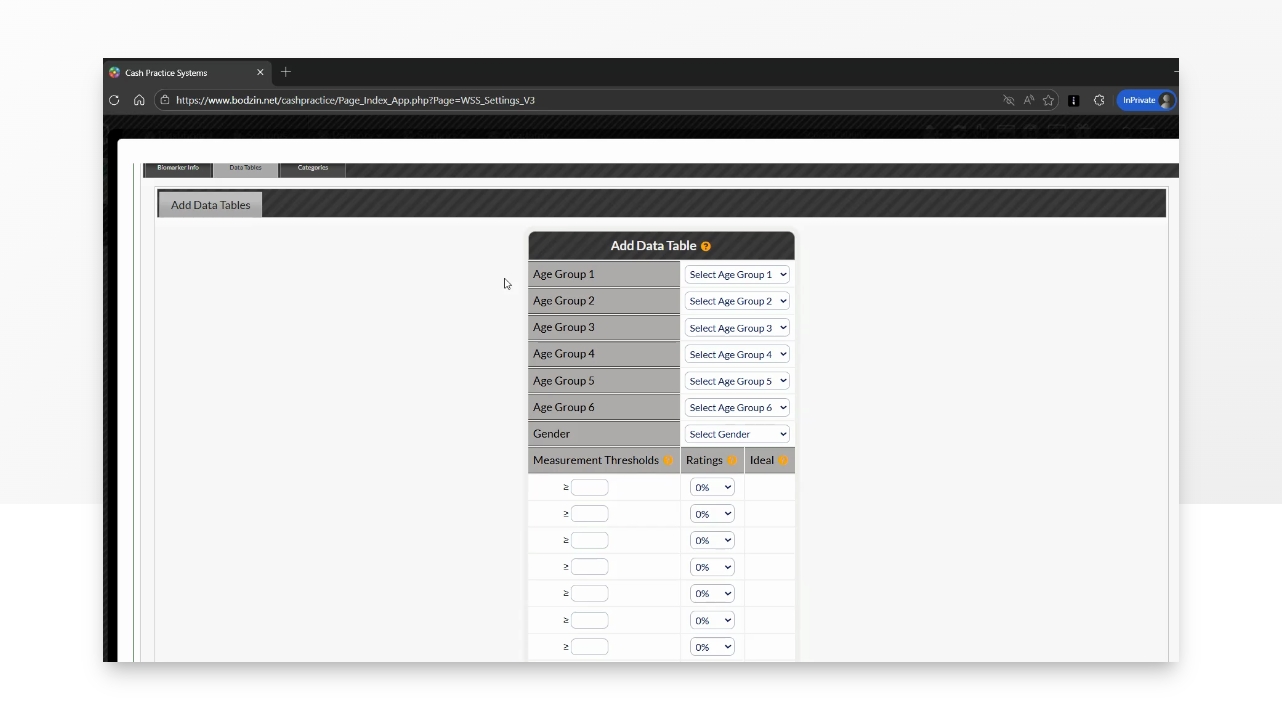
Step 5: Input Data
Optional (Advanced): You can configure your Biomarker to include multiple data tables, each graded differently by age or gender. You will need to enter the data table for each age group. If you leave the age and gender drop-downs blank, it will grade everyone the same.
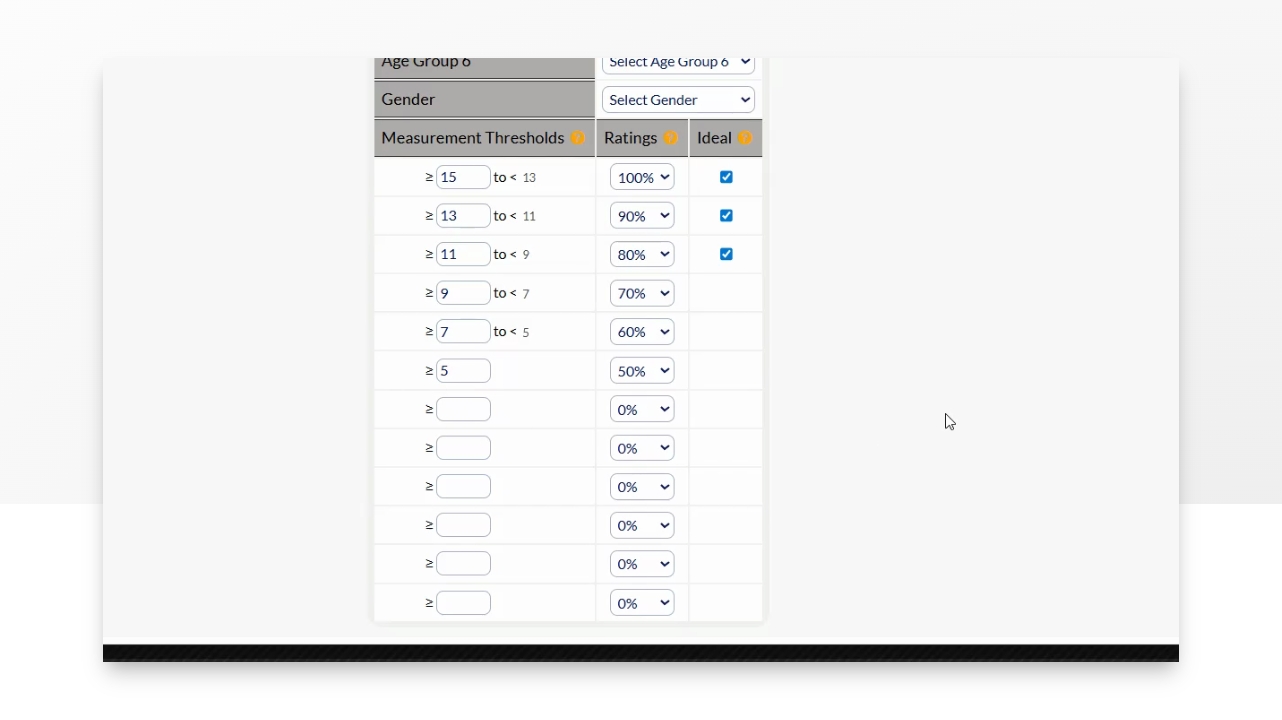
Continue by entering your Measurement Thresholds and their ratings. See below for more information on how these are graded. Click [SAVE]. Once you click save, you can view the data table and make any changes by clicking [Edit].
Measurement Thresholds Explained (Grading Scale)
Each Measurement Threshold corresponds with a Rating percentage. Once you enter in the Rating percentage.
100% = A +
90% = A
80% = B
70% = C
60% = D
50-0% = F
Ratings of 80%-100% will automatically display a checkbox indicating it is the Ideal range. If you wish to override this, please see the "Qualifier" item in the previous step.
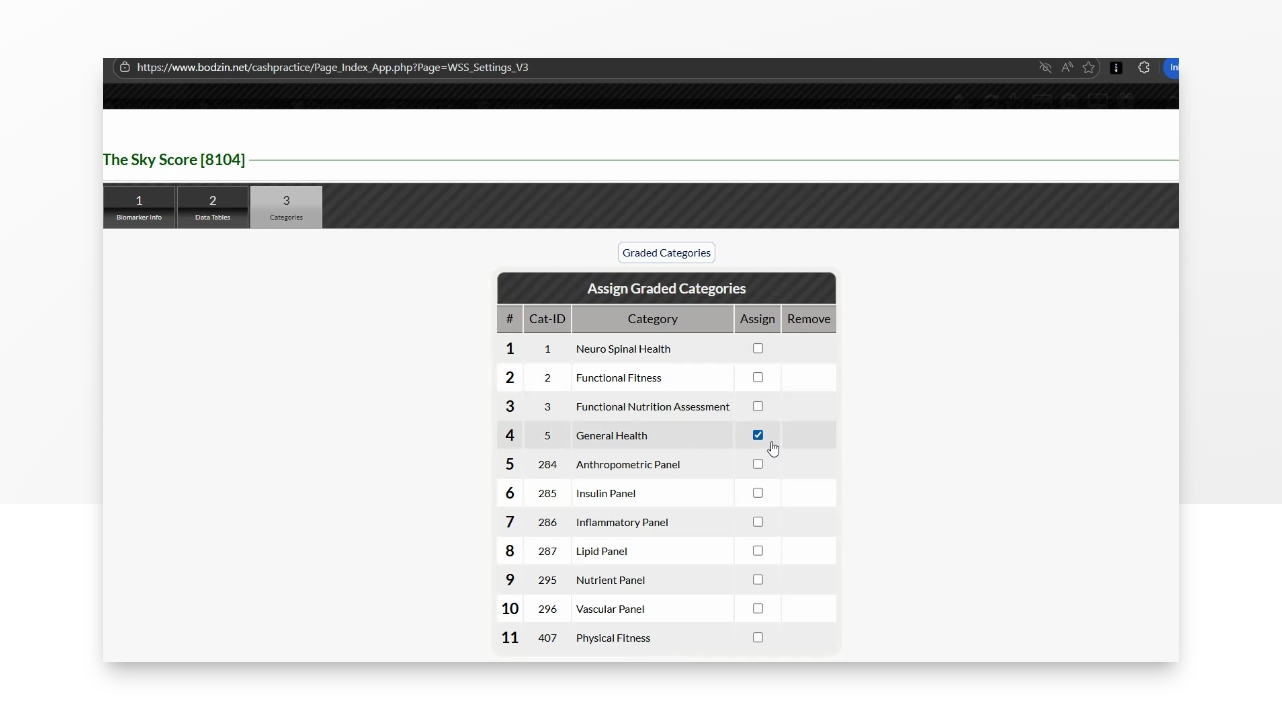
Step 6: Assign Category
Go to Step 3 Categories. Assign the biomarker to one or more categories by checking the box in the Assign column. You may add more categories by clicking the "Graded Categories" button.
Step 7: Add to a Biomarker Exam
Choose the examination you want to add the biomarker to, such as a chiropractic exam.