
Wouldn't it be great to pull a report to see how much money was collected for a particular service, product, or location? Well, thanks to our super-smart developers you're able to do just that!
The Cash Practice® Auto Debit Groups™ allows you to categorize your payments into groups. For example, it allows you to track your Chiropractic Services, Massage Services, Products, Locations, etc. The groups are easy to create too! Click HERE for instructions on how to create Auto-Debit Groups™.
NOTE: You can also assign a payment to an Auto-Debit Group™ while processing the payment with any of the payment tools.
The instructions below review how to assign a payment to an auto-debit group after the payment has been collected.
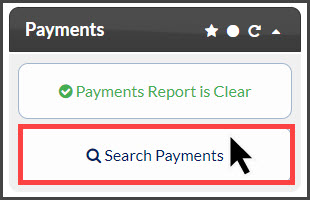
Step 1: From your Dashboard, select the [Search Payments] button.
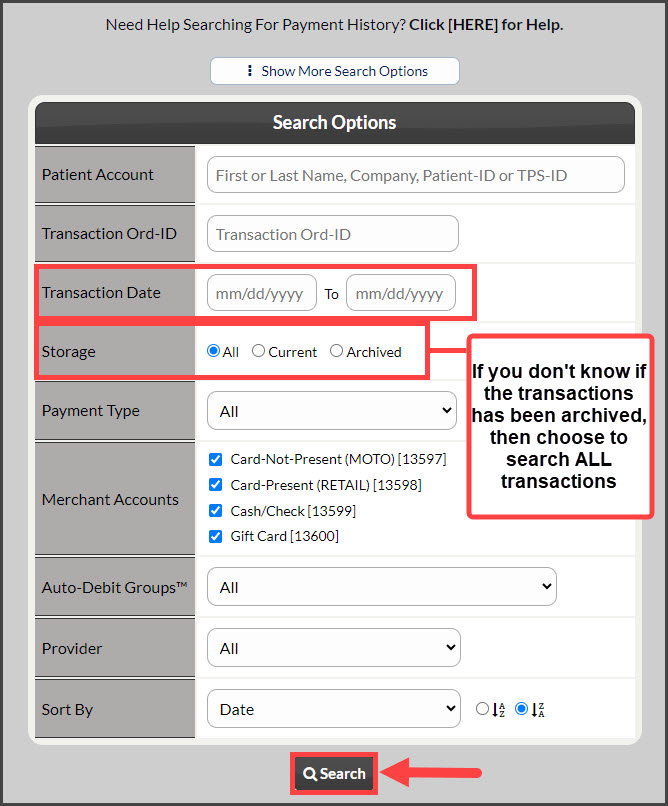
Step 2: Use the search options to define what transactions you are looking for → click [Search].
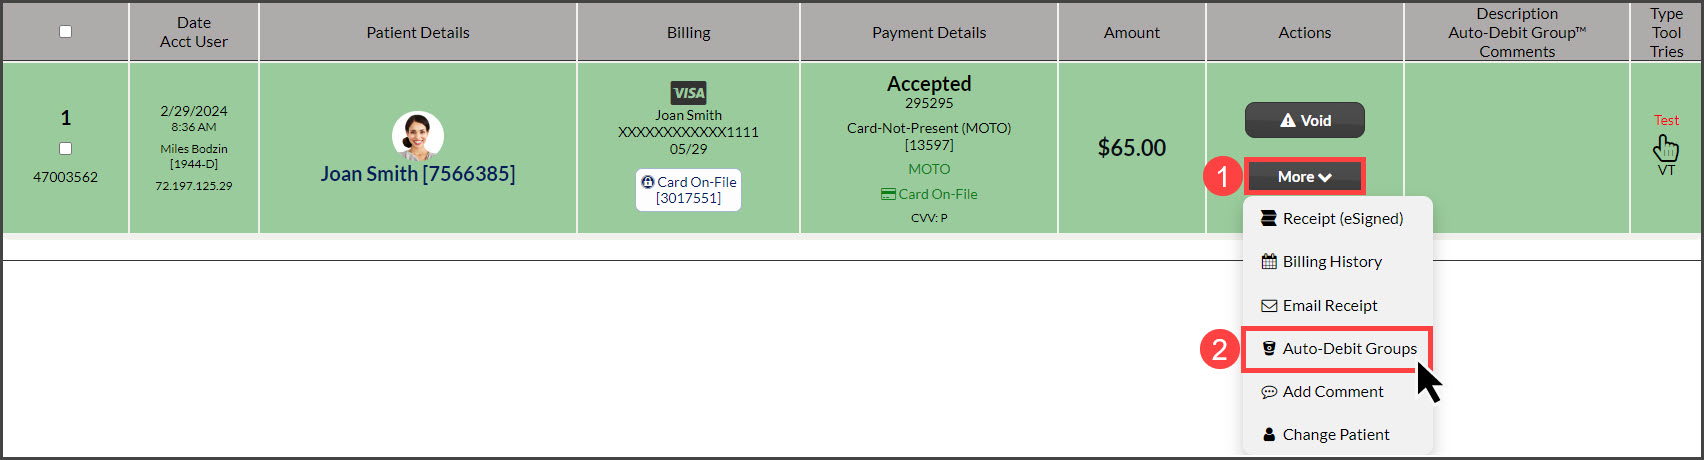
Step 3: Once the page has loaded, your search results will display. To assign the transaction to an Auto-Debit Groups™, click the [More] drop-down menu and select the [Auto-Debit Groups] button.
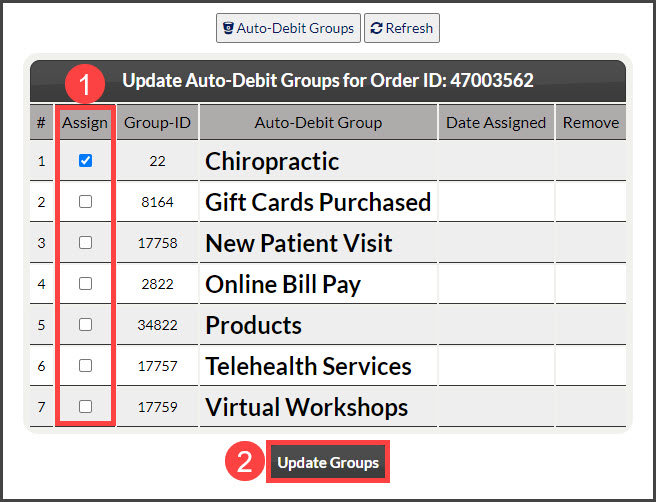
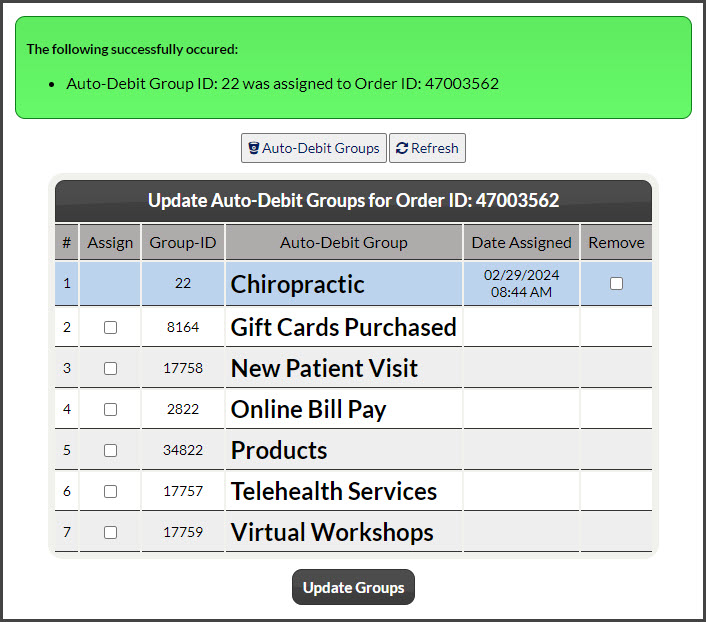
Step 4: A new page will load. Here you will find all of your previously added Auto-Debit Groups™. In the "Assign" column, select the toggle boxes for the groups you would like assigned to this transaction. Once finished, click on the [Update Groups] button.
Step 5: The screen will refresh to display an alert to notify that the group was successfully assigned to the transaction. Also seen here is the date and time it was assigned, as well as a toggle box to remove this group from this transaction if needed. To close out of this screen, click the RED X in the bottom right-hand corner of the page.
Step 6: The page will automatically refresh and you'll see the newly added Auto-Debit Group listed in the Description column. See the example below. ↓
