
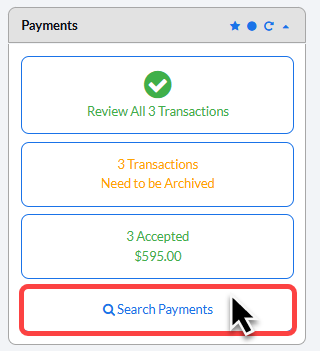
Step 1: From the Dashboard, click the [Search Payments] button on the right. Located under the "Payments" section.
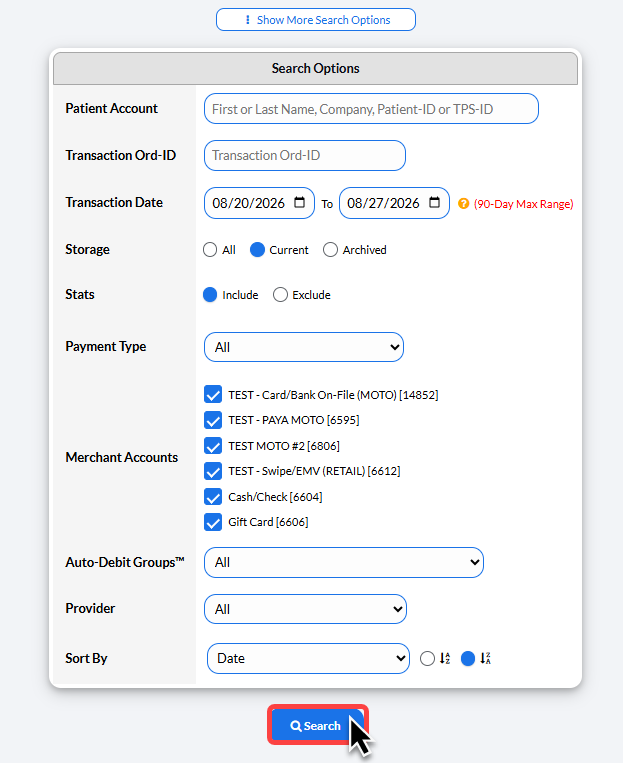
Step 2: Use the search options to define what transactions you are looking for → then click [Search].
Tip #1: Set the [Storage] selection to All to ensure all transactions are pulled, regardless if they have already been archived.
Tip #2: To pull complete Billing History for patient → First enter in the Patient Account (patient name) and the select [Storage] to All.
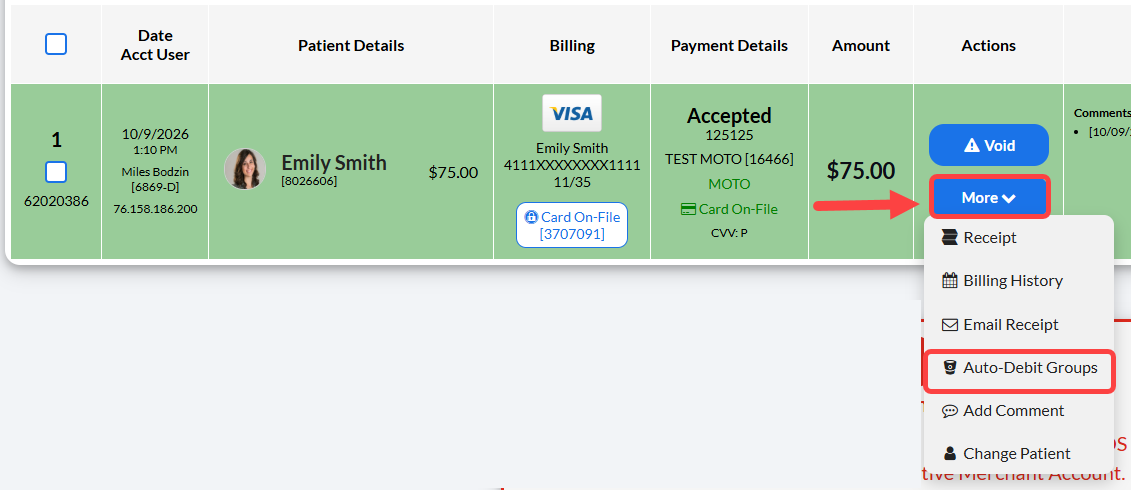
Step 3: Once the page has loaded, your search results will display.
To remove an Auto-Debit Group from a transaction, click on the [More] drop-down menu, then select the [Auto-Debit Groups] button.
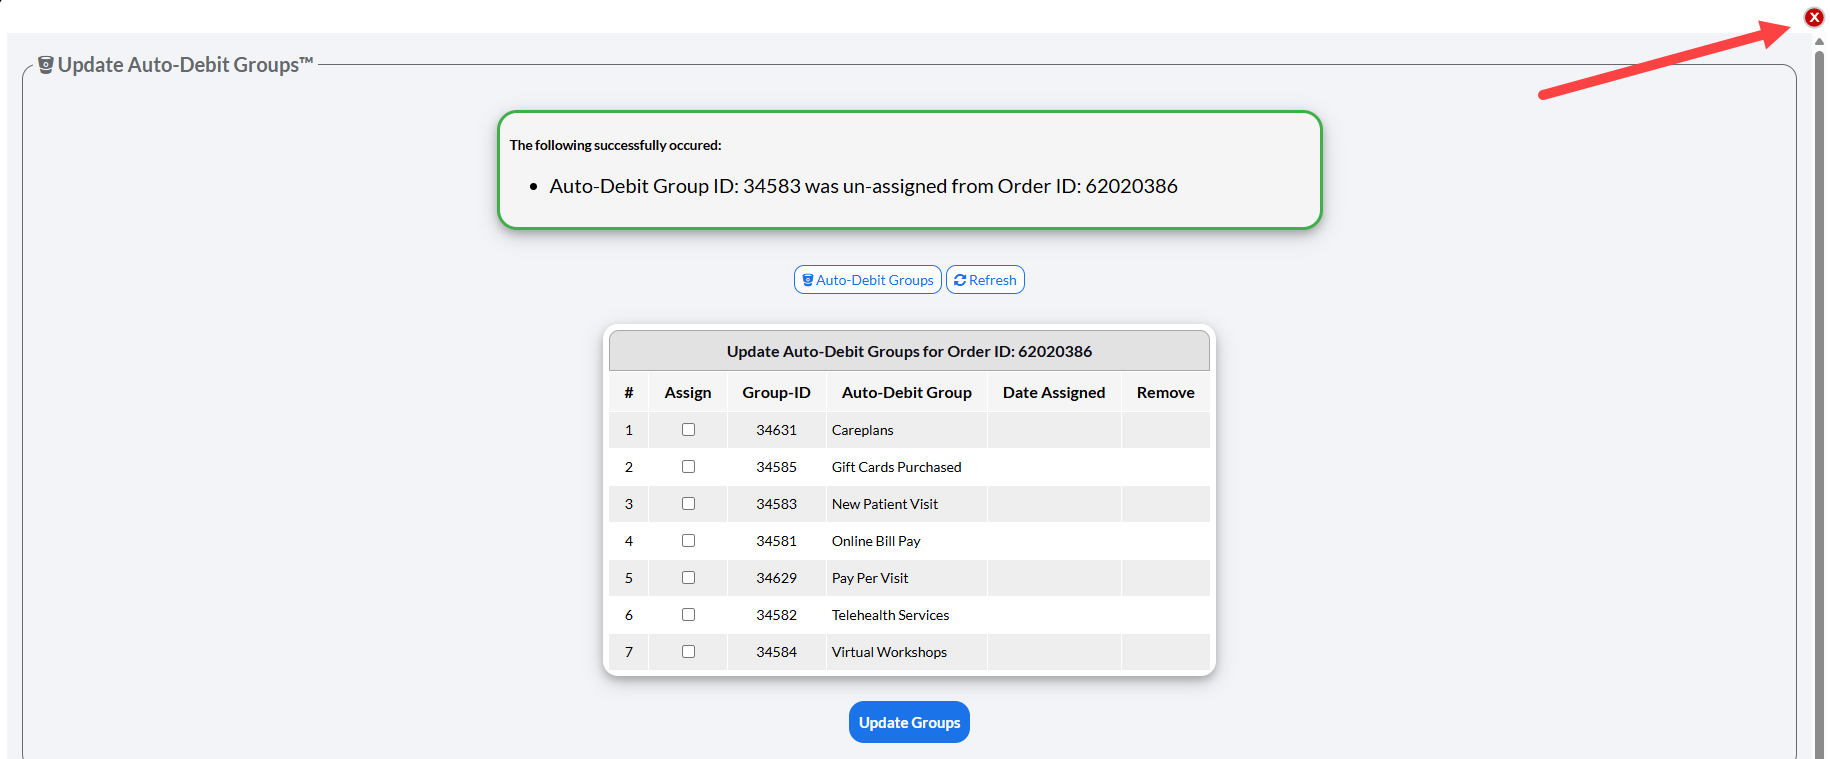
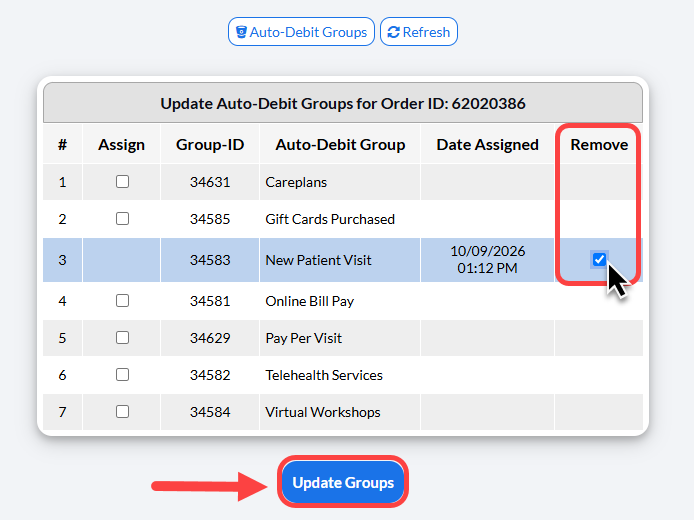
Step 4: A new page will load. Here you will find all of your previously added Auto-Debit Groups™.
In the "Remove" column, select the toggle boxes for the groups you want to be removed from this transaction.
Once finished, click the [Update Groups] button.
Step 5: The screen will refresh to display an alert to notify that the group was un-assigned from the transaction.
To close out of this screen, click the RED X in the bottom right-hand corner of the page.