
Click the Self Help button to use the Cash Practice® walkthrough when logged into your account.

Getting started:
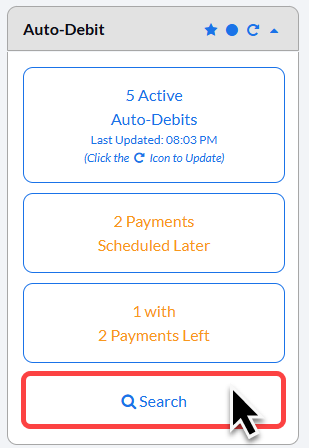
Step 1: From the right side of the Dashboard, click on the [Search Auto-Debits] button.
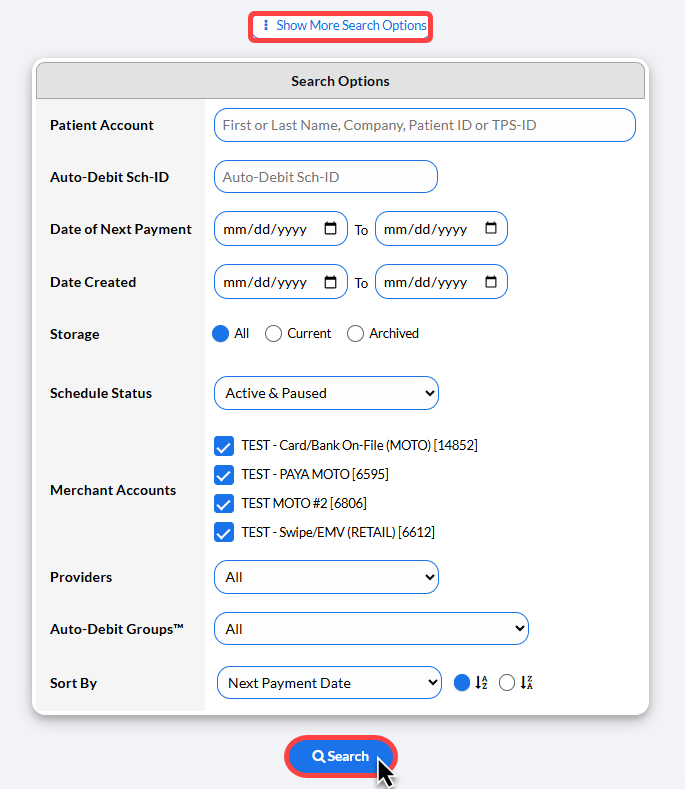
Step 2: Enter your search criteria (at minimum enter the patient name). Then click [Search].
Step 3: Click on the [Edit Auto-Debit] button.

Step 4: The Auto-Debit Schedule Editor™ tool will display, allowing you to make any changes or updates to the auto-debit.
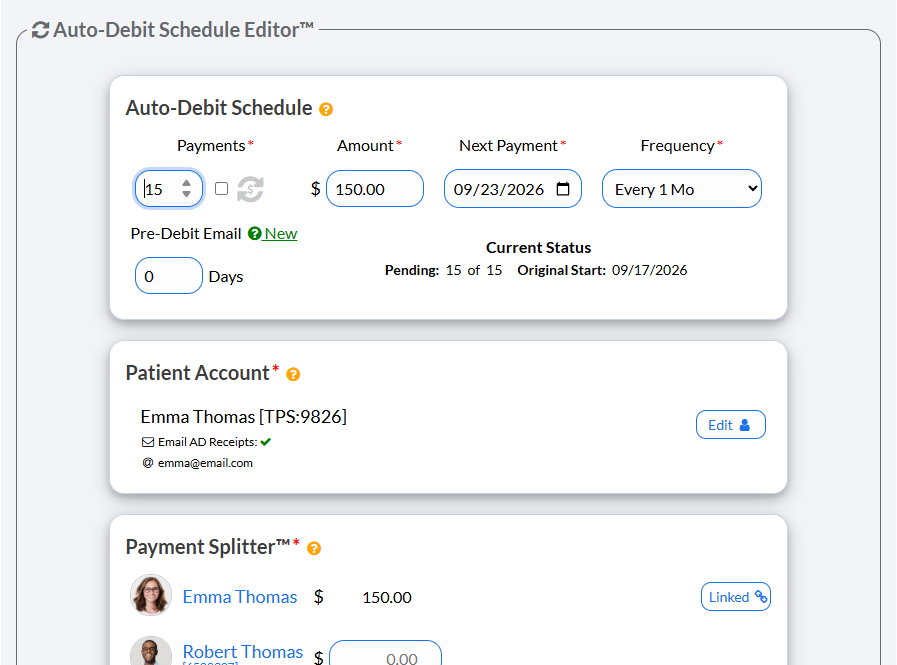
Auto-Debit Schedule | |
Payments | Enter the number of payments for the scheduled auto-debit or check the [Indefinite] box to have the payments go forever. |
Amount | Enter the dollar amount for the payment |
Next Payment | Click the date to open the calendar and easily select the next payment date. |
Frequency | Select how often you would like the payment to occur. |
Pre-Debit Email (optional) | Enter the number of days in advance to send a reminder email, which includes a link to update their billing details. |
Apply Changes ONLY to Next Payment: | Use Next Payment Only when a patient needs to move a single upcoming payment date without changing their recurring monthly schedule. Do not select this option to skip or pause a payment, as pushing the date to the following month will result in a double charge. |
Payment Splitter | Enter the dollar amount to be split amongst linked patients (if applicable) |
Billing Type | |
Card On-File | Key enter the credit card information, OR pull stored credit card information that has been previously saved on file in the patient account. Click the [New] button to add new information to the Billing Vault |
Bank On-File (EFT) | Routing and account number off of the check. Click the [New] button to add new information to the Billing Vault |
Reminder | Auto-Debit Reminders are to be used when the patient has a monthly payment but it is not running automatically in Cash Practice® (i.e. over the counter with a check or cash). |
Merchant Account | The defaulted merchant account will be displayed, but if using multiple merchant accounts with us, make the correct selection here. For more information, contact our Merchant Services Department by phone at (877) 343-8950 x102) or email MerchantAccounts@CashPractice.com |
Comments (Optional) | (OPTIONAL) Add a comment for your team's eyes only. This will be displayed on the Posted Payments Report when reviewing the transaction details in the future |
Show Options (Optional) | (OPTIONAL) By clicking the drop-down, you have the capability to assign auto-debit groups, Drip-Education campaigns for frequent contact, Patient Groups to better organize your patient lists, and a comment |
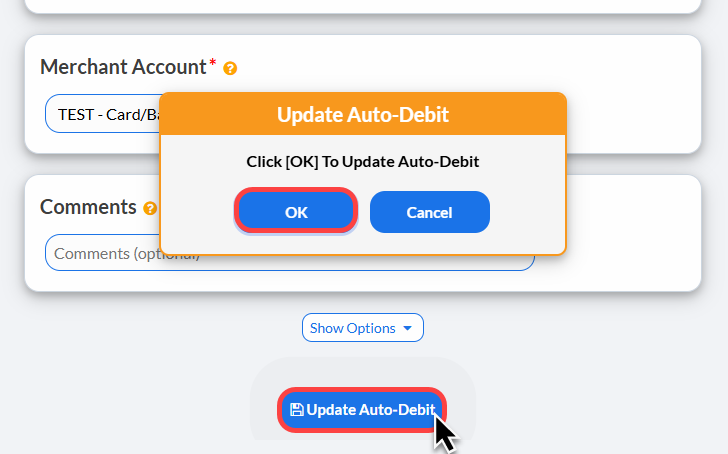
Step 5: Click the [Update Auto-Debit] button, to submit the auto-debit Then Click [OK] to proceed.
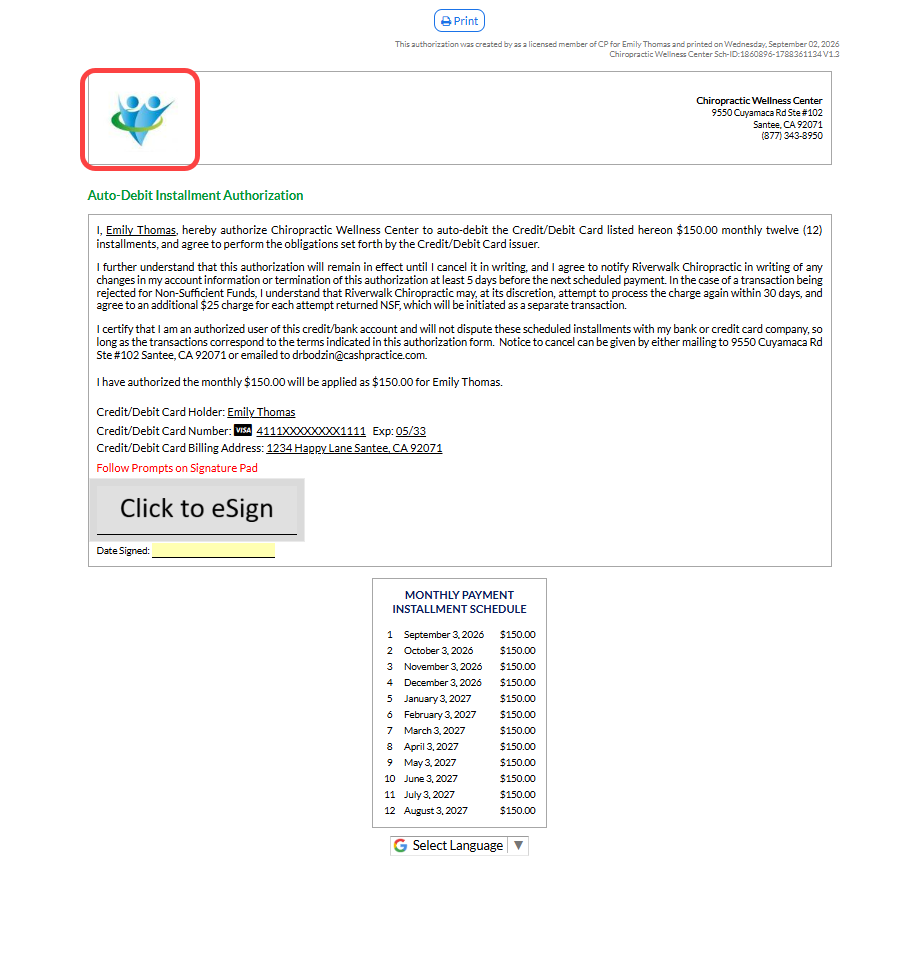
Step 6: Print the Auto-Debit Installment Authorization form by clicking on the [Logo] or clicking [Print] button.
Your may also capture the [e-signature] from the patient directly on this page.
Note: Anytime you [edit] the auto-debit, you need to have the patient sign the authorization form acknowledging the changes.