

Step 1: Logged into your Cash Practice® account, select the Virtual Terminal tool in the top-right corner.

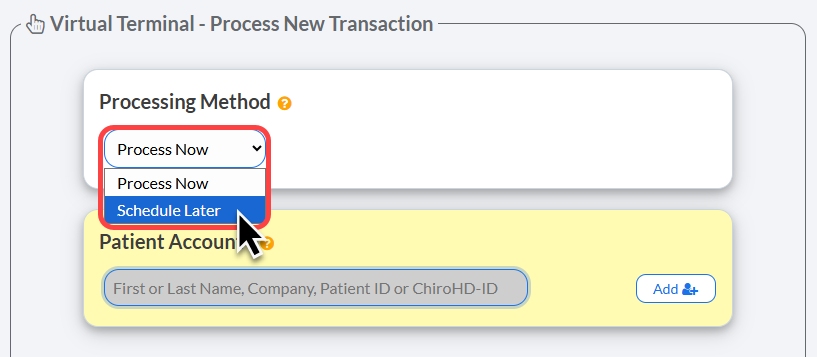
Step 2: For the "Processing Method", select [Schedule Later] in the drop-down menu.
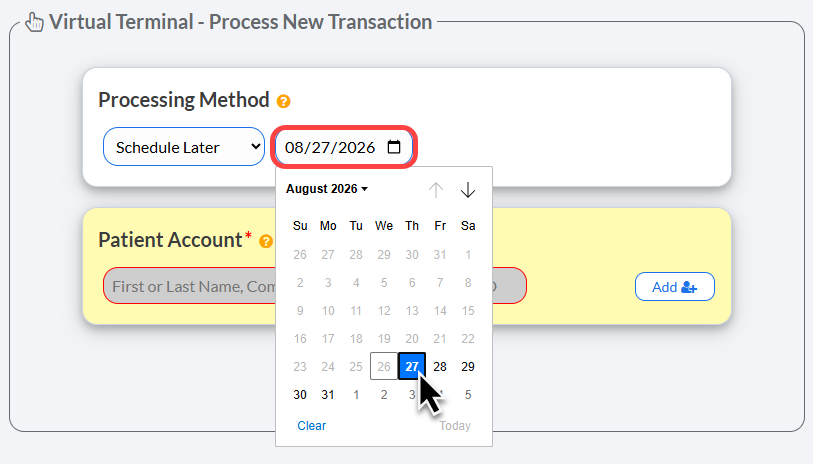
Step 3: Select the date for your scheduled later payment by clicking on the calendar icon and selecting your desired date from the calendar.
Note: These payments will process automatically on the day they are scheduled for.
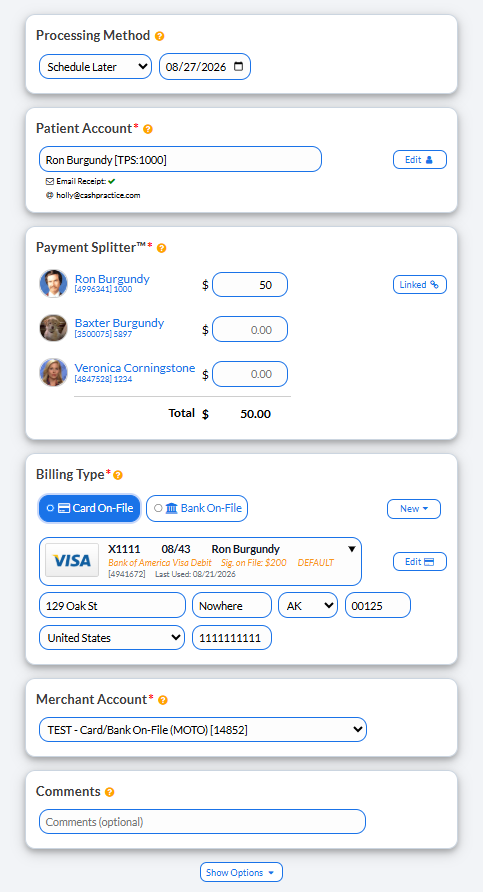
Step 4: Continue to fill out the remainder of the criteria needed to complete the payment in the Virtual Terminal.
For detailed instructions for using the Virtual Terminal, refer to this article: Processing: How to use the Virtual Terminal
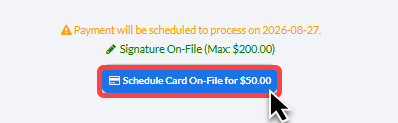
Step 5: Select the [Schedule Card/Bank on File] button to schedule the payment.
You will see an orange notice confirming the schedule date.
If there is a signature on file for this patient, it will display in green.
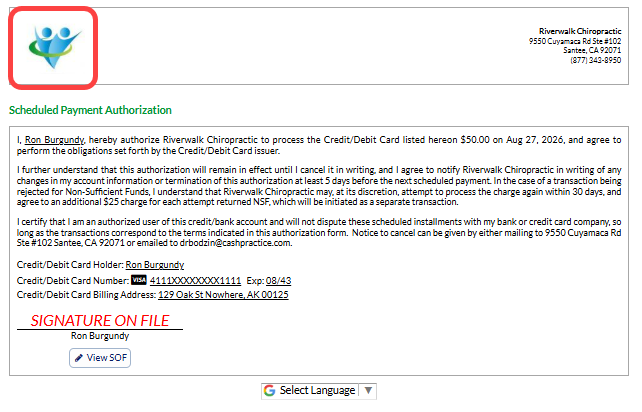
Step 6: A Scheduled Payment Authorization will be produced. Click the logo on the left side of the form to print.
You can view any scheduled later payments in your patient's billing history in the Patient Record.


Once your "Schedule Later" payments are pushed through, you will find the status (whether they were accepted or declined) of those transactions under your [End of Day for MM/DD/YYYY] button on your Dashboard or in your Posted Payment Report.