

The EZ Payment Signature On File Form (EZ Pay SOF) lets you store client signatures for all of their one-time payments processed via Simple Swiper, EZ Swiper, Virtual Terminal, or Billing Vault- eliminating the need for signing receipts with every transaction!
Requirements & Setup:
Requires the Scriptel EasyScript device. Purchase directly from our CP Products Page to ensure compatibility.
The instructions below review where this can be signed and how it is stored:
Payment tools/Receipt:
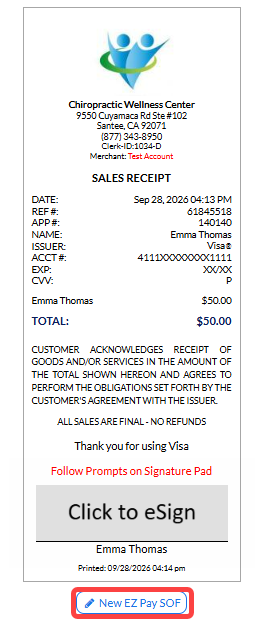
When a payment receipt appears and no signature is on file for that card or bank account, a [New EZ Pay SOF] button will be displayed at the bottom of the receipt.
Step 1: Click [New EZ Pay SOF] to access the Authorization form.
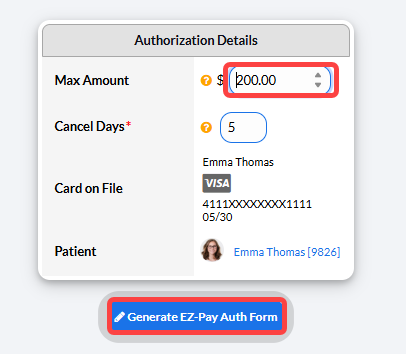
Step 2: From the [EZ-Pay SOF Authorization] page, complete the following for the Authorization Details
Enter the maximum dollar amount authorized by the patient.
(optional) Edit the number of [Cancel Days] to specify in the Authorization form.
Click [Generate EZ-Pay Auth Form].
Note: In the example below, Joseph authorizes single transactions up to $200. If a payment exceeds $200, the system alerts the user and requires the patient to sign a new receipt for the higher amount.
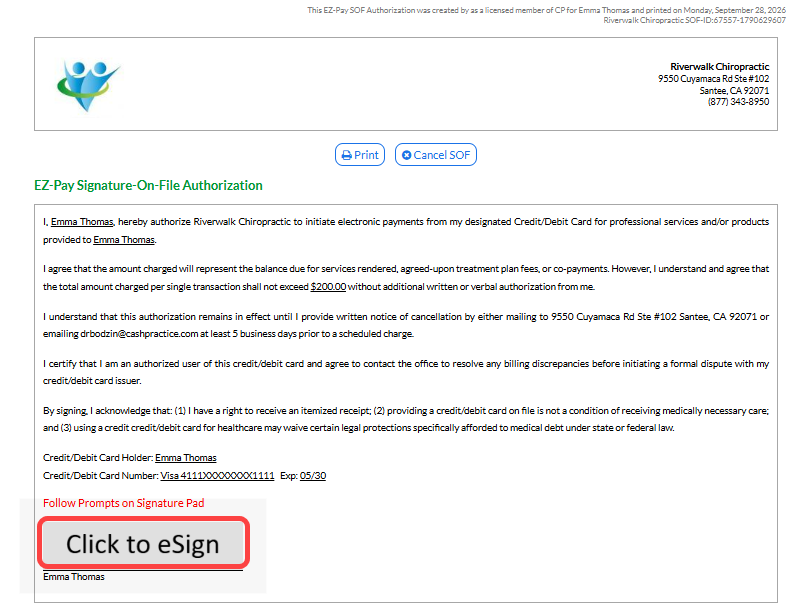
Step 3: The form will then be generated as seen below.
On the Scriptel EasyScript Device: Use the signature pad by selecting [Start], then ask the patient sign, and then press [OK].
Apply the signature by selecting [Click to eSign]
Billing Vault
Access the [New EZ-Pay SOF] form from a patient's Billing Vault.
Step 1: Open the Billing Vault to access the card on file for which you'd like to add a new signature on file.
Refer to this article for full instructions for accessing the Billing Vault: Billing Vault: What is the Billing Vault?
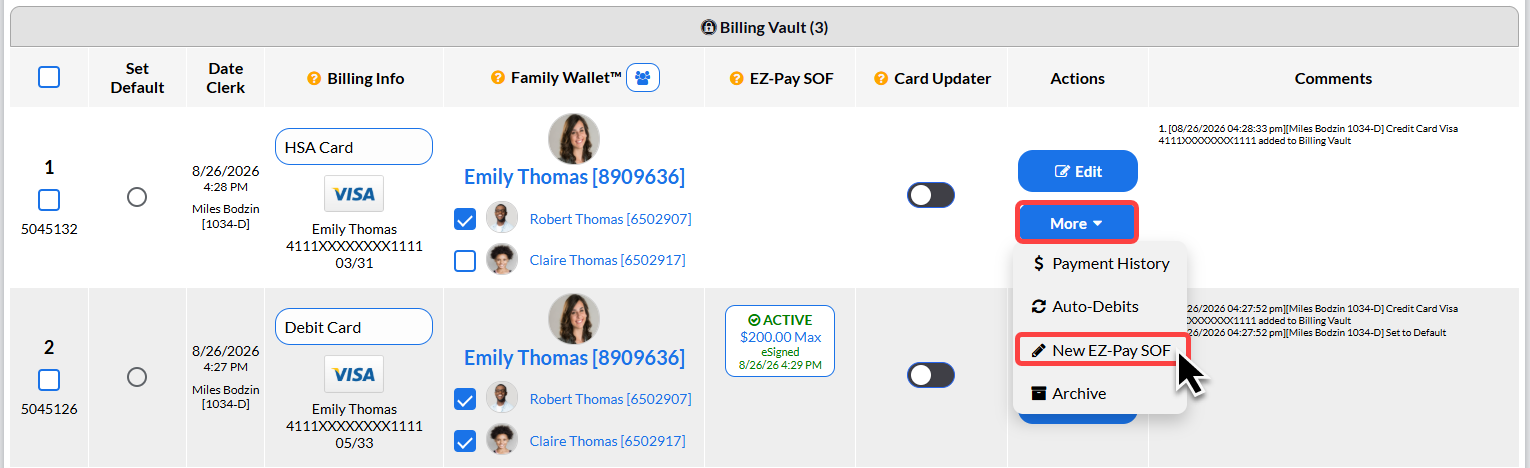
Step 2: In the Billing Vault, click the [More] button next to the desired card. Select [New EZ-Pay SOF]
Step 3: From the [EZ-Pay SOF Authorization] page, complete the following for the Authorization Details
Enter the maximum dollar amount authorized by the patient.
(optional) Edit the number of [Cancel Days] to specify in the Authorization form.
Click [Generate EZ-Pay Auth Form].
Note: In the example below, Joseph authorizes single transactions up to $200. If a payment exceeds $200, the system alerts the user and requires the patient to sign a new receipt for the higher amount.
Step 4: The form will then be generated as seen below.
On the Scriptel EasyScript Device: Use the signature pad by selecting [Start], then ask the patient sign, and then press [OK].
Apply the signature by selecting [Click to eSign]