
How Do Split Payments Work?
When processing a payment for linked accounts (such as on a family plan):
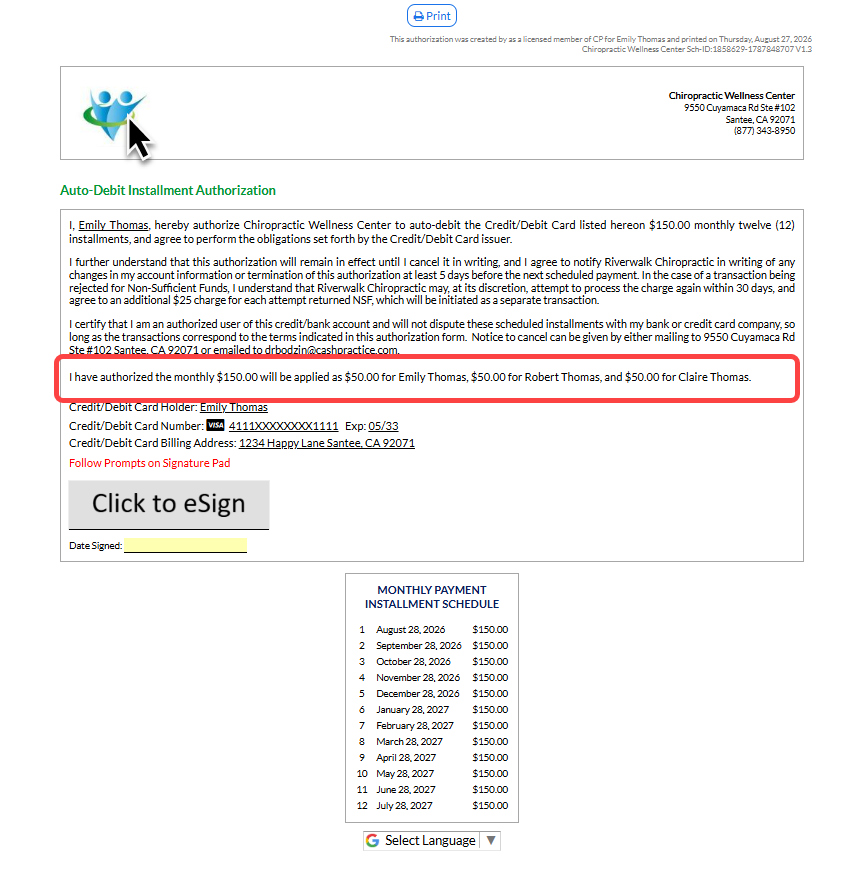
Single Charge: The total amount ($230) is collected in one transaction from the primary patient.
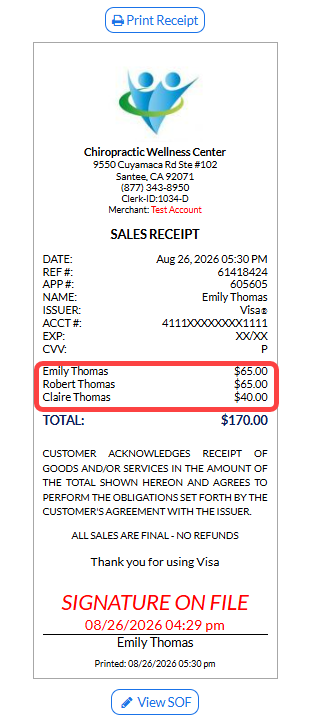
Automatic Split: Cash Practice automatically divides the payment into sub-transactions for each linked patient based on the amounts shown on the receipt.
EHR Sync: These sub-transactions import directly into your integrated EHR to keep individual patient ledgers and financial stats accurate.
Start Here: Link your patients.
Before you can split a payment, you must LINK the patient records.
See this article for full instructions: How do I Link Patients?
Did you know that you can also make billing accessible to multiple accounts? Once they are linked - check out the FAMILY WALLET to determine which patients have access to shared billing.
You're now ready to process one payment and split it amongst multiple family members!
Splitting the Payment in the Payment Tools:
Option 1: Virtual Terminal → Use this payment tool for a one time payment.

Step 1. Once the Virtual Terminal is open, choose your processing method and patient account:
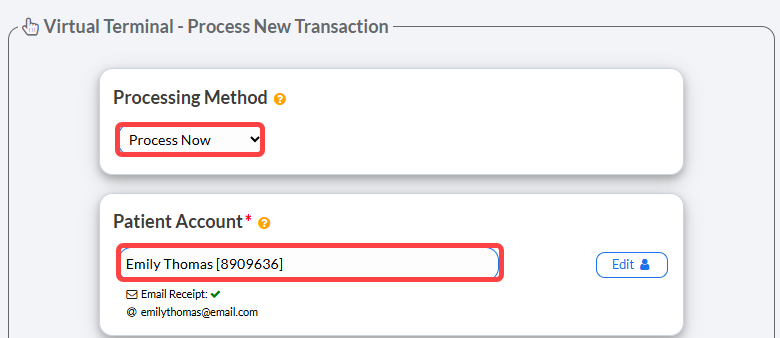
Processing Method: | Process Now or Schedule Later |
Patient Account: | Enter the name of the patient that you want to process the payment for. This is the patient that you will link your other patients to. |
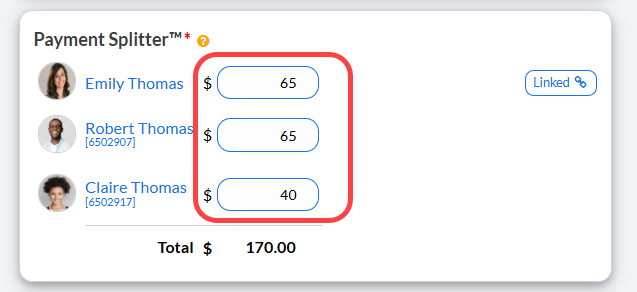
Step 2. Payment Splitter: Enter the amount for each person you're going to collect payment for today (it's ok to leave some fields empty).
Step 3. Then, continue filling out the Virtual Terminal's required fields.
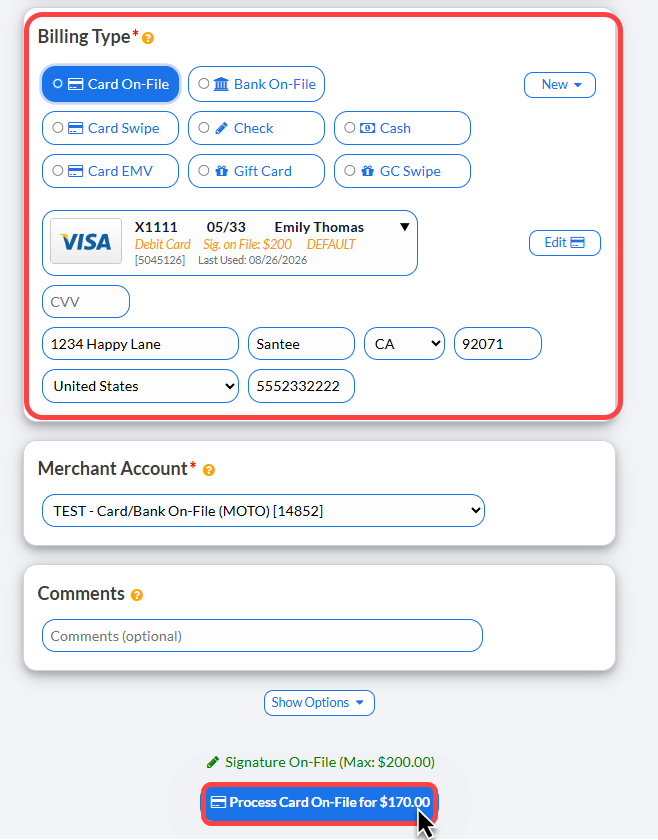
Billing Type | Choose the billing type for the split payment. |
Card CVV: Optional and only to be entered if you physically have the credit card present. | |
Merchant Account | The merchant account will default to the account you selected as default in the setup. You may make another selection here if you wish to deposit funds into a different merchant account. |
Comments | Optional and will not be seen by the patient. Comments appear on the Posted Payment Report. |
Show Options: | Open this section to assign: Patient Groups, Drip Ed Campaigns, Auto-Debit Groups, and Care Plan Options |
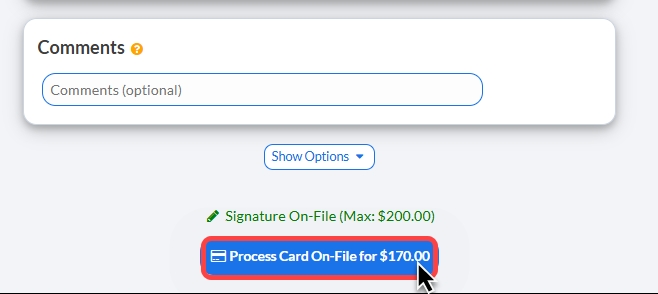
Step 4. Click the [Process] button to complete the payment.
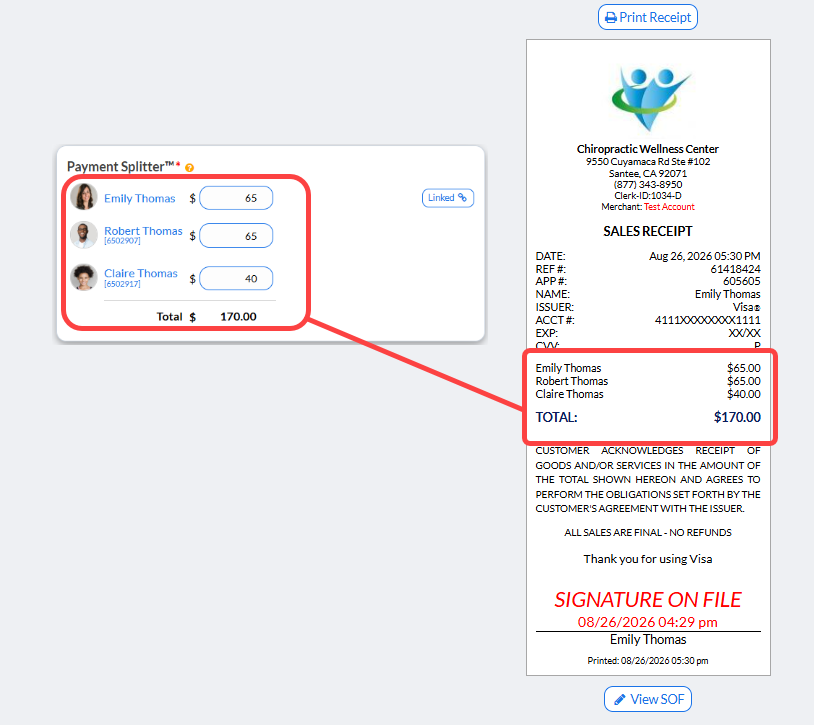
Step 5. A receipt will generate with the split amounts noted. Click the logo or the [Print Receipt] button to print.
You may also capture the [e-signature] from the primary patient on this page.
Option 2: Auto-Debit Scheduler → Use this tool to schedule recurring payments

Step 1. Enter the criteria for the Auto-Debit Schedule and select the patient account.
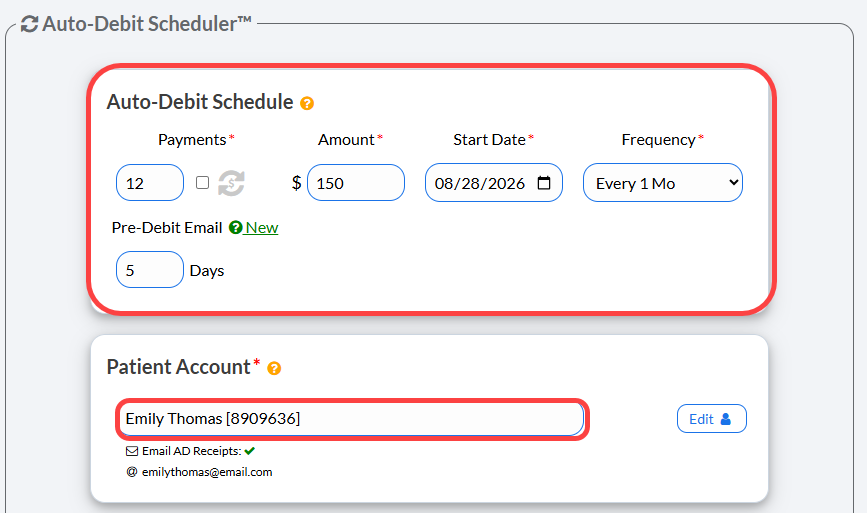
Payments | Enter the number of payments for the scheduled auto-debit or check the [Indefinite] box to have the payments go forever. |
Amount | Enter the dollar amount for the payment |
Start Date | Click the date to open the calendar and select the date the payments will begin. |
Frequency | Select how often you would like the payment to occur. |
Pre-Debit Email (optional) | Enter the number of days in advance to send a reminder email, which includes a link to update their billing details. |
| |
Step 2. Payment Splitter: Enter the amount for each person you're going to split the recurring payment for (it's ok to leave some fields empty).
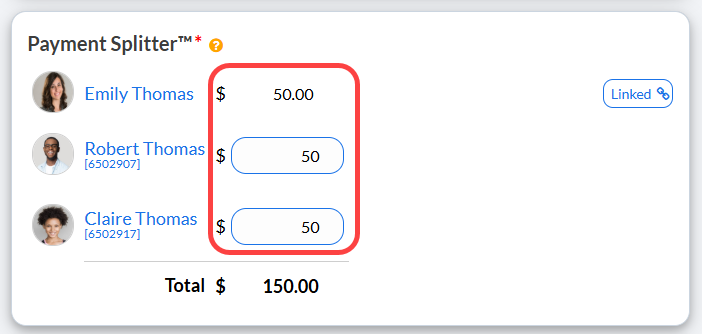
Step 3. Then continue to complete the required fields for the scheduled Auto-Debit
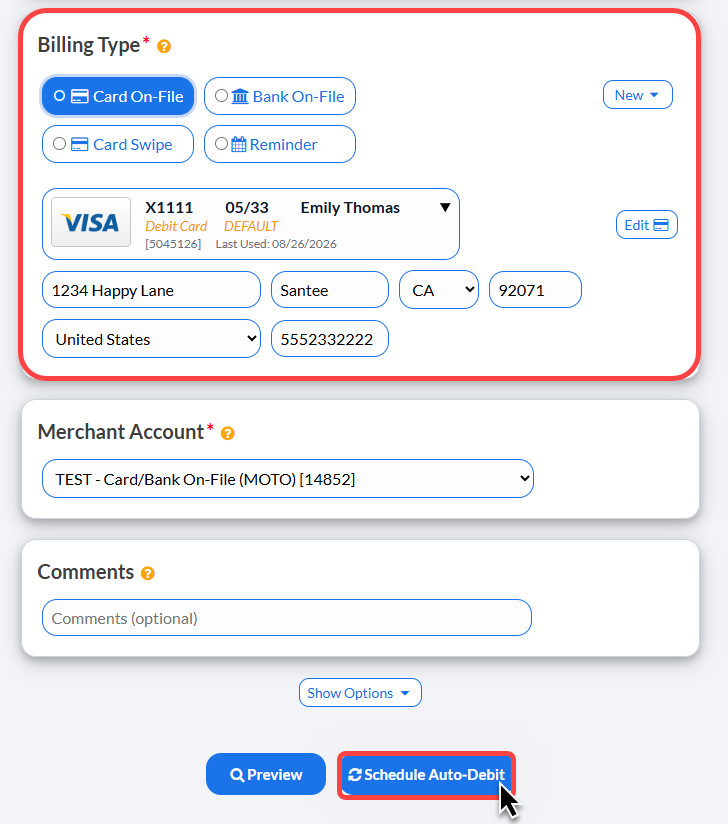
Billing Type: | Choose the billing type for your patient's recurring payment. |
Merchant Account: | The defaulted merchant account will be displayed, but if using multiple merchant accounts with us, make the correct selection here. For more information, contact our Merchant Services Department by phone at (877) 343-8950 x102) or email MerchantAccounts@CashPractice.com |
Comments (optional) | Add a comment for your team's eyes only. This will be displayed on the Posted Payments Report when reviewing the transaction details in the future |
Show Options: | Open this section to assign: Patient Groups, Drip Ed Campaigns, Auto-Debit Groups, and Care Plan Options |
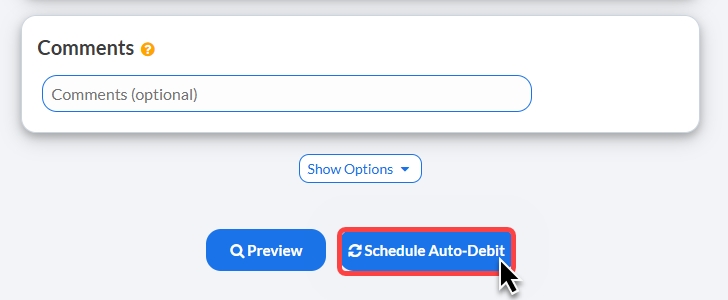
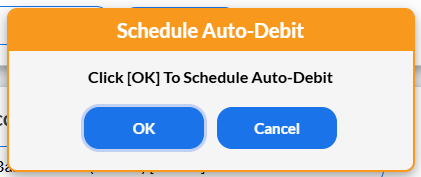
Step 4. Click [Schedule Auto-Debit] then click [OK] to proceed.
Step 5. The Auto-Debit Installment Authorization form will show Split Payment Details.
Click the logo or the [Print Receipt] button to print.
You may also capture the [e-signature] from the primary patient on this page.